Overview
This document describes the complete workflow for modding inZOI character faces using MetaHuman Editor in Unreal Engine 5, and registering the finished assets in the ModKit.
MetaHuman Editor Limitations
Options set in the Materials and Hair & Clothing tabs of MetaHuman Editor are not reflected in the inZOI ModKit.
-
Skin-related settings → Proceed separately via the Skin Modding workflow
Project > CAZ > Skin > Overview -
Hair-related settings → Proceed separately via the Hair Modding workflow
Project > CAZ > Hair > Overview
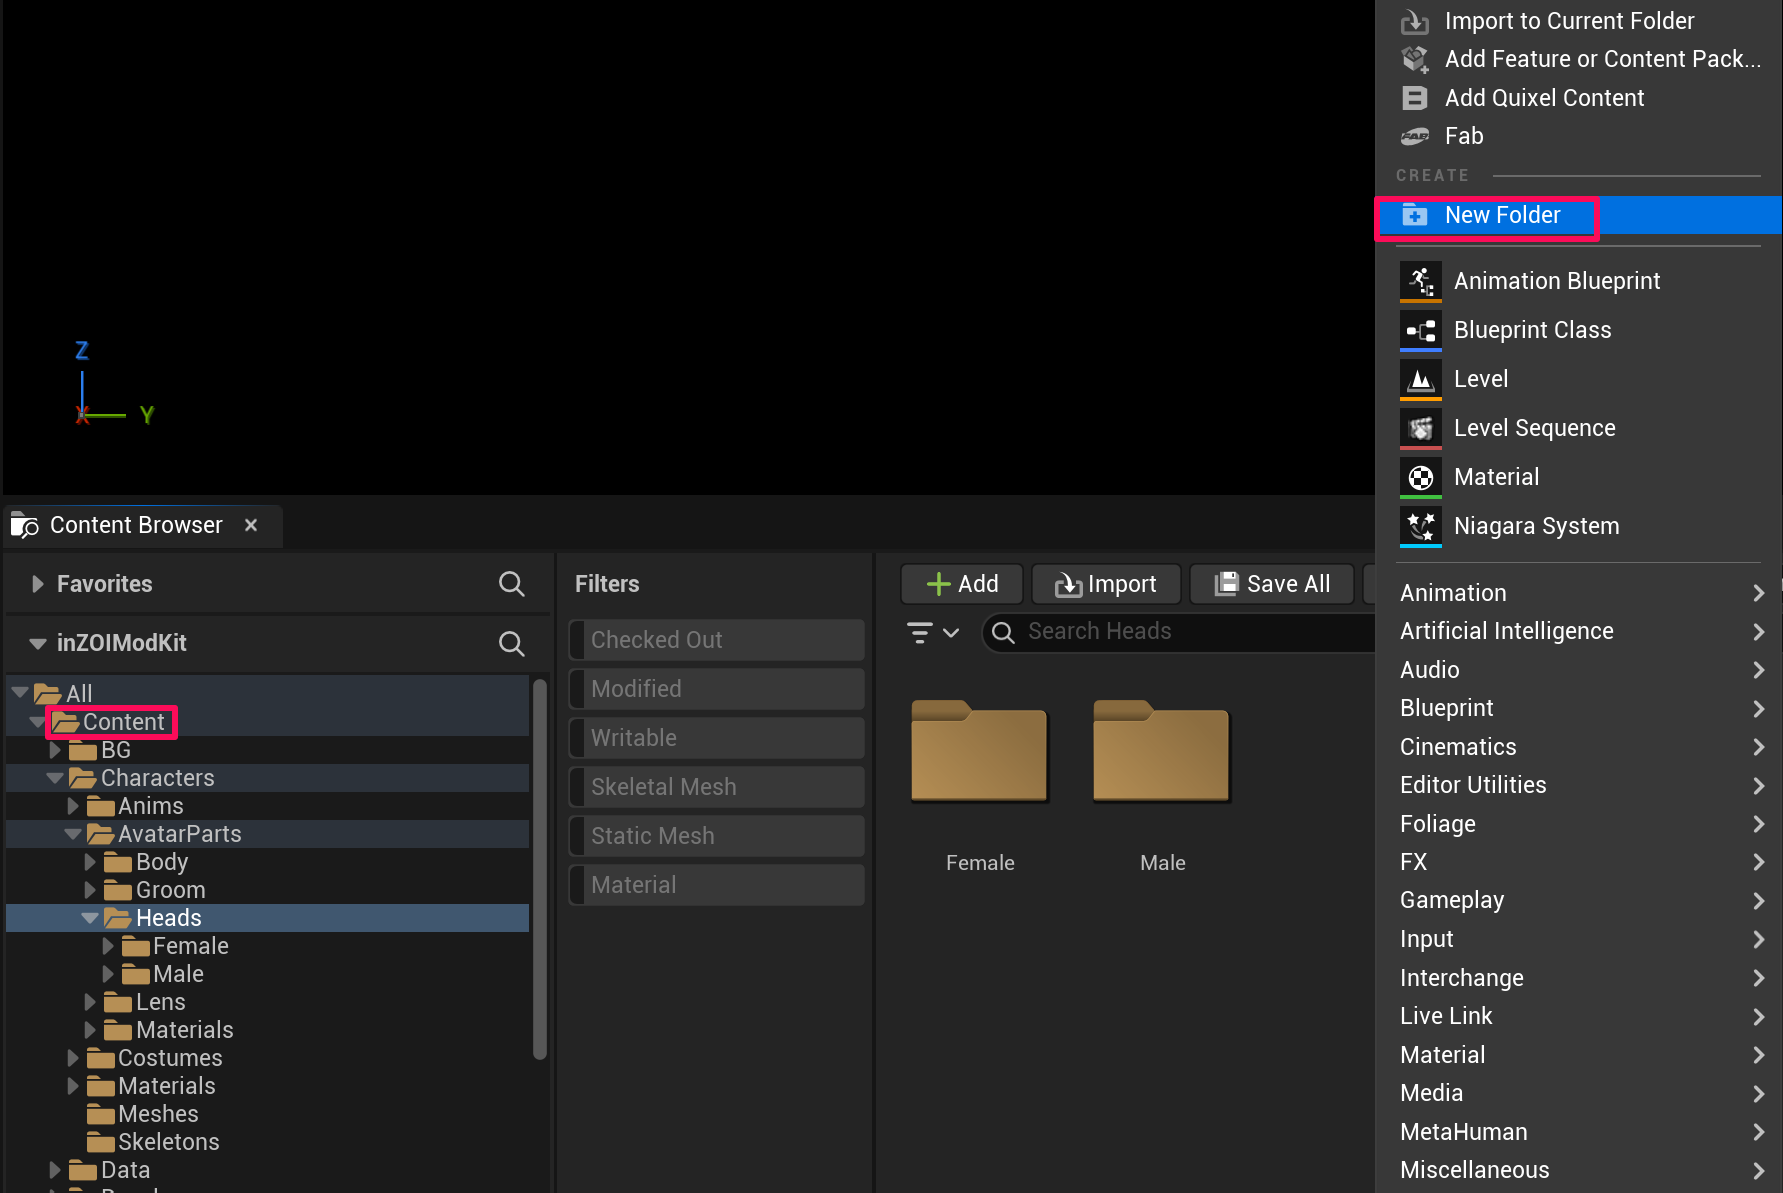
1. Create a Project Folder
Create a new folder at your desired path in the Content Browser.
Info
Any folder inside Content will work. Remember this path, as you will use the same one during the Assemble step later.
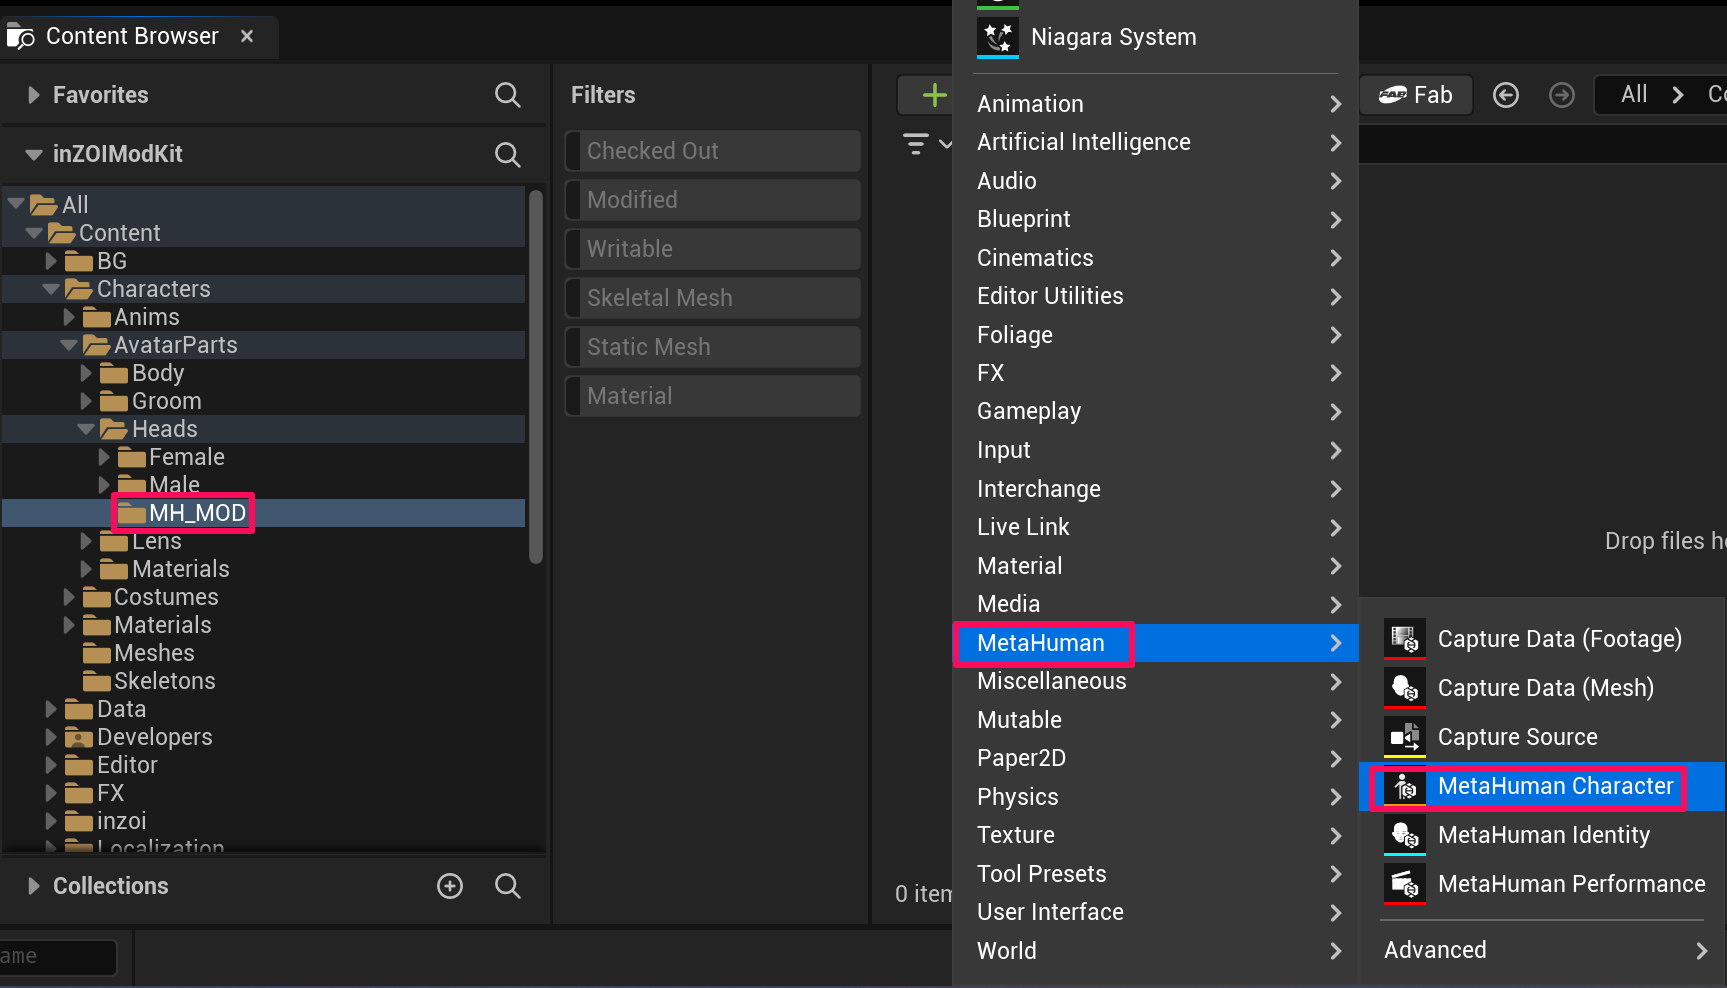
2. Create a MetaHuman Character
Right-click in the folder you created and select MetaHuman → MetaHuman Character to create and name your character.
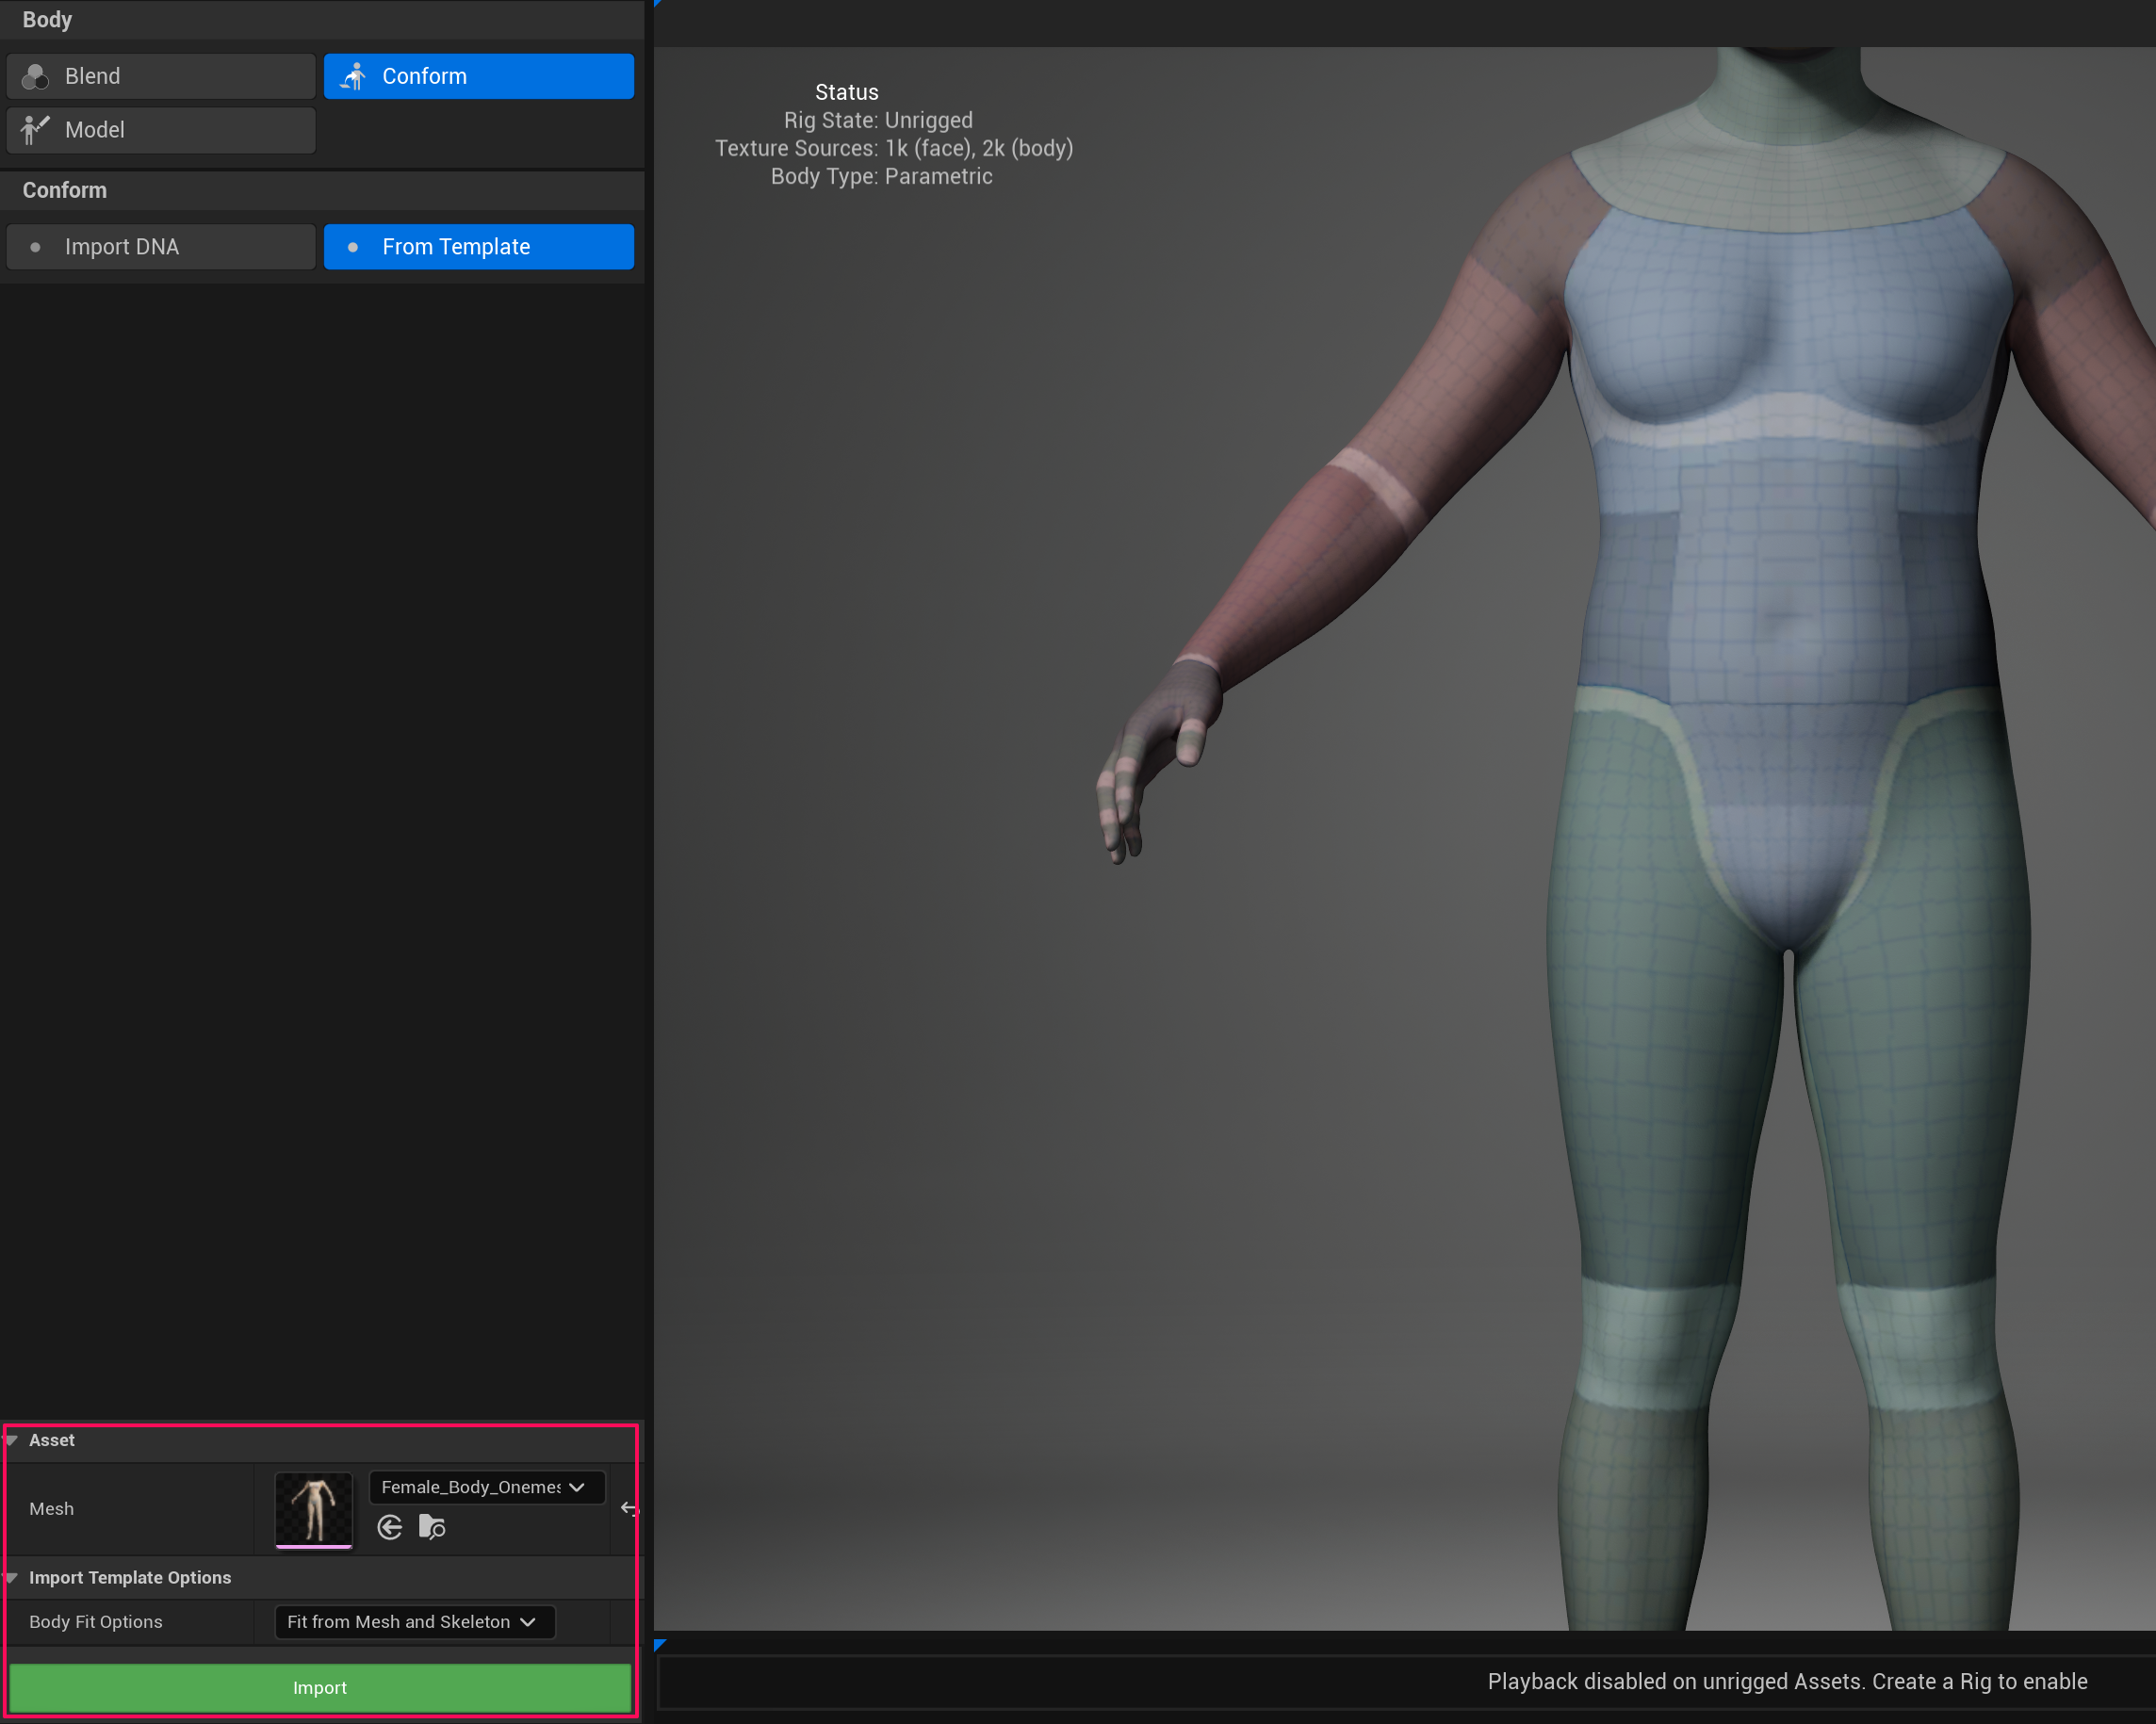
3. Body Conform Setup
Important: You must set up the Body first
The Body must be conformed before the Head for everything to work correctly. Reversing the order may cause issues.
Open the MetaHuman character you created and follow the steps below.
- Select Body → Conform → From Template
- In Asset → Mesh, assign the body mesh for the desired gender
Male
Characters/AvatarParts/Body/Male/Mesh/ModKit
Female
Characters/AvatarParts/Body/Female/Mesh/ModKit
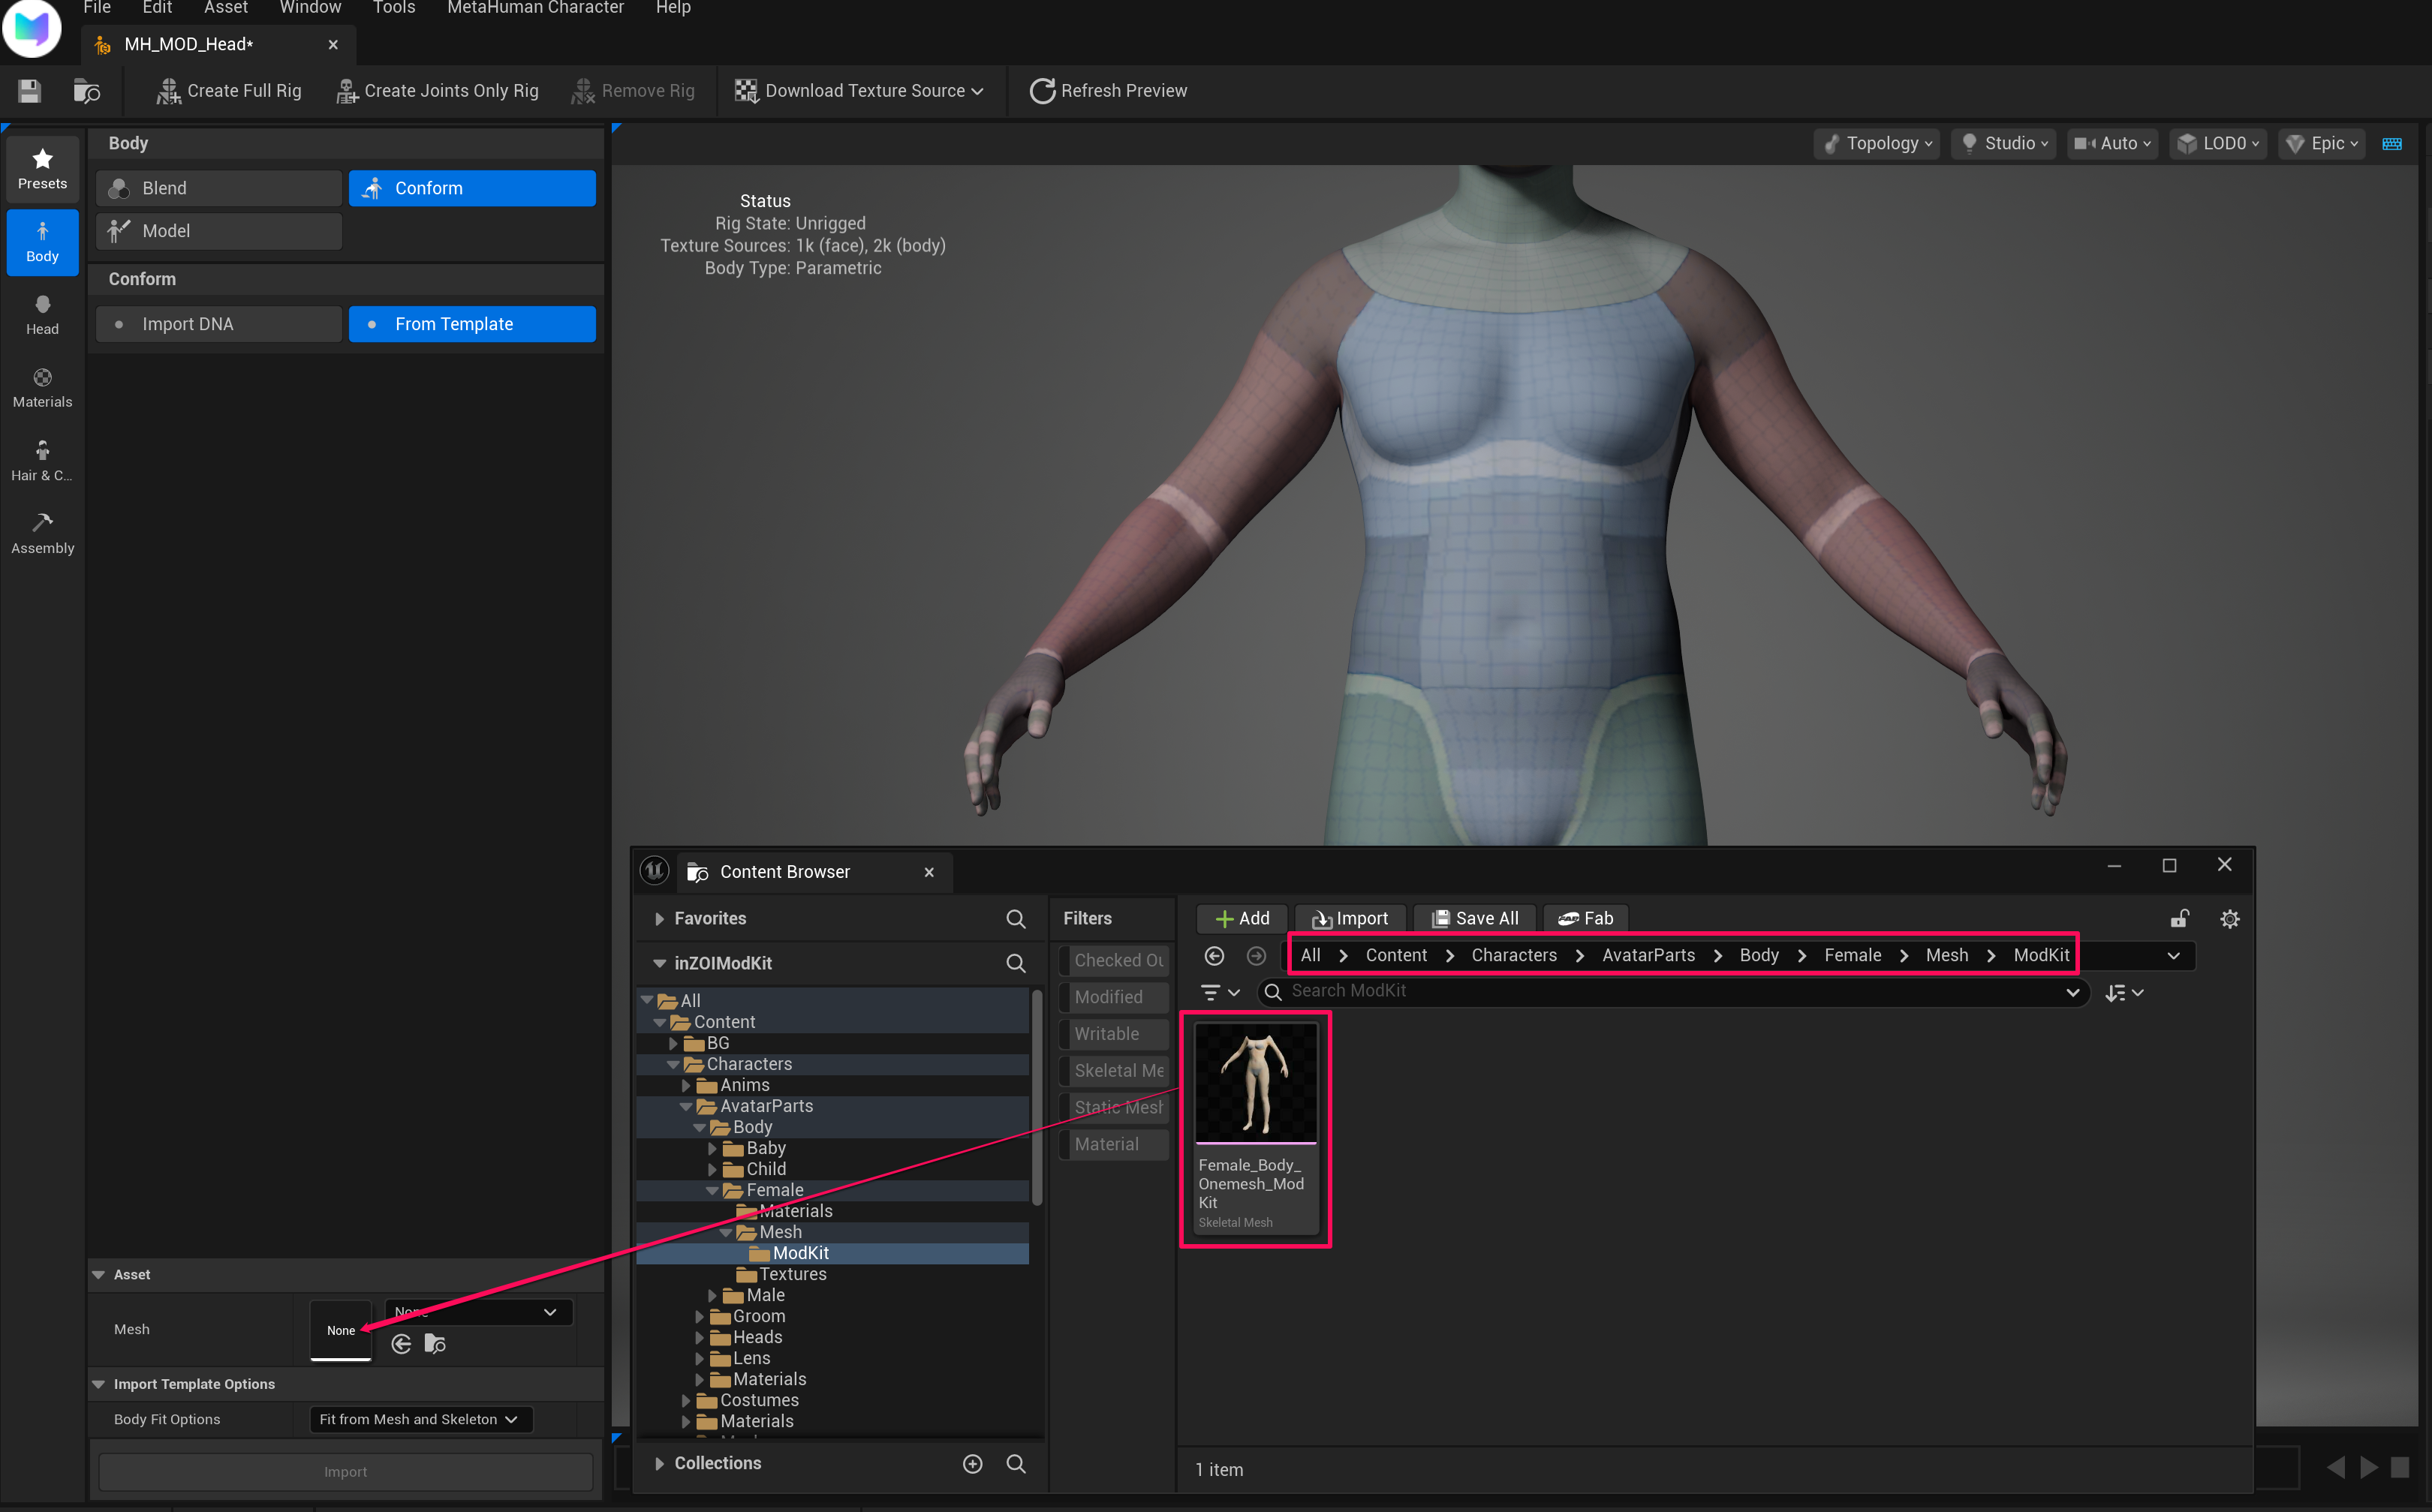
4. Body Import
After assigning the body mesh, click the Import button.
Note
Leave Body Fit Options at the default value: Fit from Mesh and Skeleton.
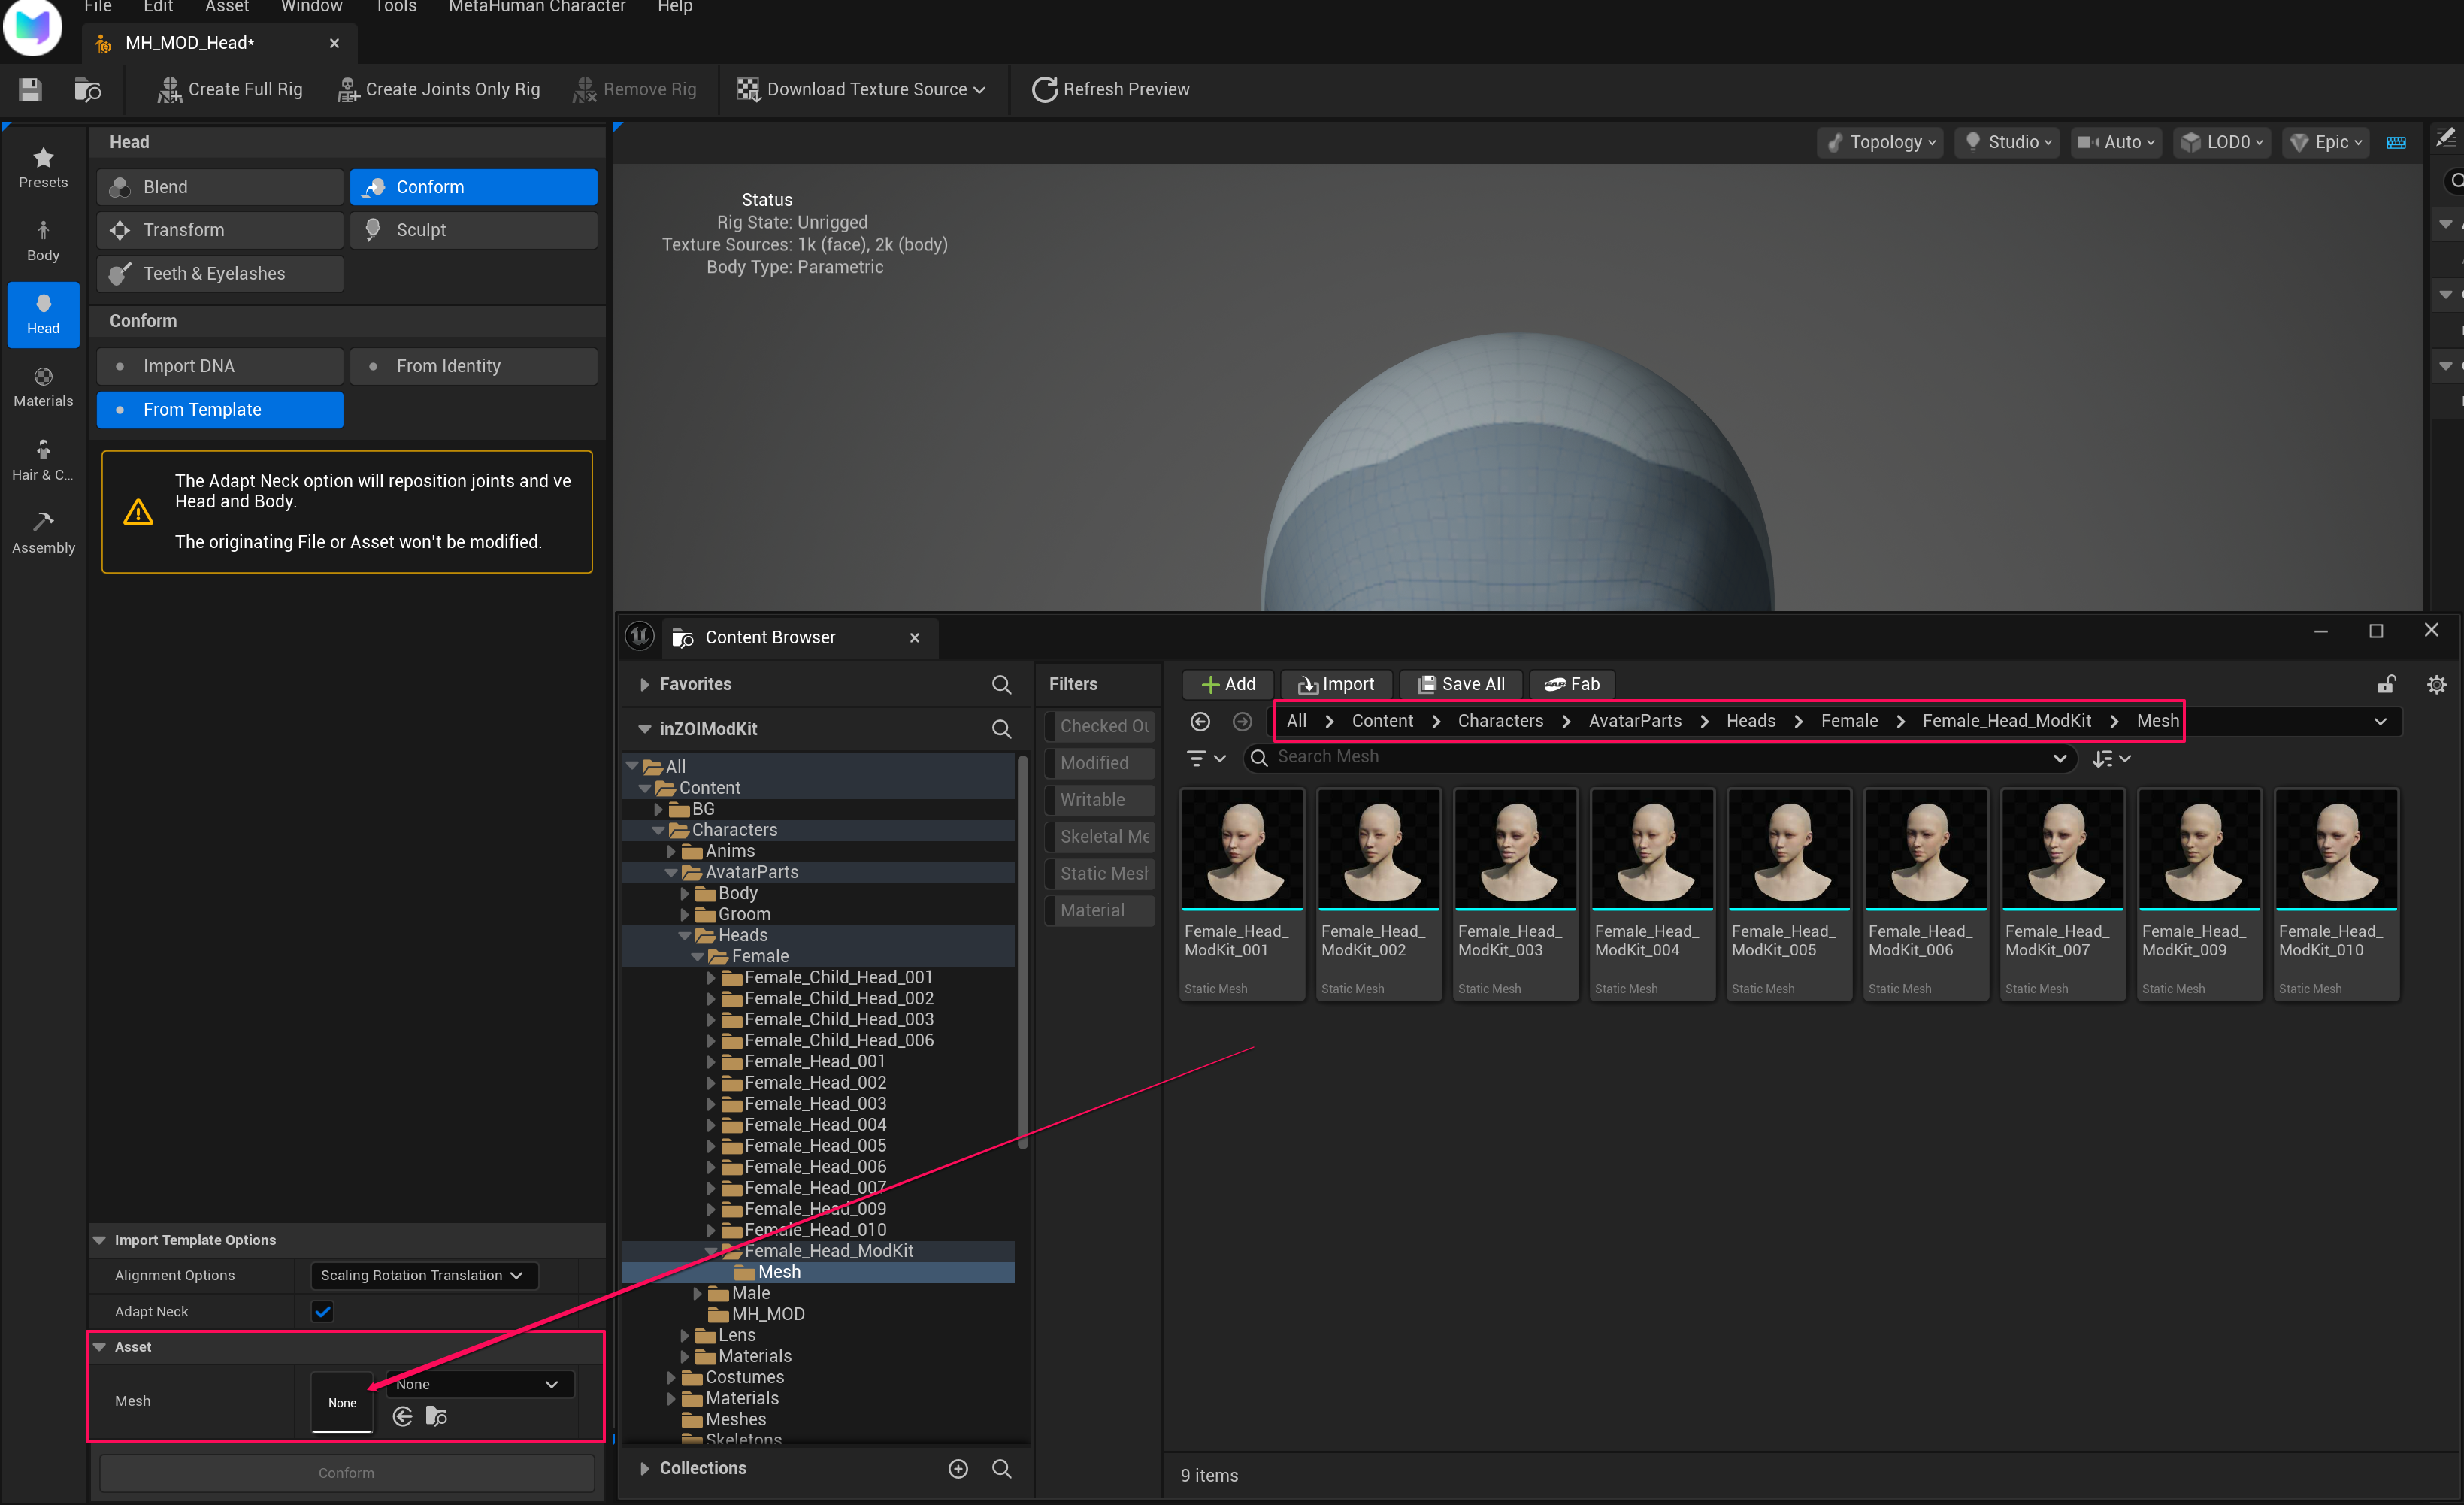
5. Head Conform Setup
- Select Head → Conform → From Template
- In Asset → Mesh, assign the face mesh for the desired gender
Choose from one of the 9 inZOI face types.
Male
/All/Game/Characters/AvatarParts/Heads/Male/Male_Head_ModKit/Mesh
Female
/All/Game/Characters/AvatarParts/Heads/Female/Female_Head_ModKit/Mesh
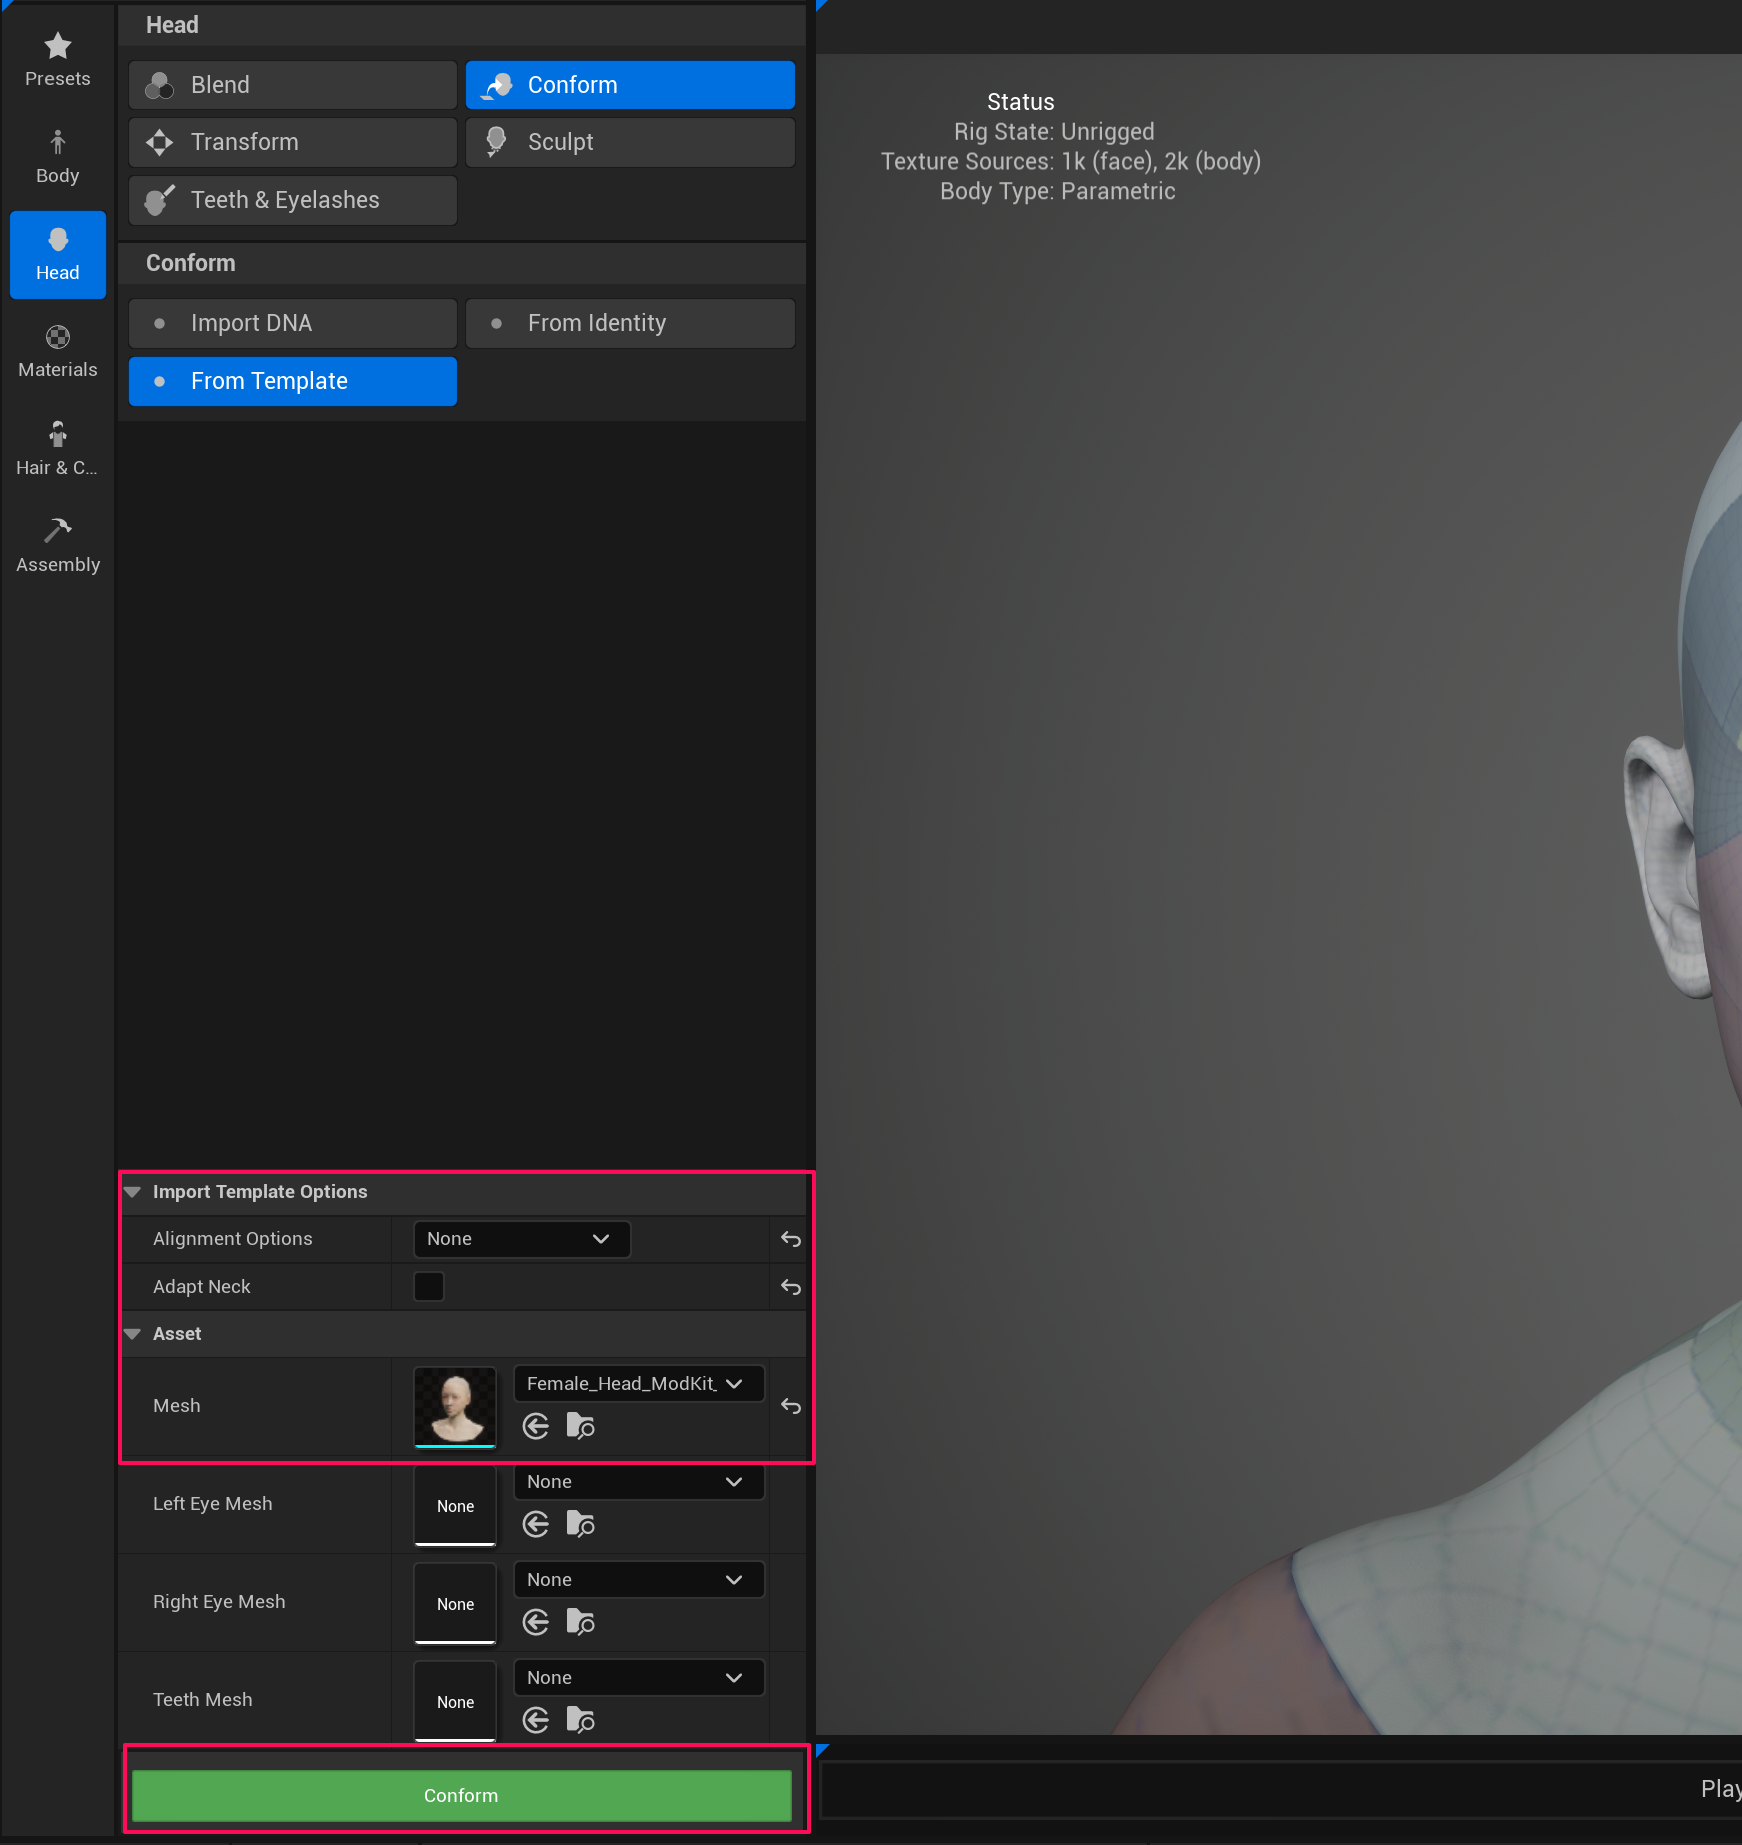
6. Head Import Option Settings
After assigning the face mesh, configure the following options under Import Template Options, then click Conform.
| Option | Value |
|---|---|
| Alignment Options | None |
| Adapt Neck | :material-checkbox-blank-outline: Unchecked |
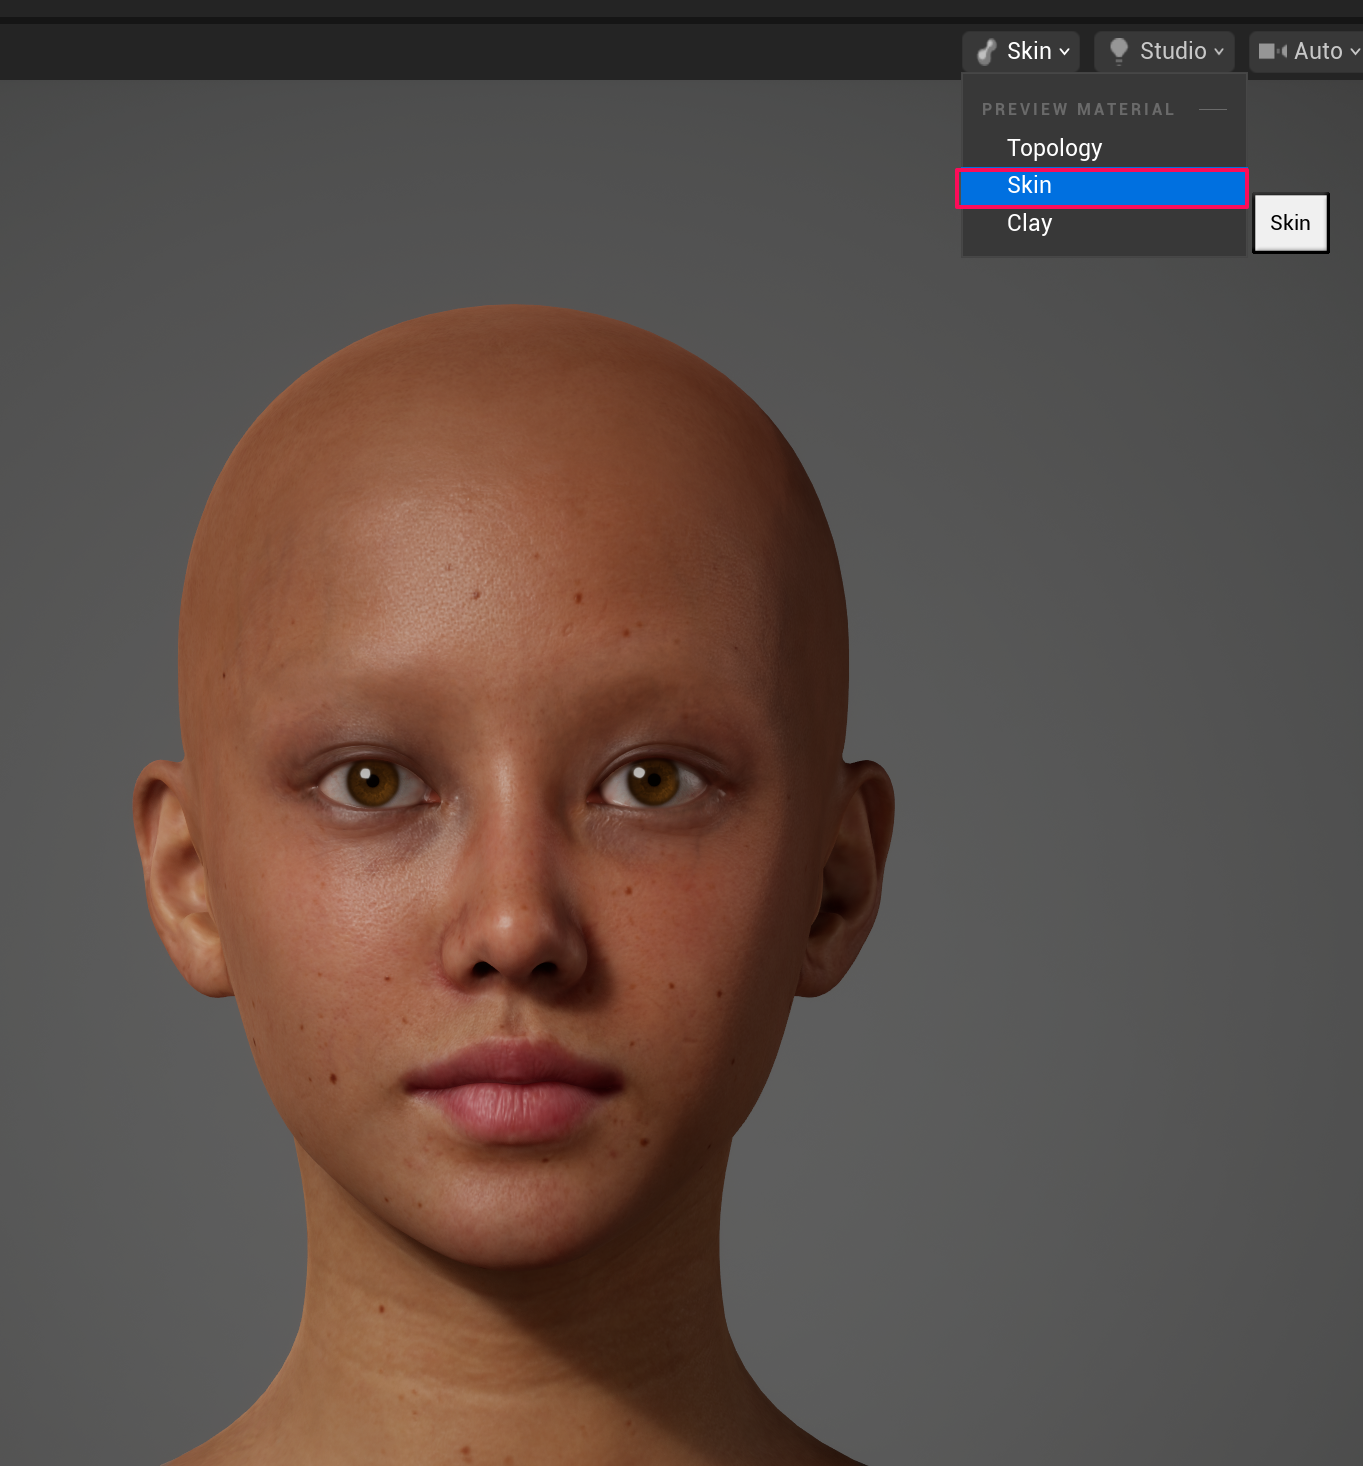
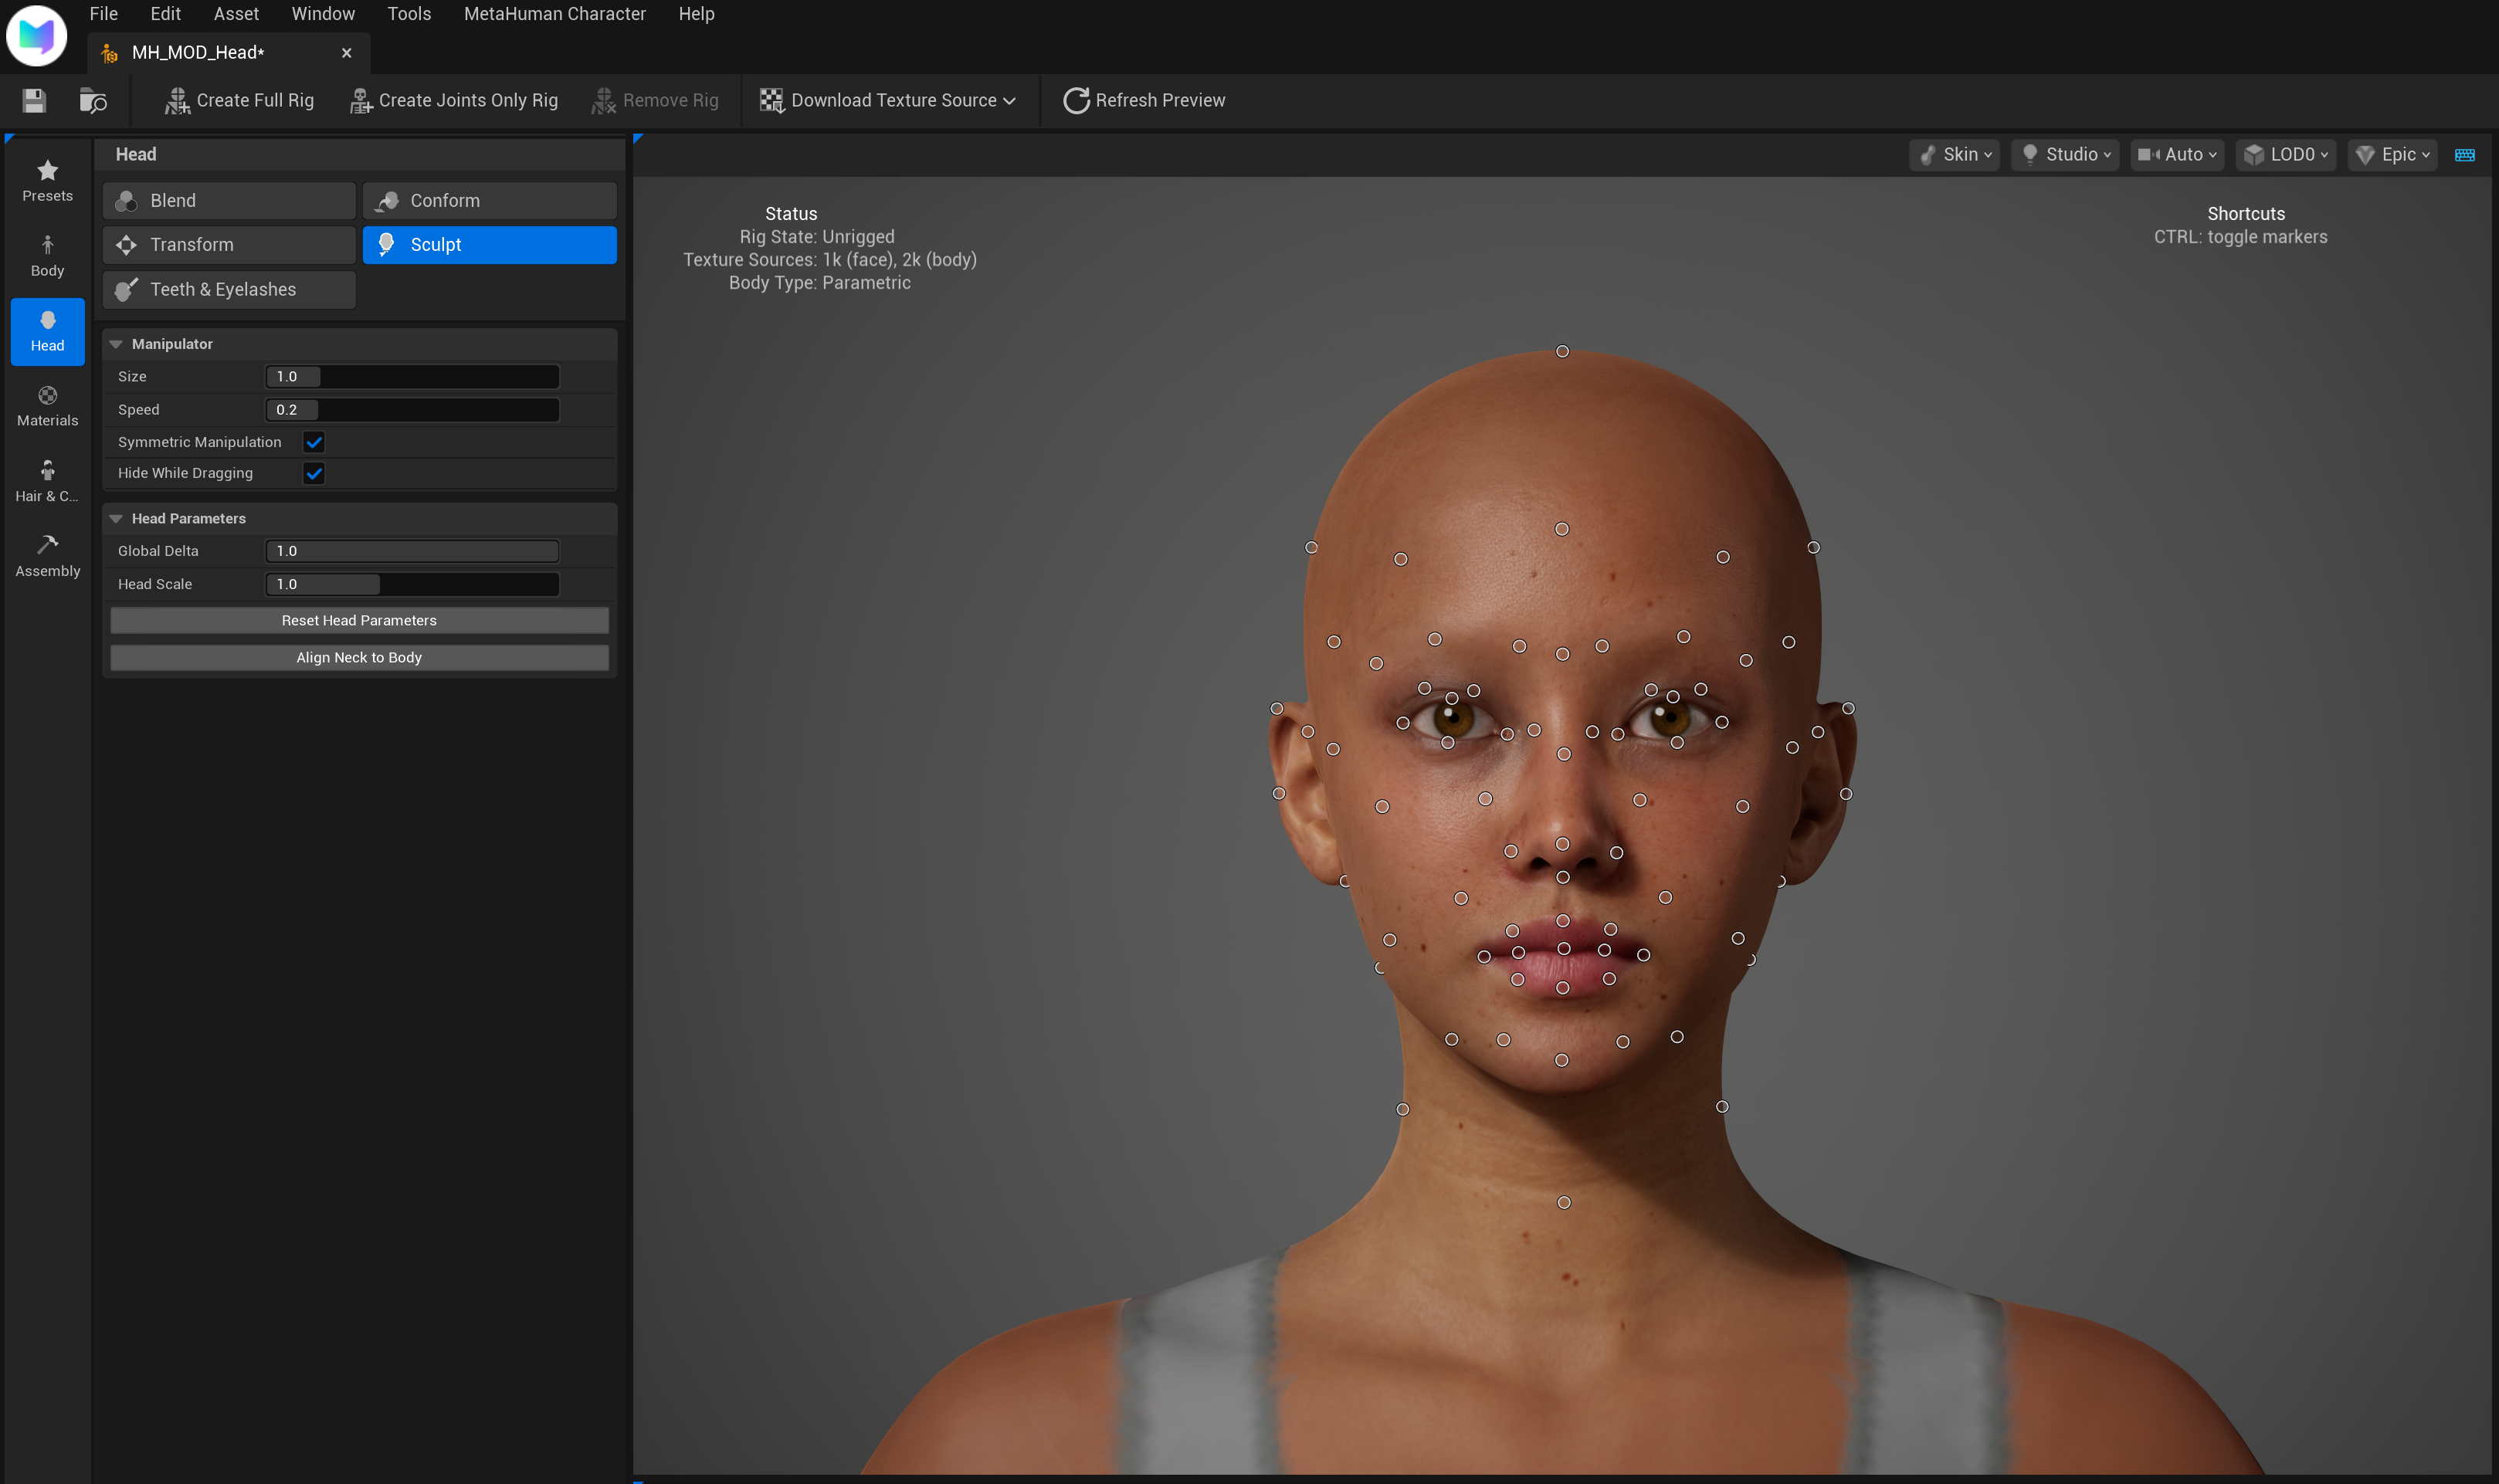
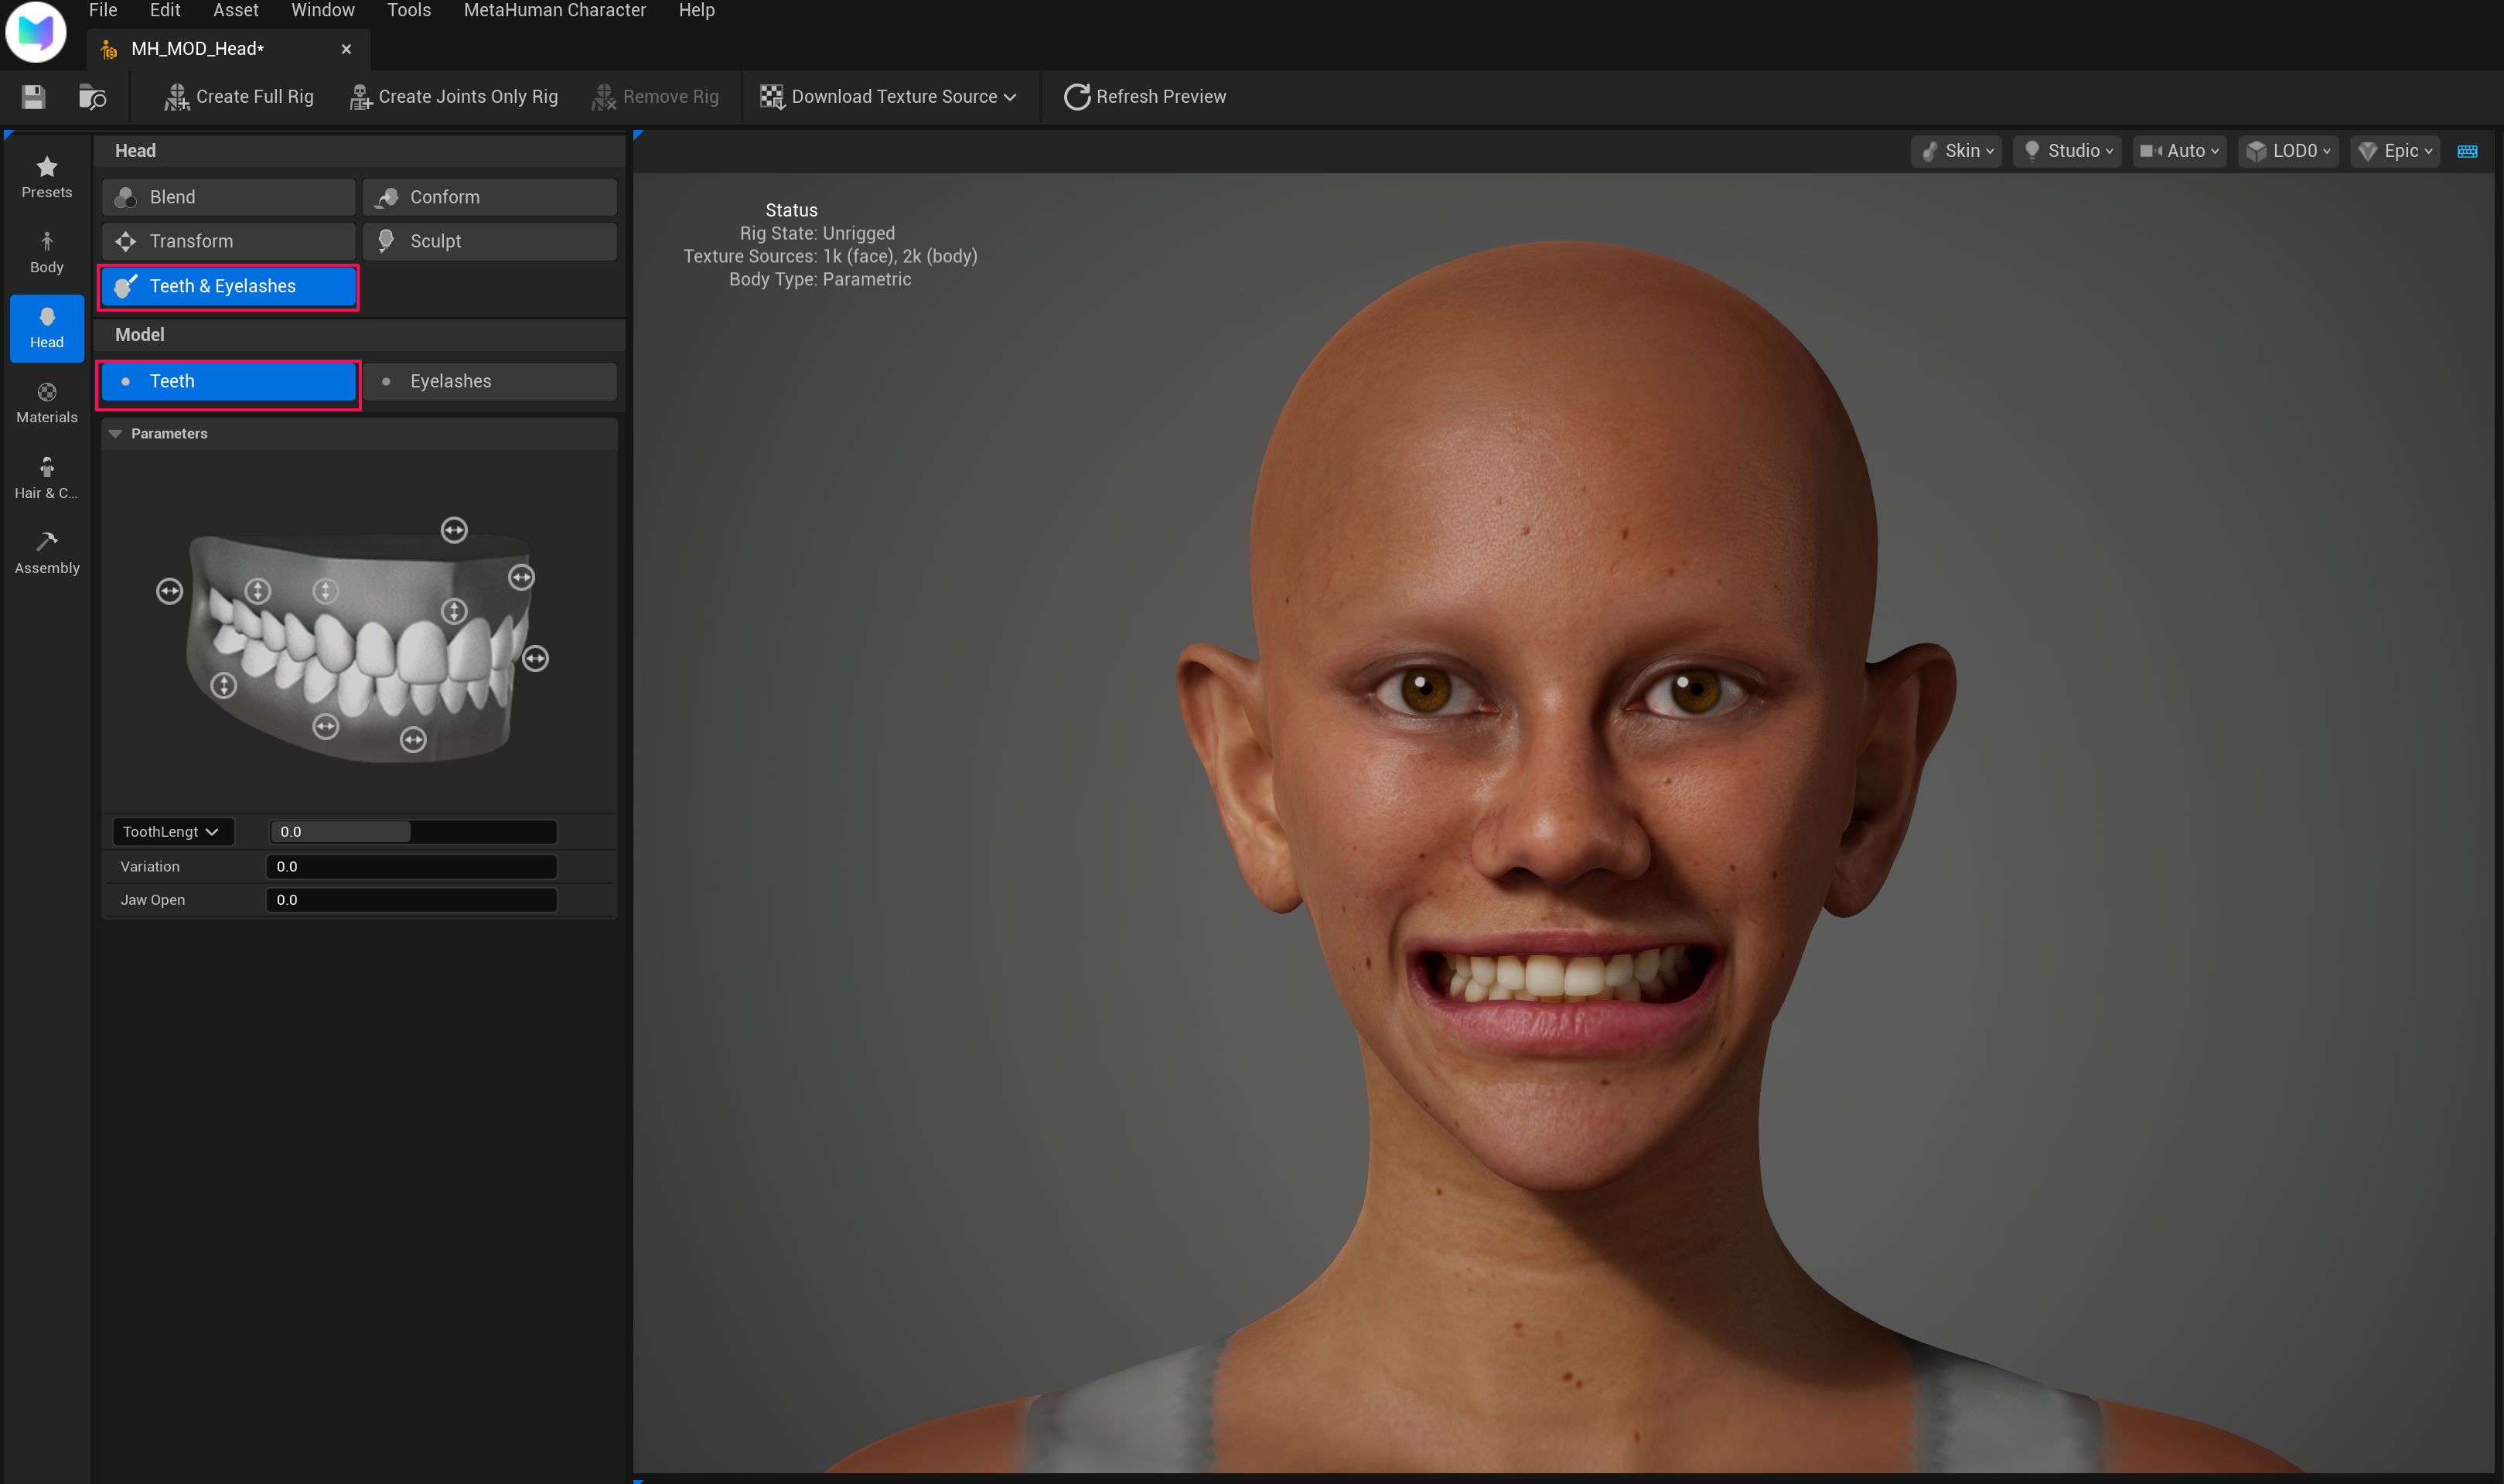
7. Edit the Face (Sculpt / Transform)
Once the setup is complete, use Head → Transform / Sculpt to mod the face.
Editing in Skin Mode
Change the Topology option at the top to Skin to edit in skin mode.

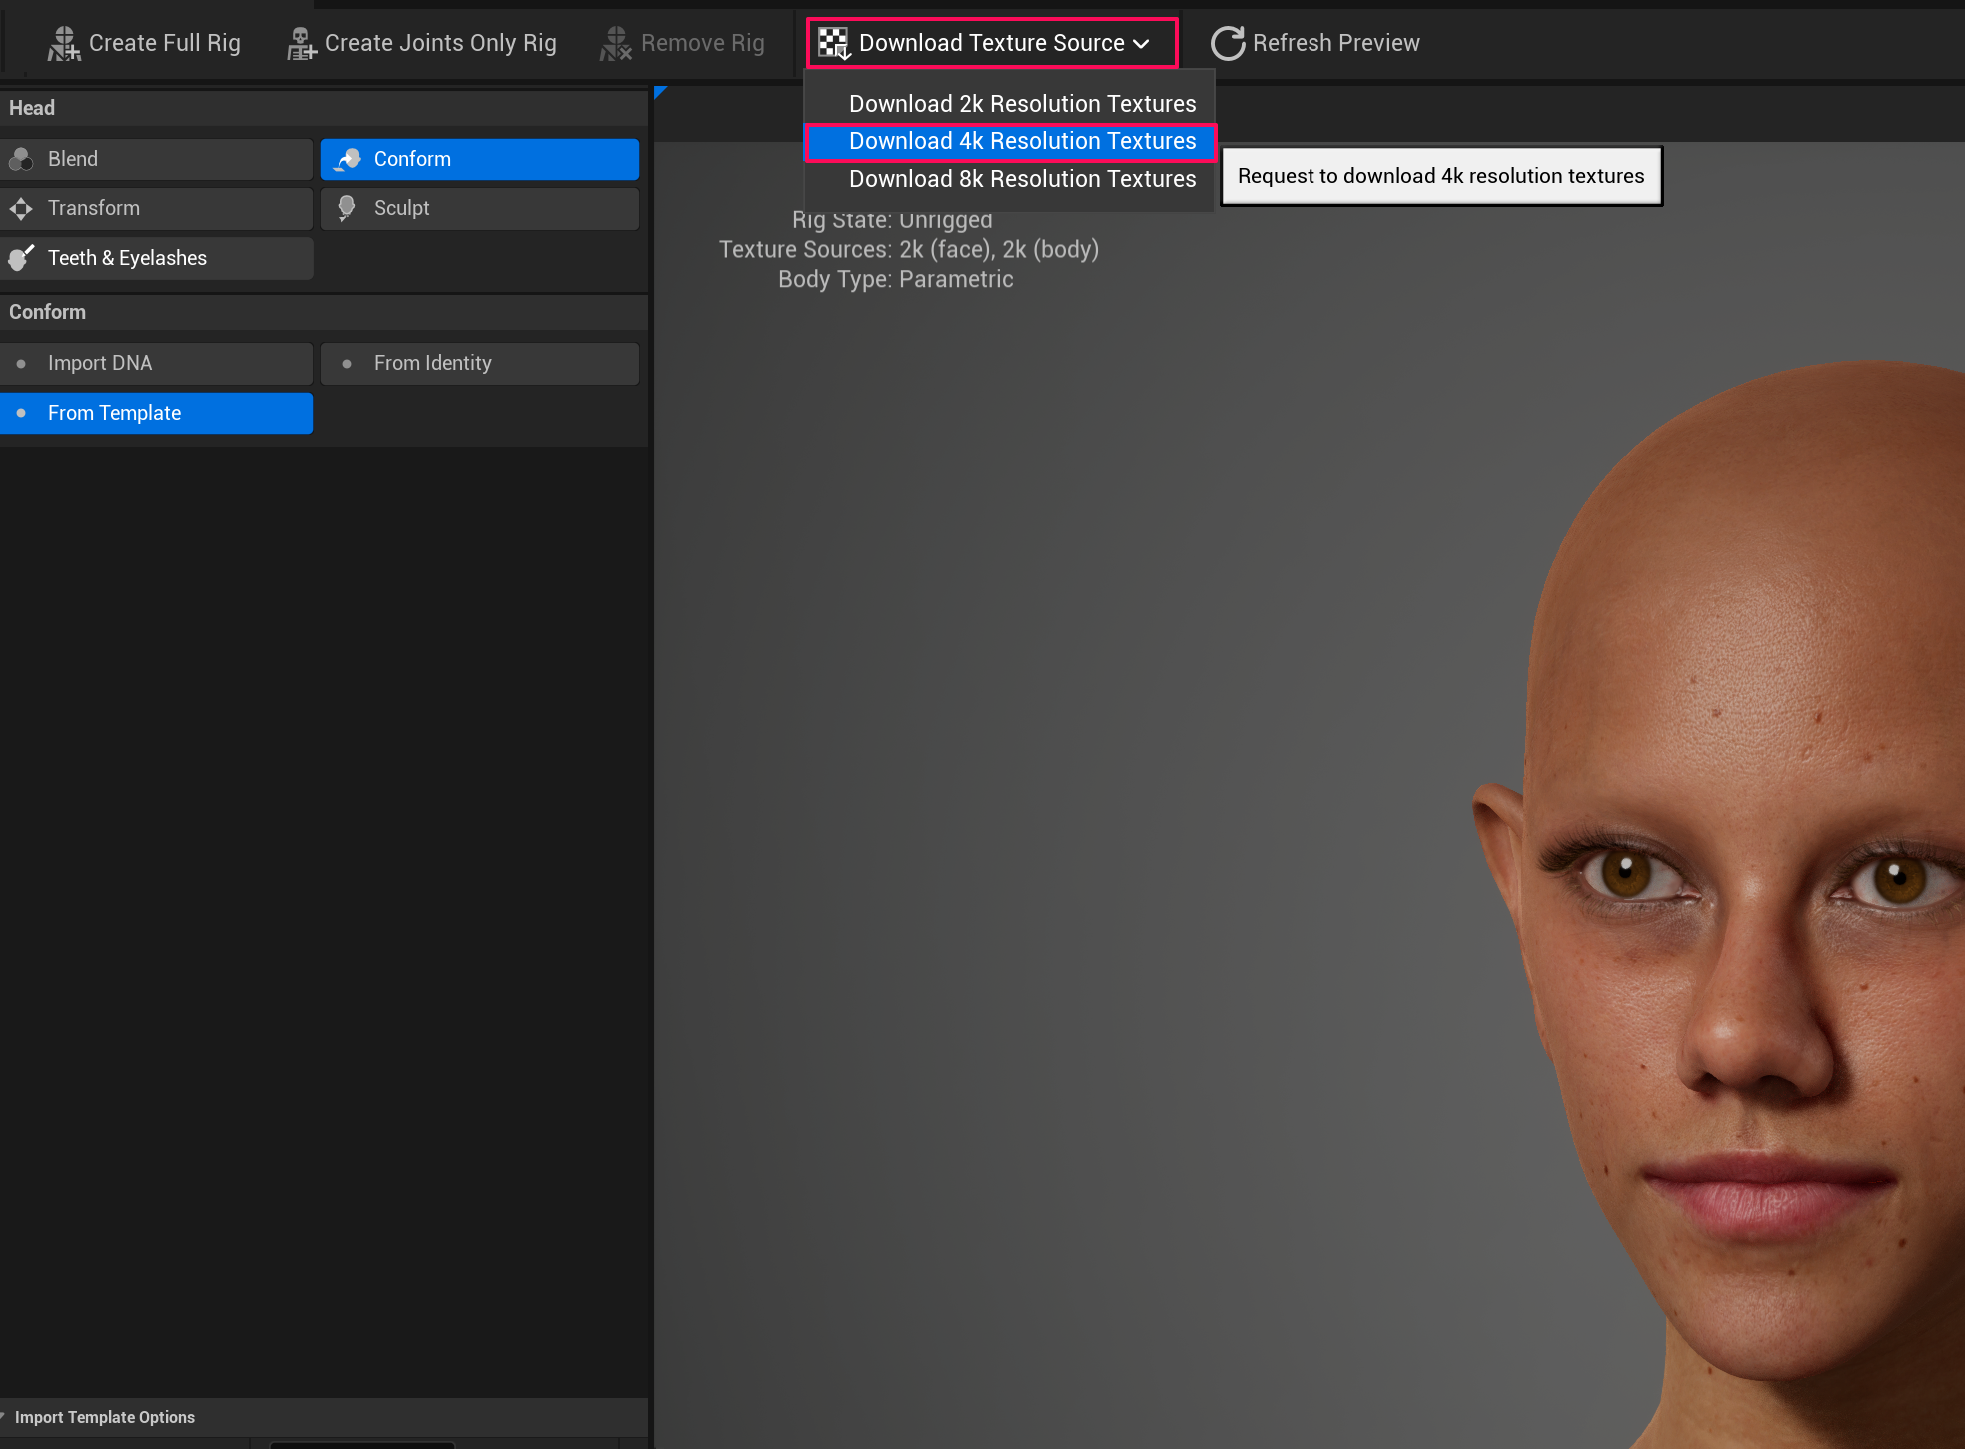
8. Download Textures
Once editing is complete, select the following from the top menu:
Download Texture Source → Download 4K Resolution Textures
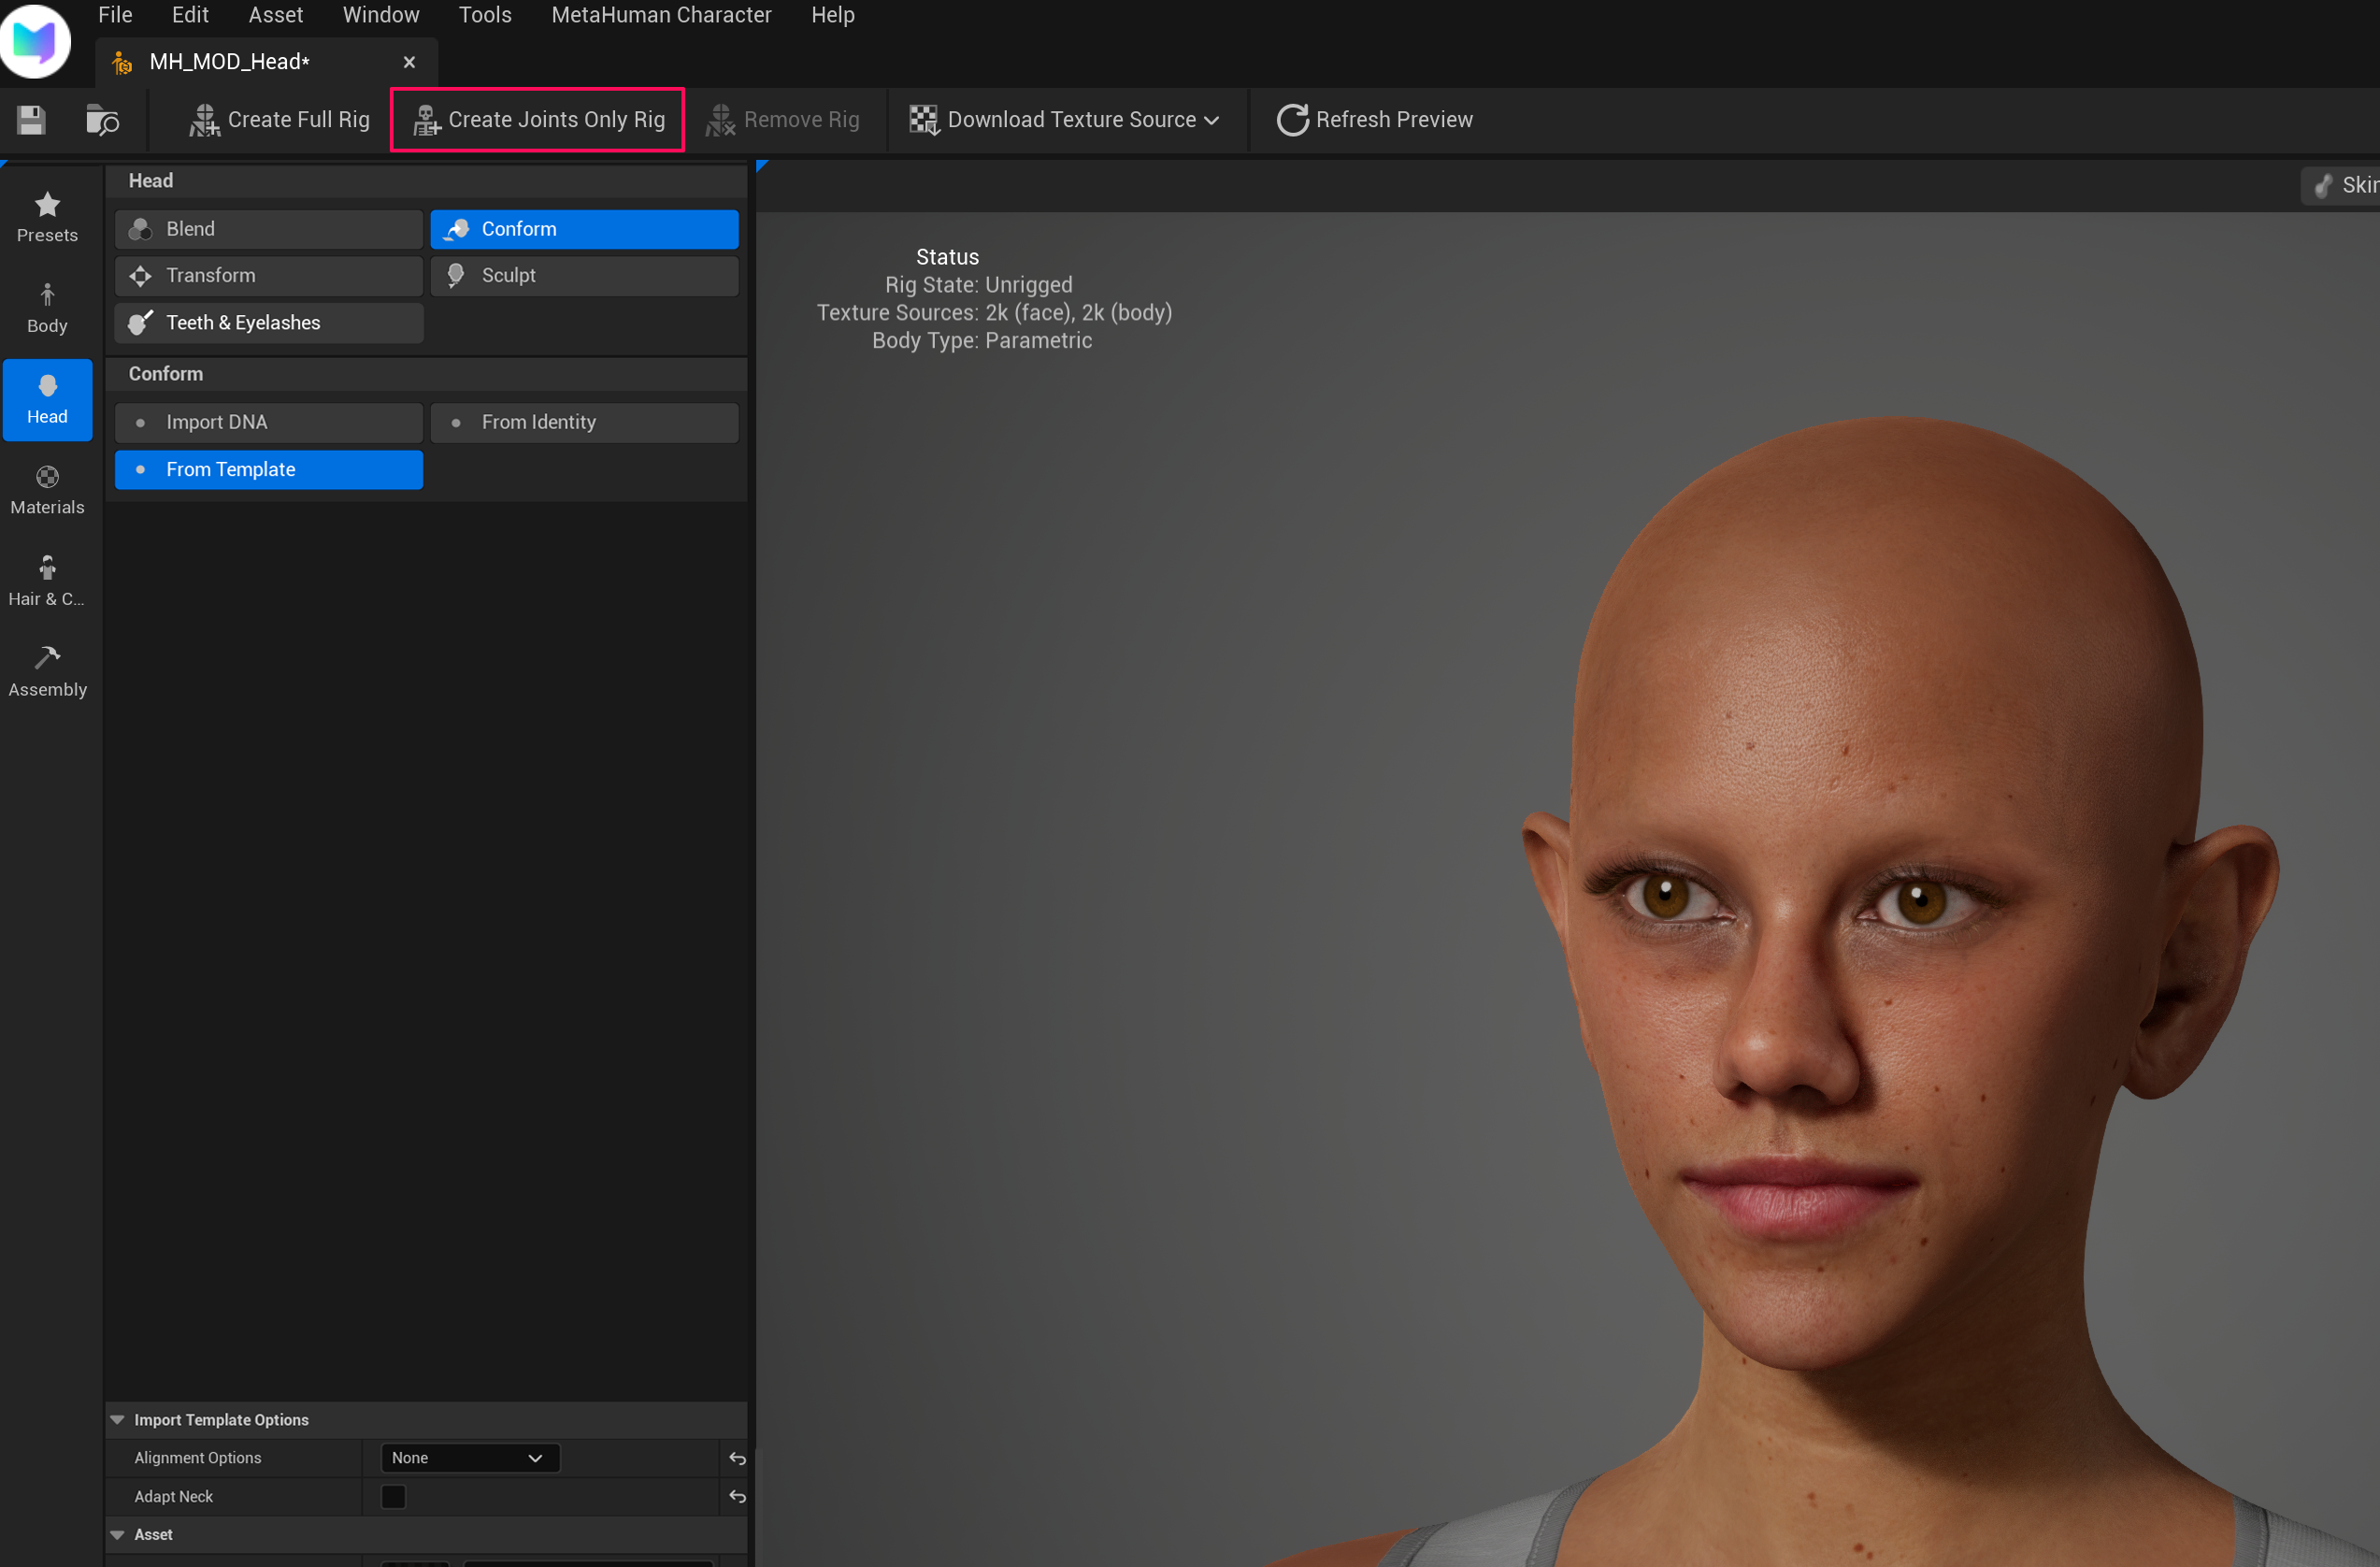
9. Create Rig
After the texture download is complete, click the Create Joints Only Rig button to generate the rig.
10. Run Assemble
Once rigging is complete, navigate to the Assembly tab.
- Set the path in Targets → Root Directory.
- Click the Assemble button at the bottom to execute.
Recommended Path
It is recommended to use the same path as the folder created in (#1-create-a-project-folder).

11. Verify the Output
Once Assemble is complete, a folder will be created at the specified path.
Specified Path/
└── Face/
    └── Face Skeletal Mesh
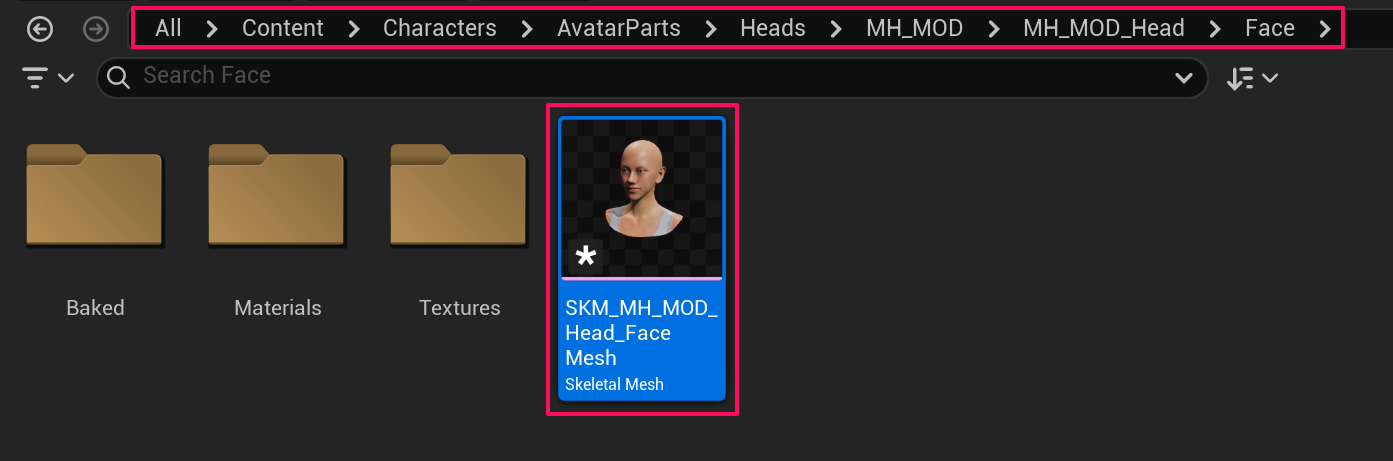
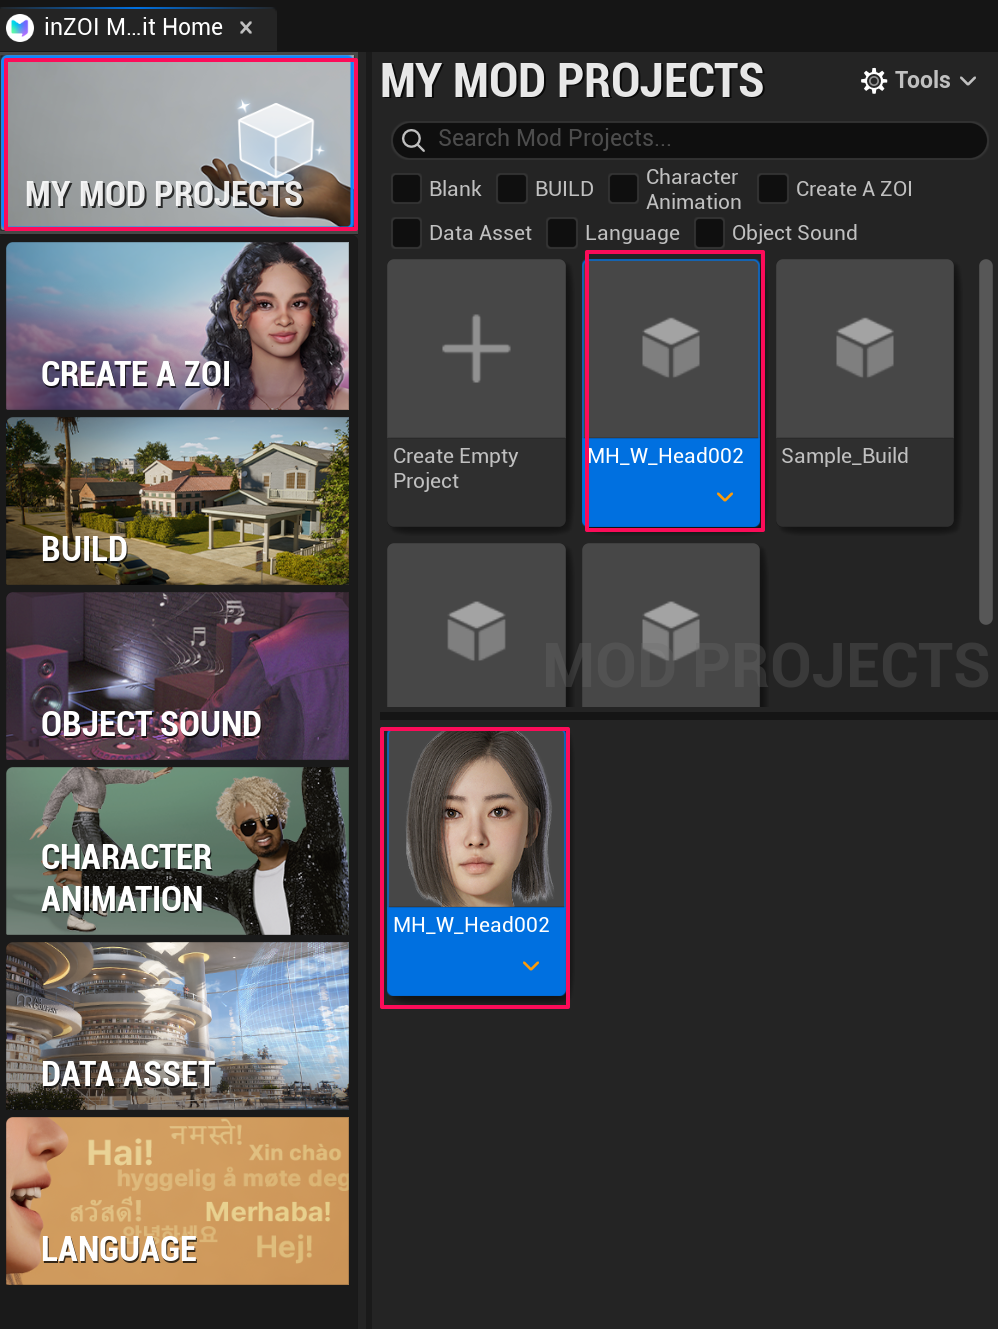
12. Create a Face Project in the ModKit
In the ModKit, follow the steps below:
- Select a face in the CREATE A ZOI → CAZ → FACE tab
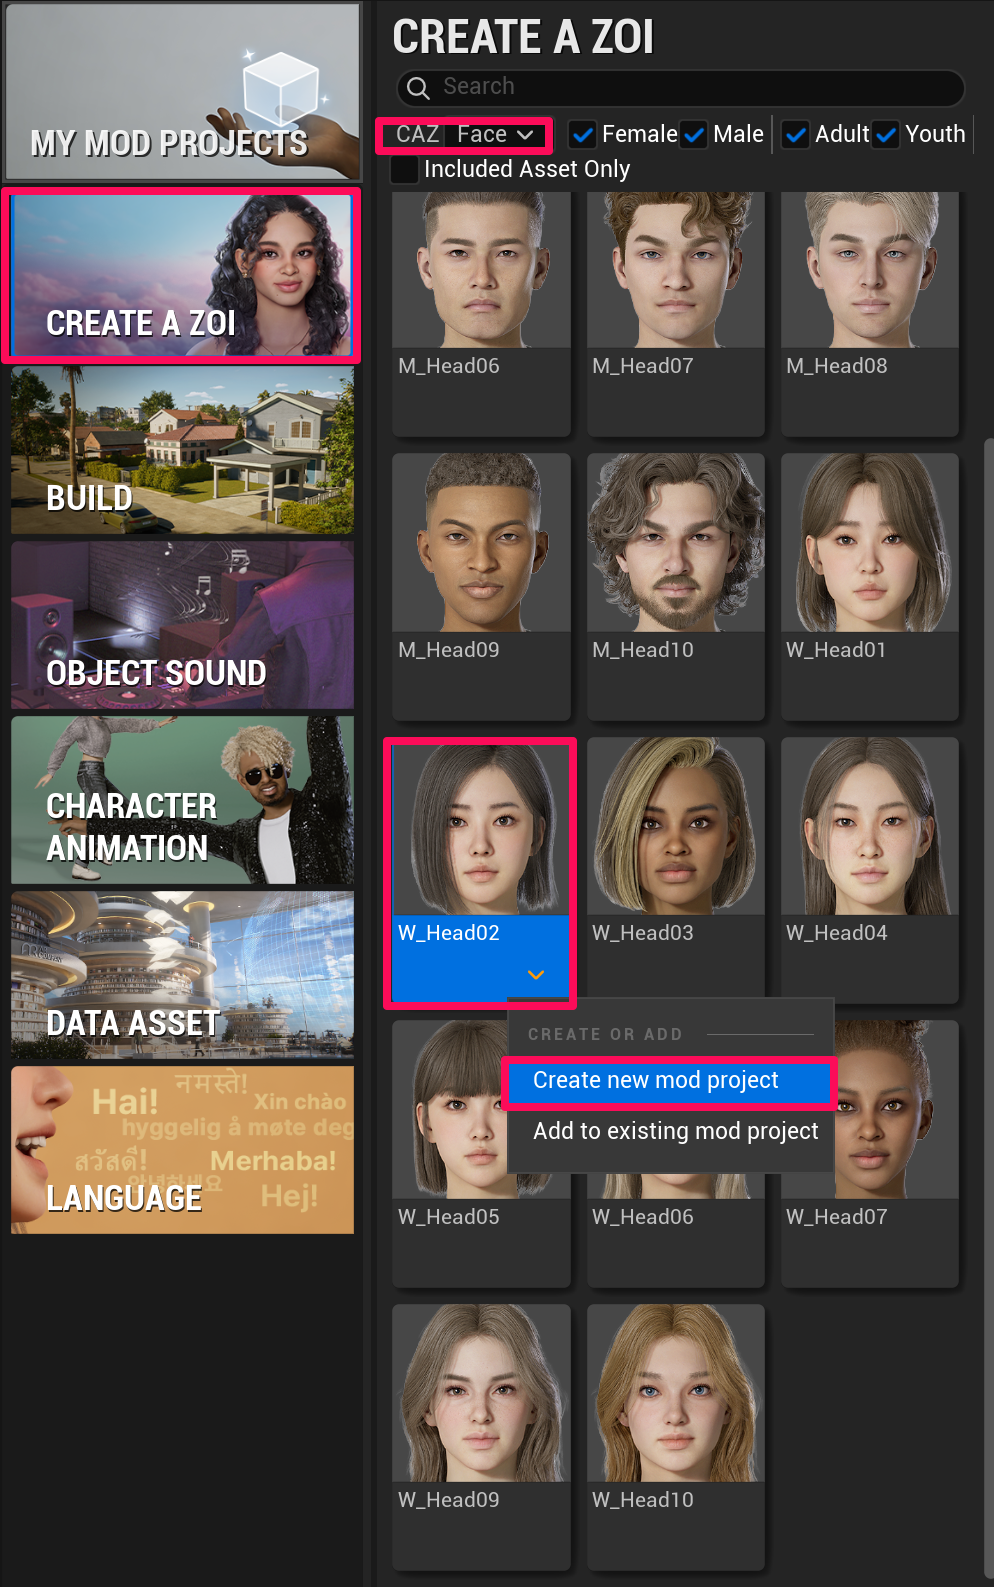
- Create a project with Create new mod project
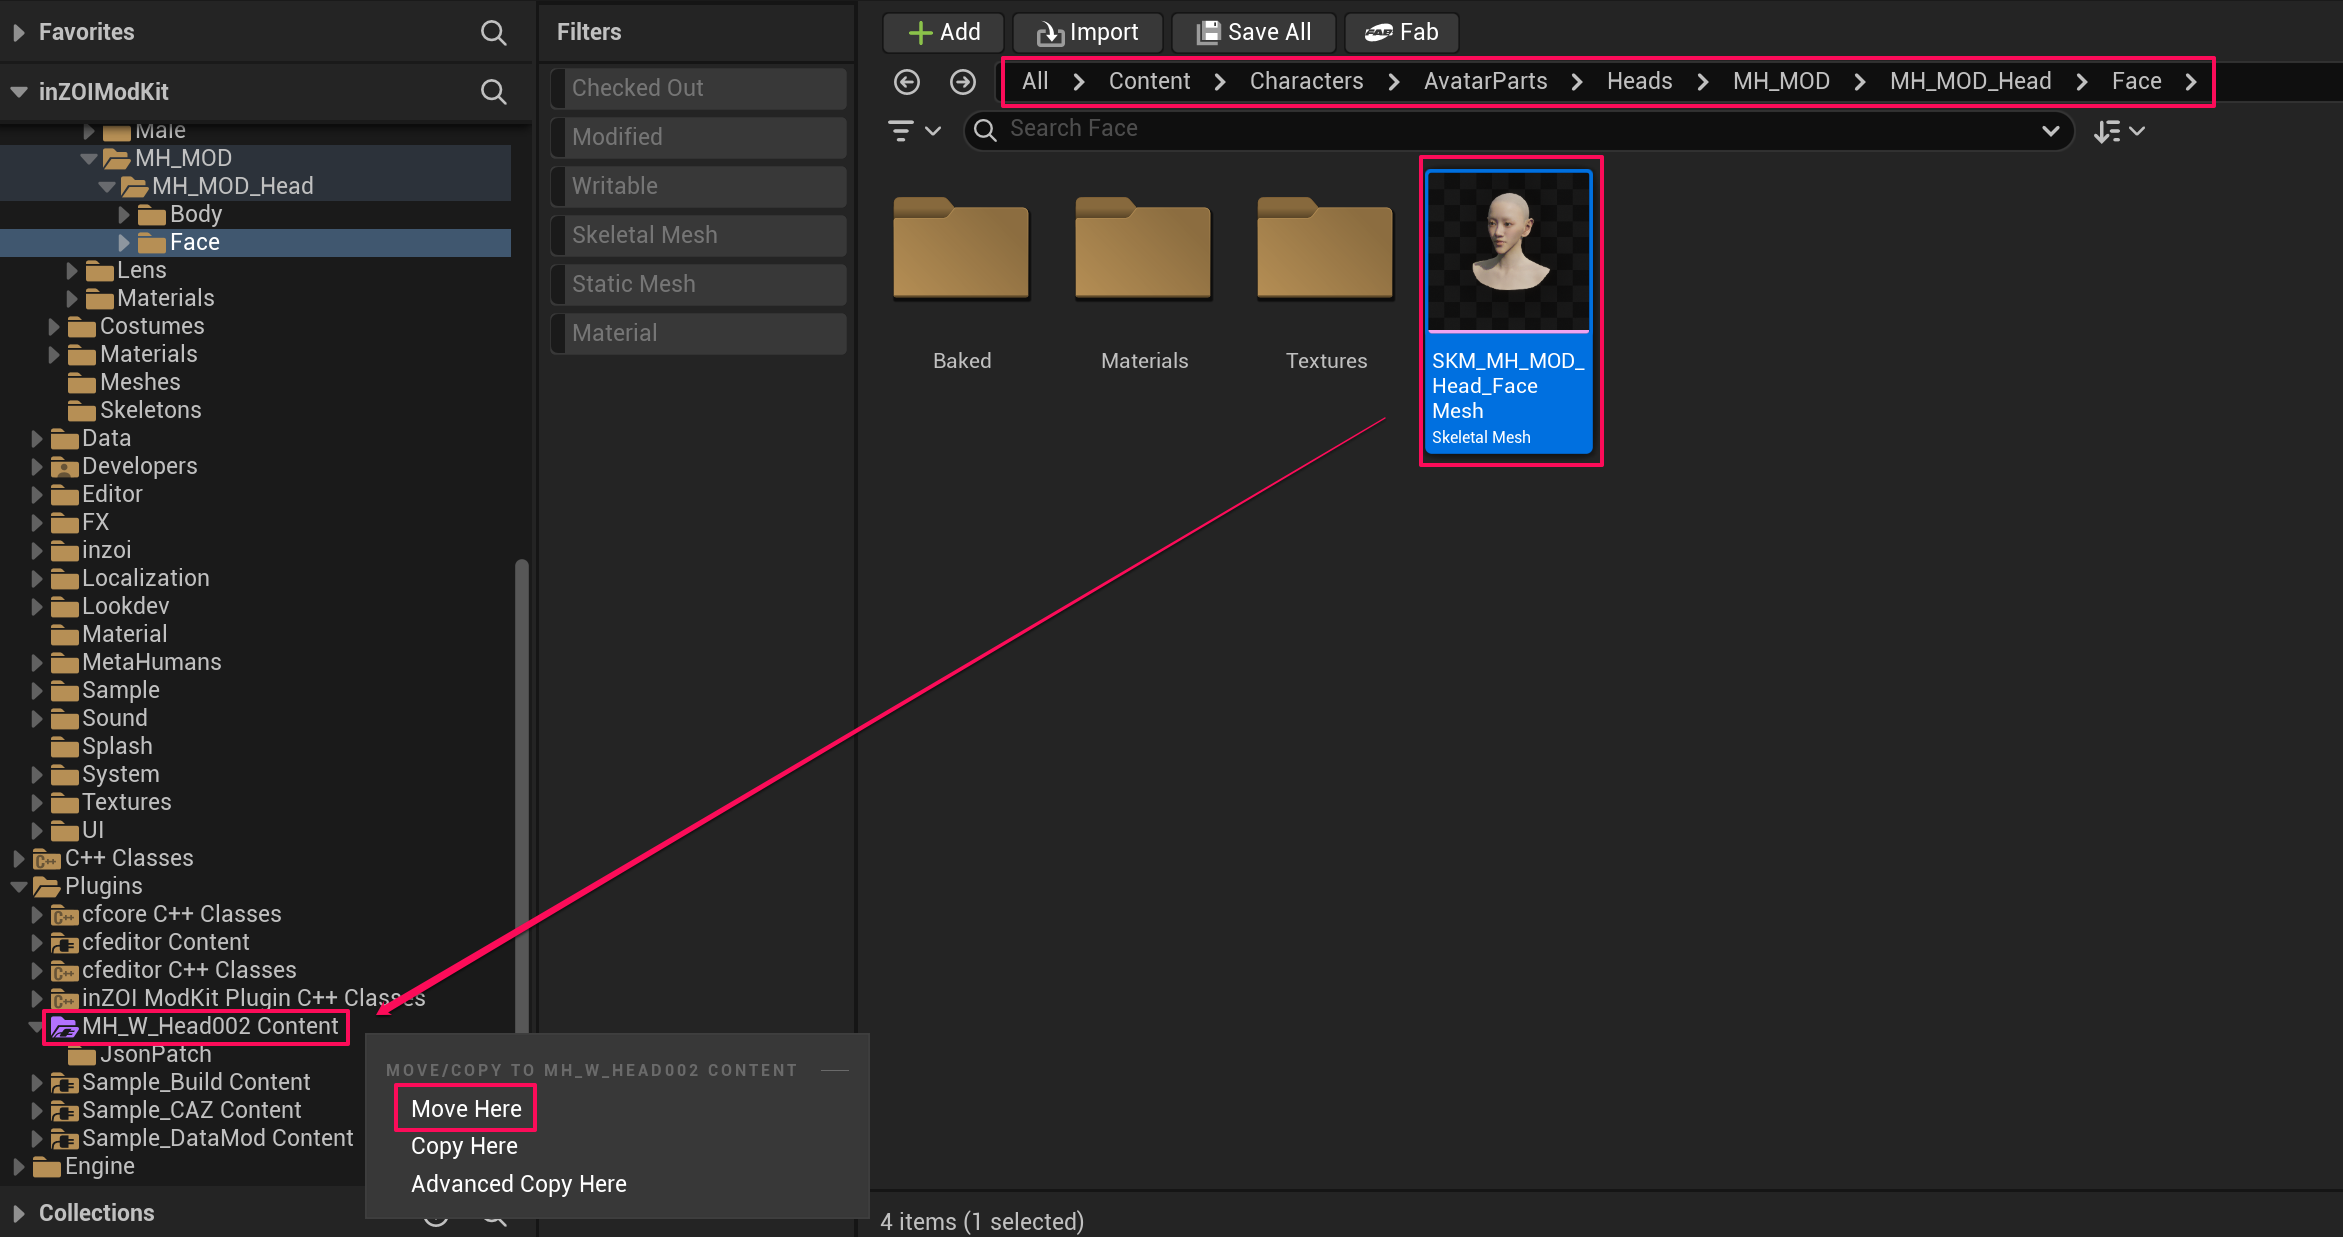
13. Move the Face Asset
Move the face skeletal mesh completed in (#11-verify-the-output) into the mod project you created.
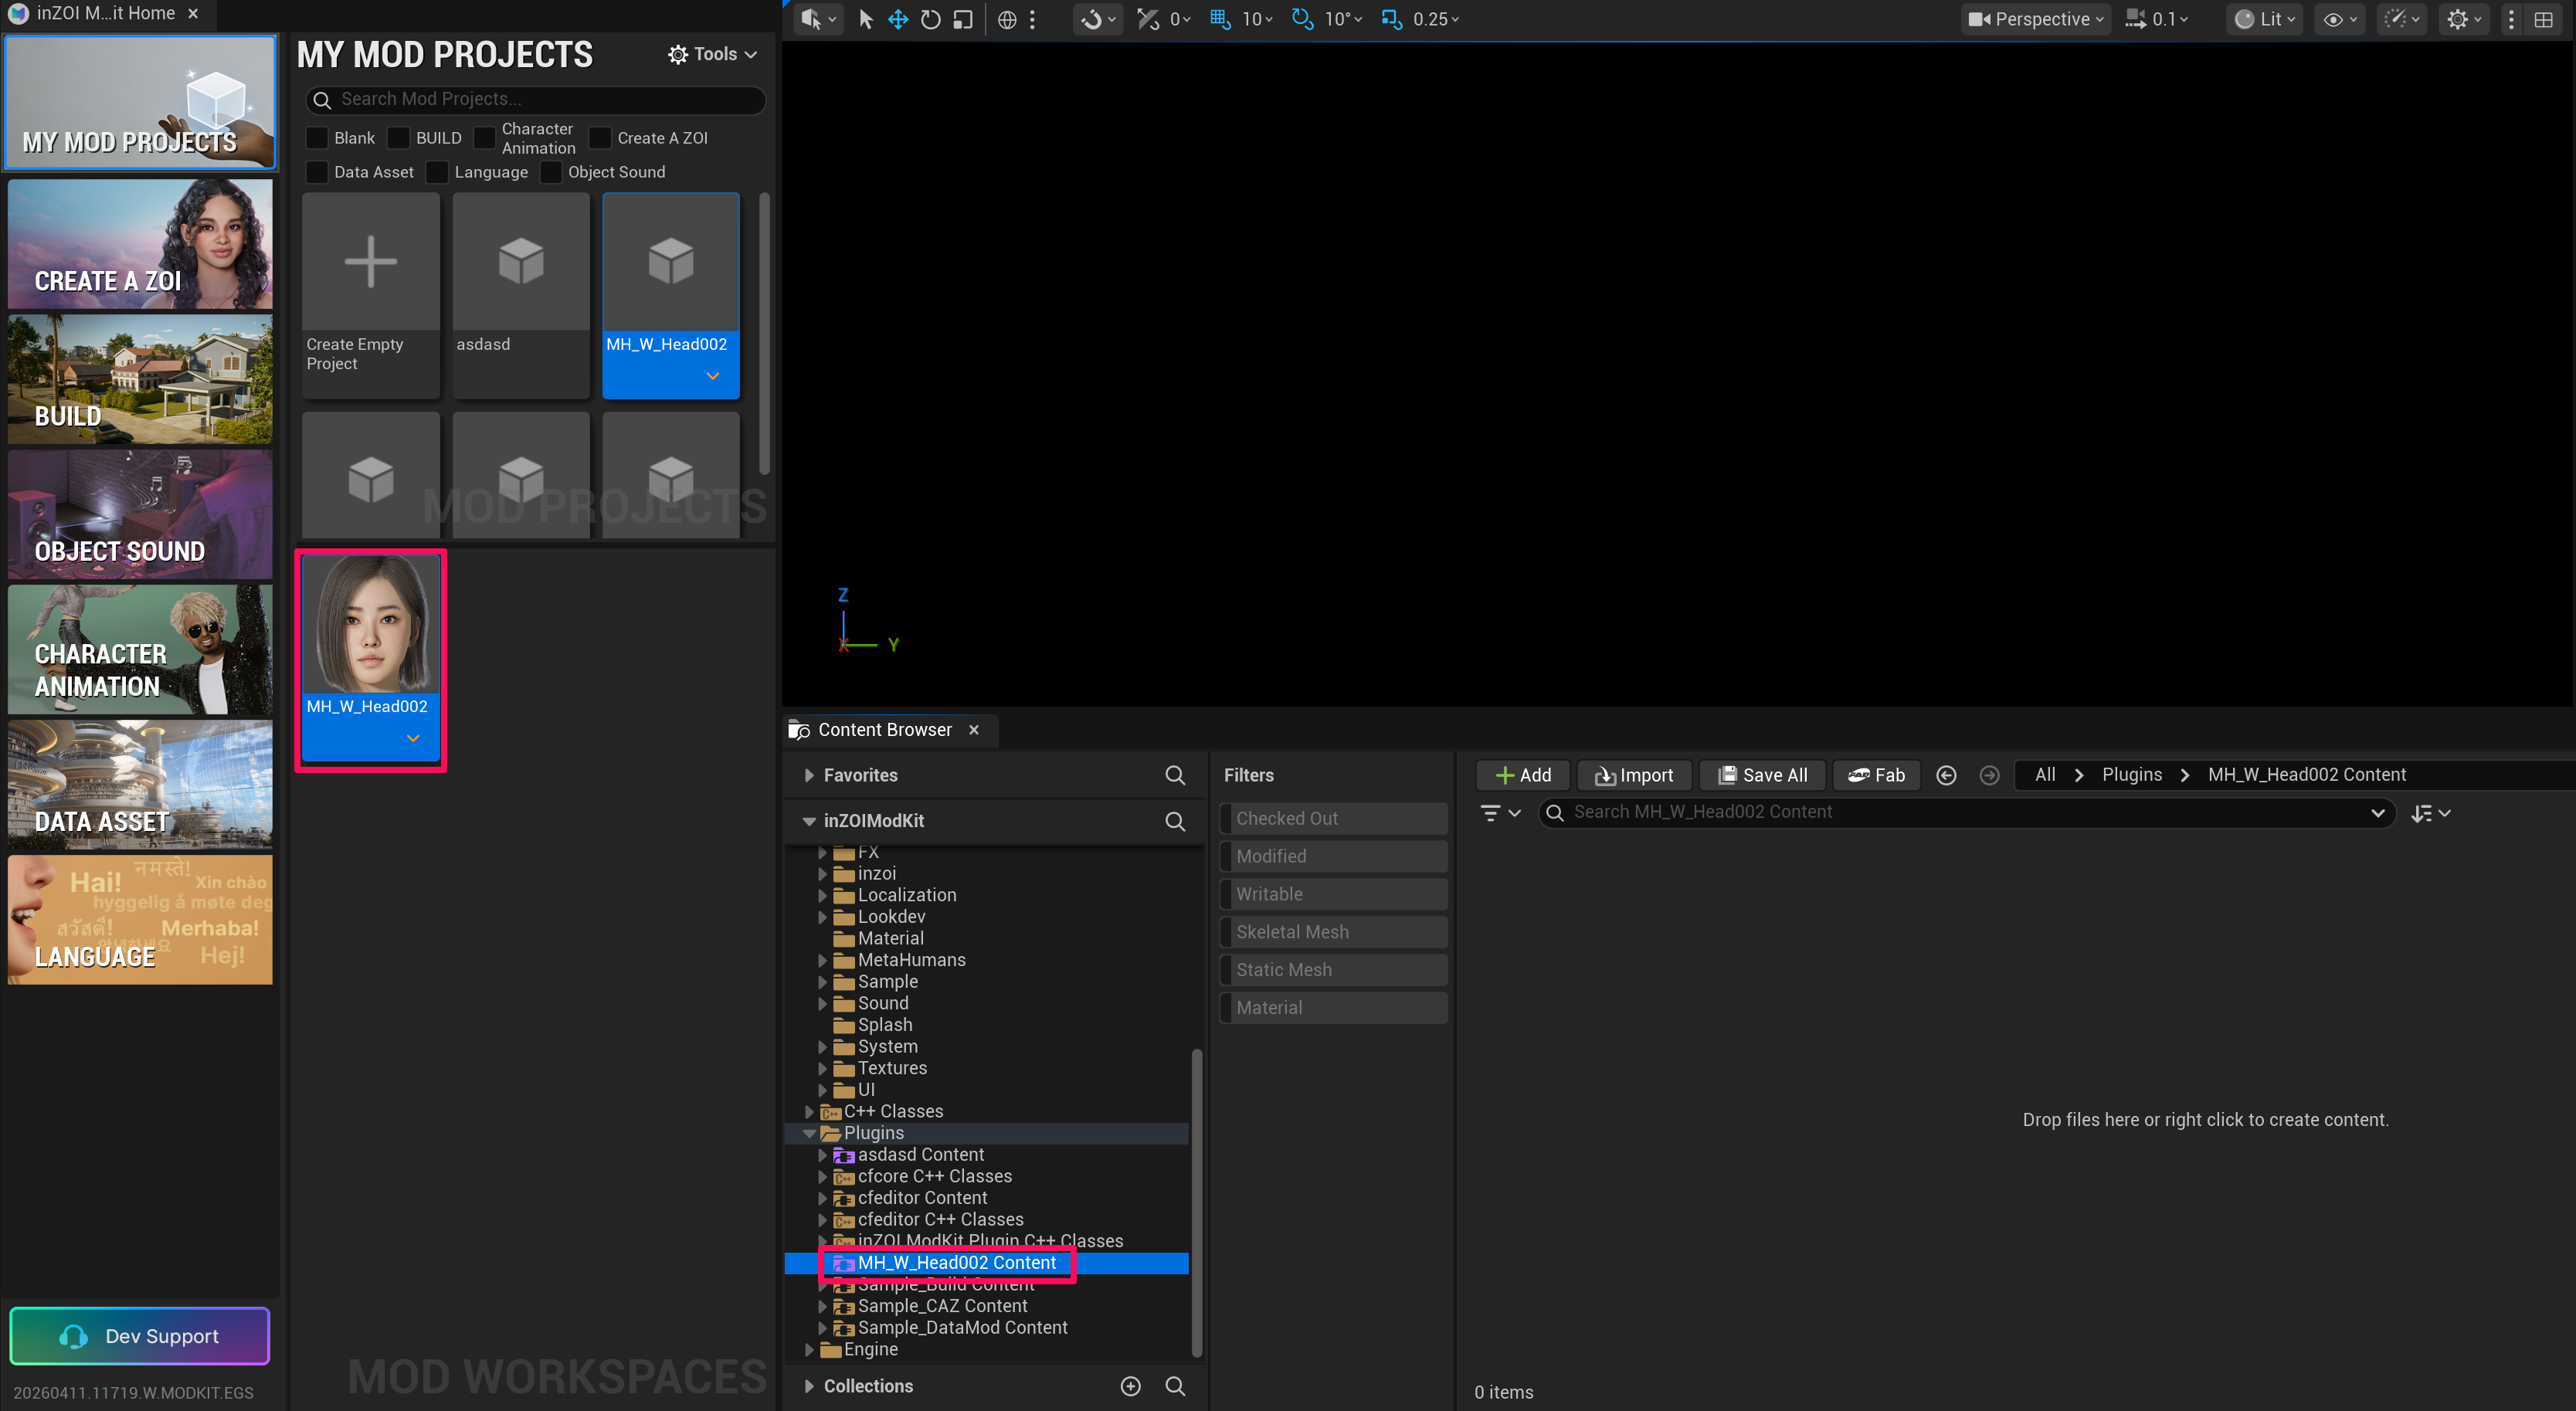
14. Open the ModKit Project
Open the face modding project from MY MOD PROJECTS.
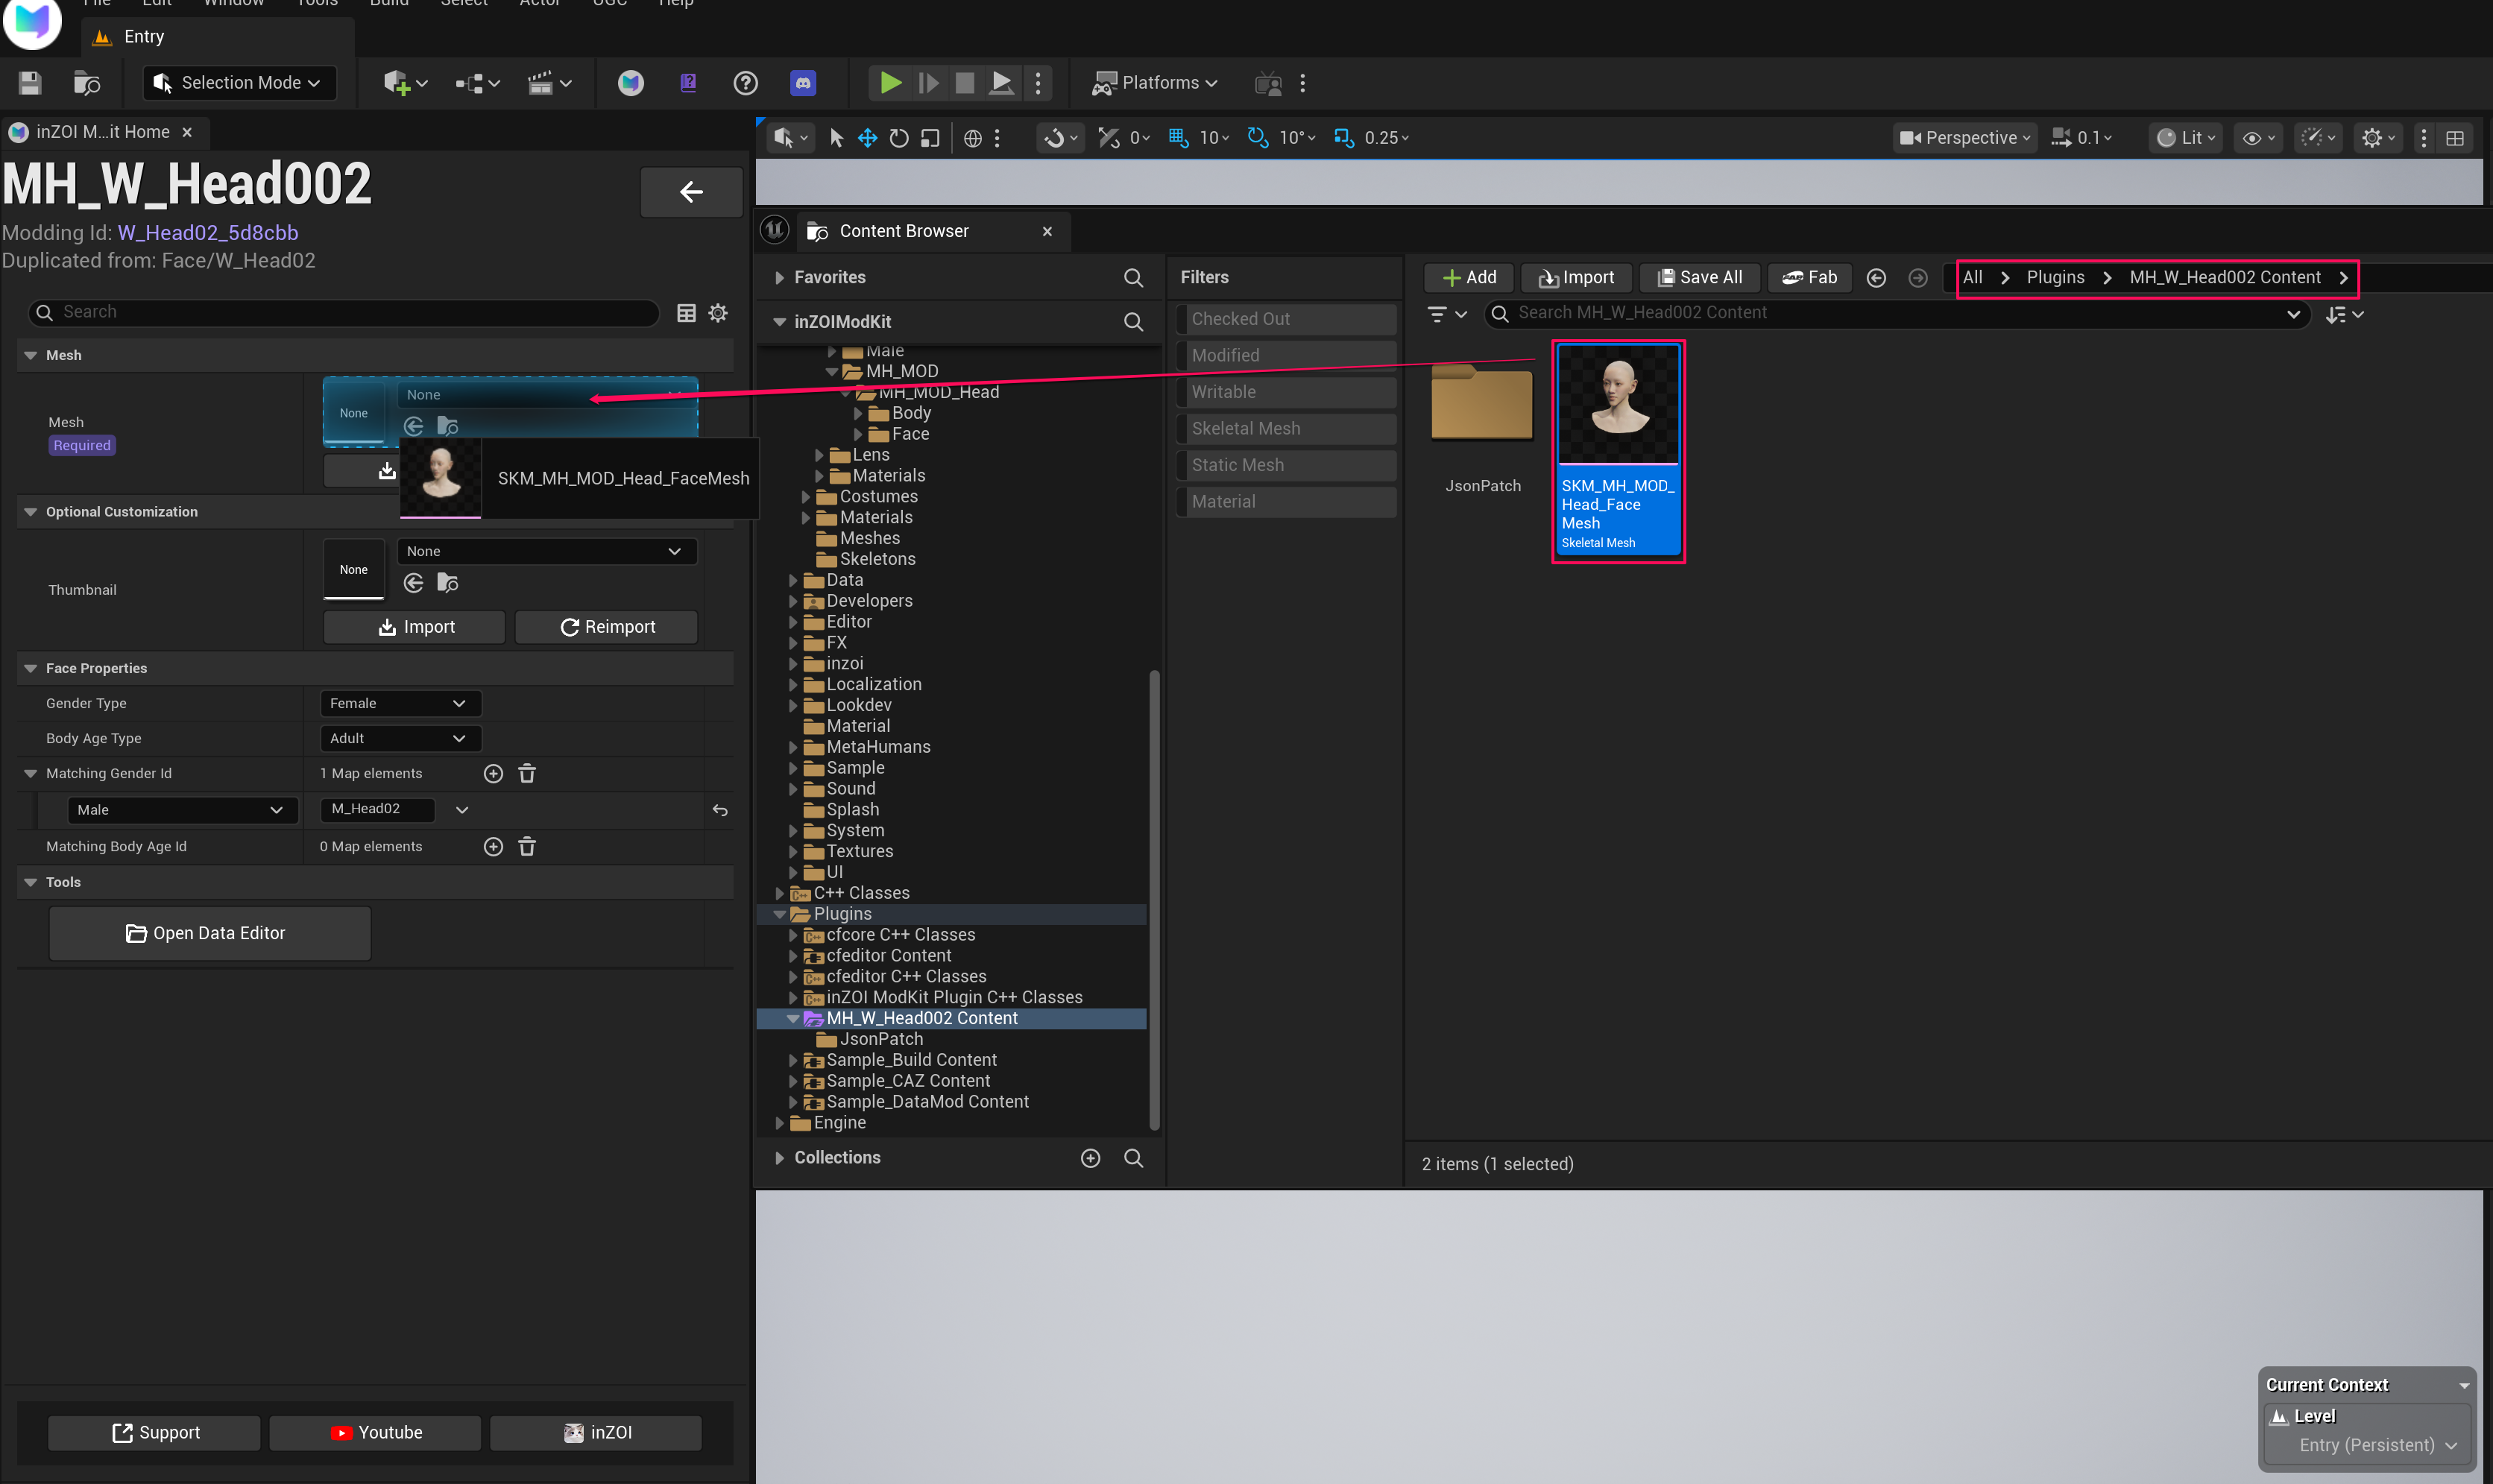
15. Register the Mesh
Register the completed face skeletal mesh in the Mesh field of the face modding project.
Joint Matching Popup
A joint matching popup will appear when the mesh is assigned. Select Yes.
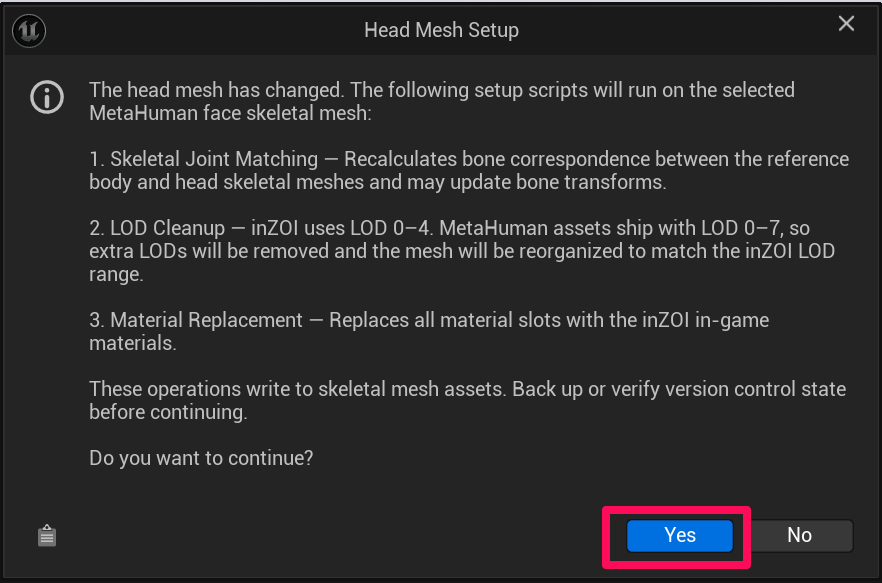
Important: Head Mesh Setup
The head mesh has changed. The following setup scripts will run on the selected MetaHuman face skeletal mesh:
- Skeletal Joint Matching — Recalculates bone correspondence between the reference body and head skeletal meshes and may update bone transforms.
- LOD Cleanup — inZOI uses LOD 0–4. MetaHuman assets ship with LOD 0–7, so extra LODs will be removed and the mesh will be reorganized to match the inZOI LOD range.
- Material Replacement — Replaces all material slots with the inZOI in-game materials.
These operations write to skeletal mesh assets. Back up or verify version control state before continuing.
Do you want to continue?
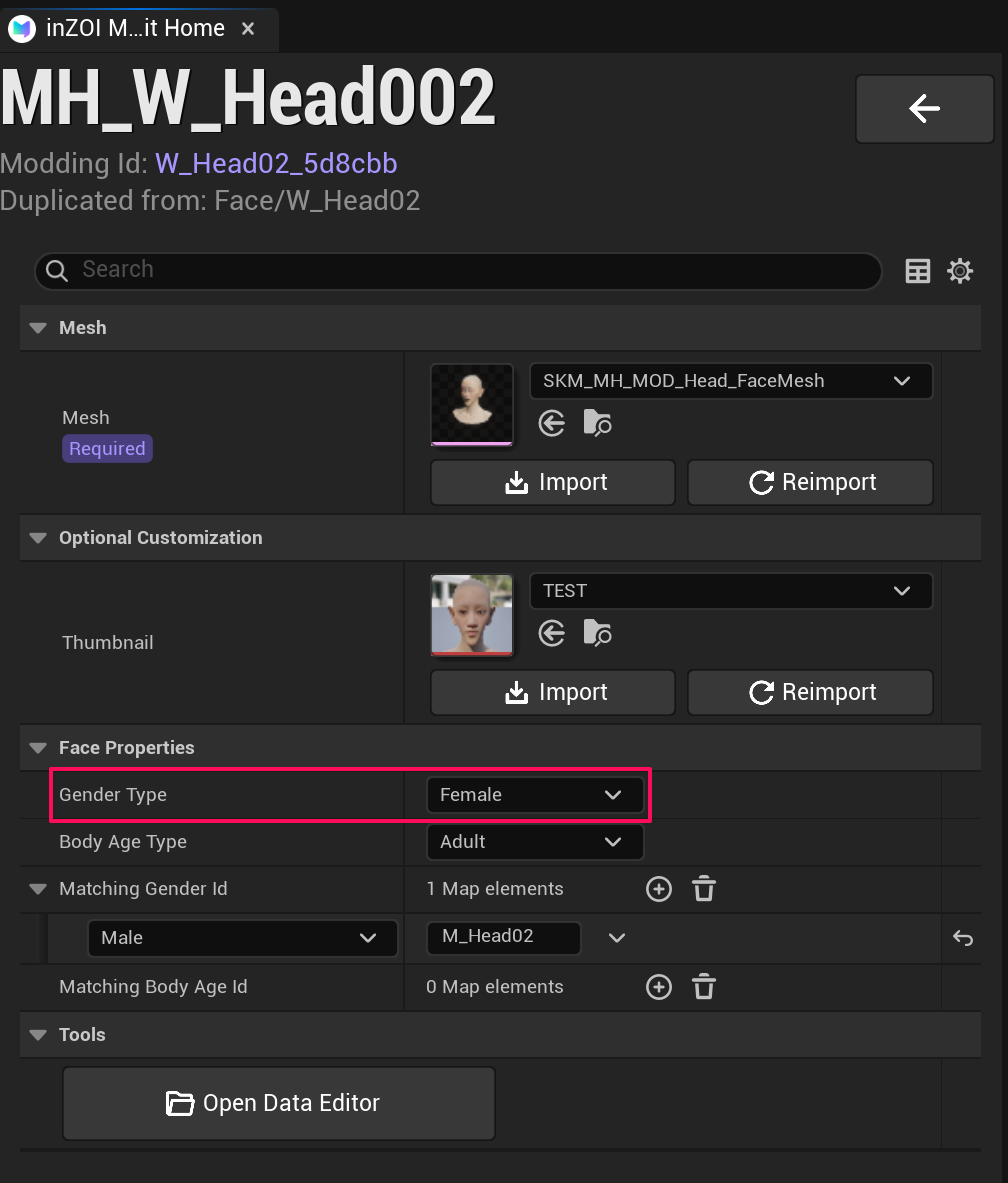
16. Final Settings
After registering the mesh, configure the following:
- Set the Thumbnail
- Select the gender in Face Properties → Gender Type