Overview
This document describes the complete workflow for modding inZOI character faces using MetaHuman Editor in Unreal Engine 5, and registering the finished assets in the ModKit.
MetaHuman Editor Limitations
Options set in the Materials and Hair & Clothing tabs of MetaHuman Editor are not reflected in the inZOI ModKit.
-
Skin-related settings → Proceed separately via the Skin Modding workflow
Project > CAZ > Skin > Overview -
Hair-related settings → Proceed separately via the Hair Modding workflow
Project > CAZ > Hair > Overview
1. Create a Project Folder
Create a new folder at your desired path in the Content Browser.
Info
Any folder inside Content will work. Remember this path, as you will use the same one during the Assemble step later.
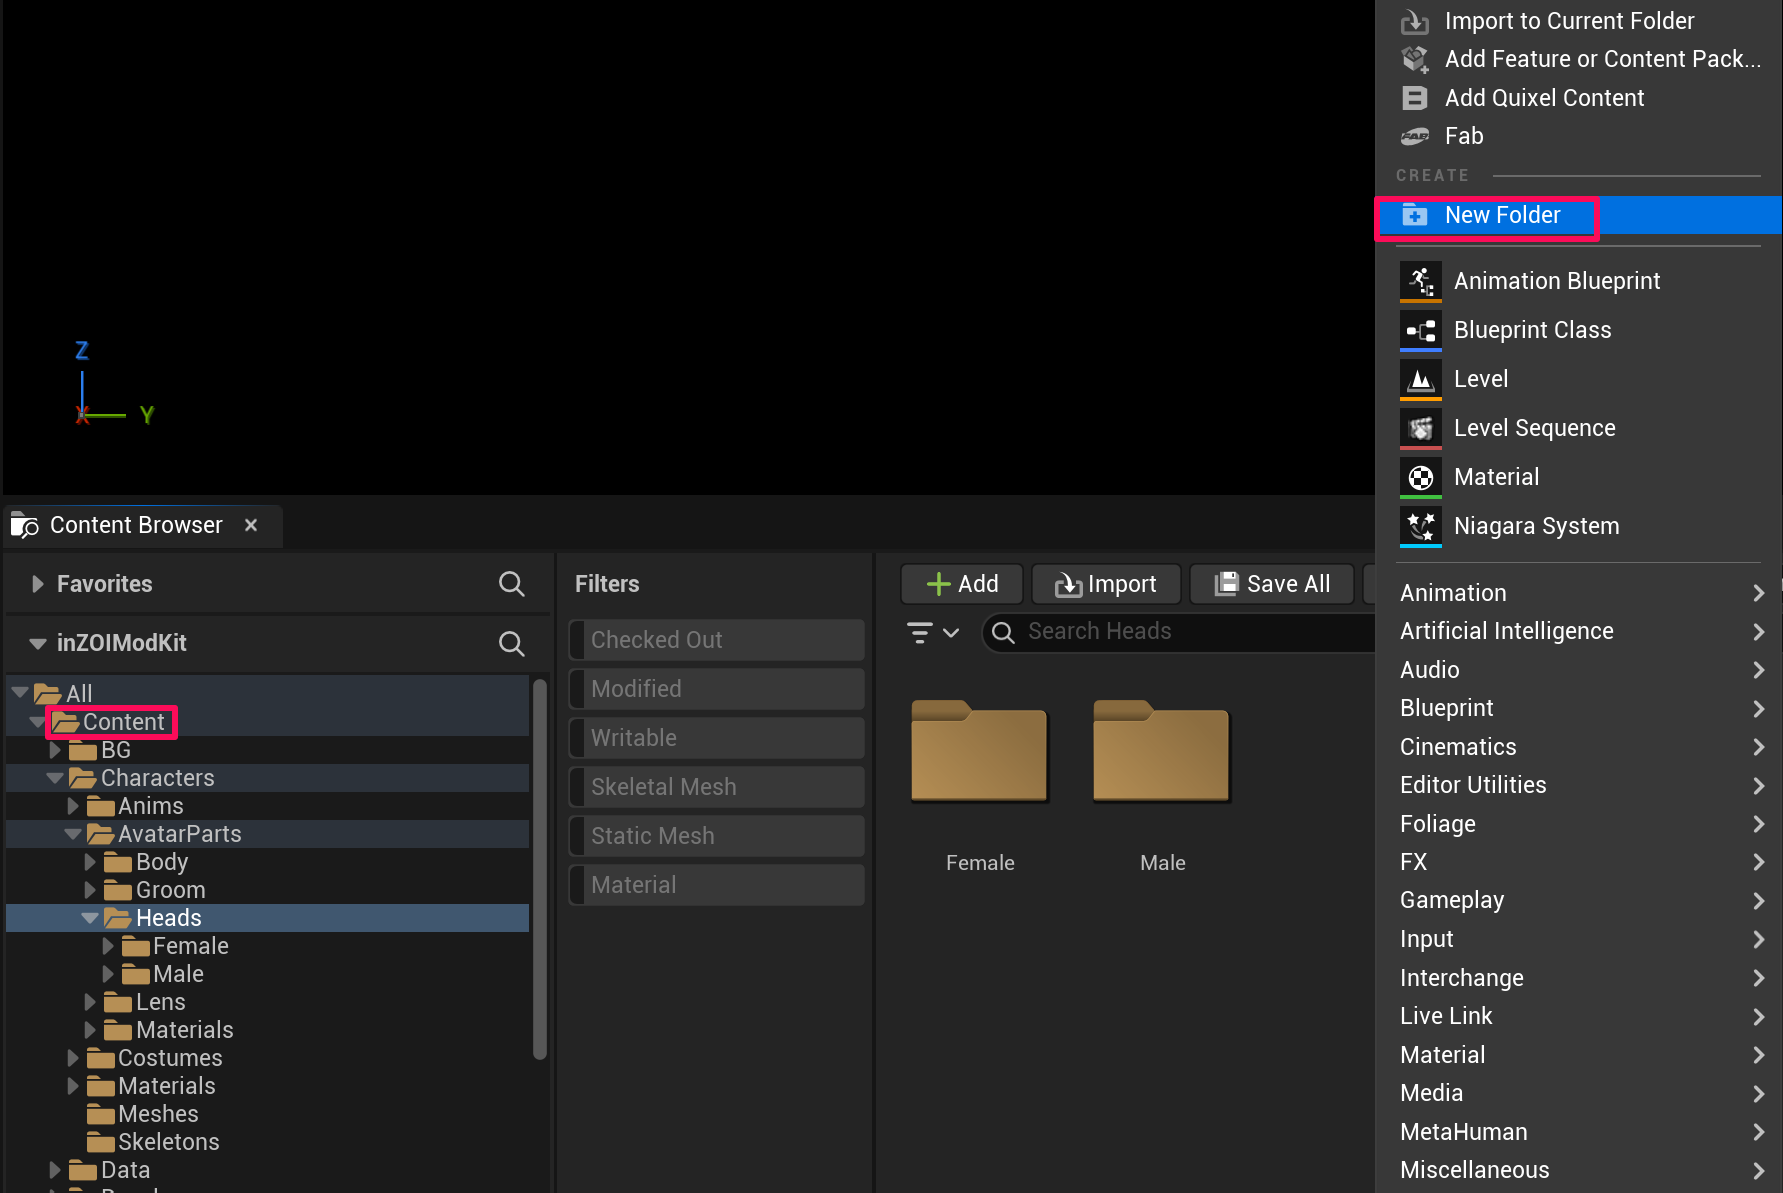
2. Create a MetaHuman Character
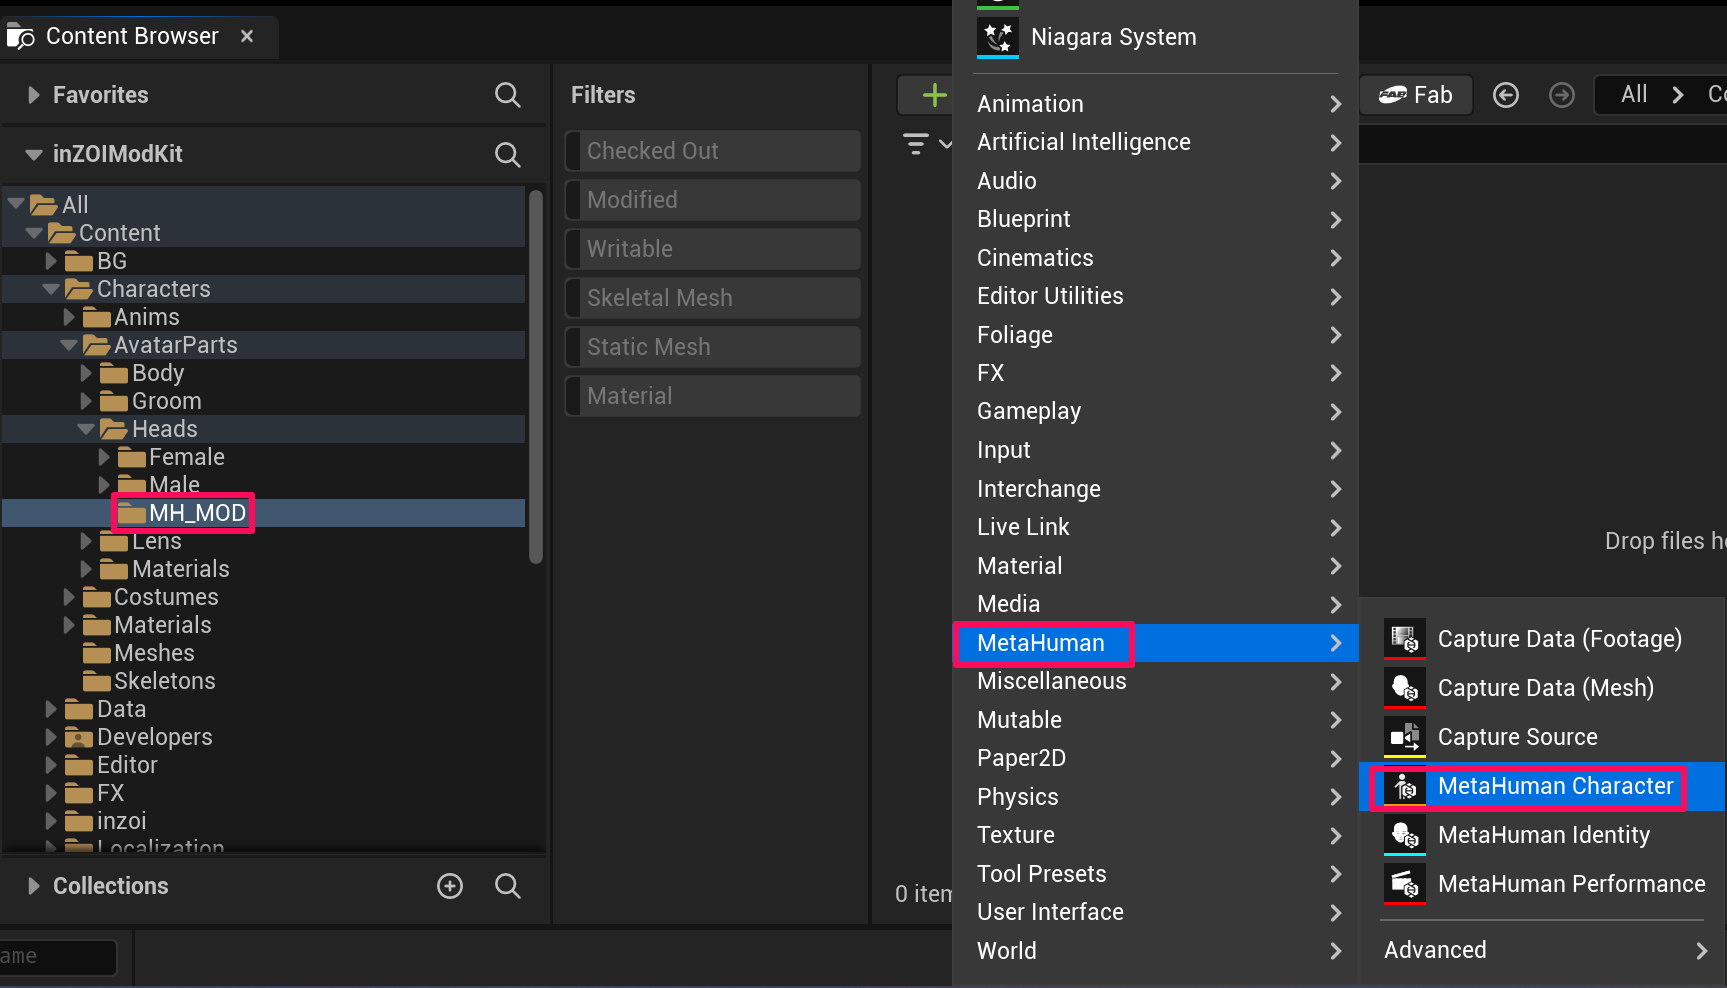
Right-click in the folder you created and select MetaHuman → MetaHuman Character to create and name your character.
3. Body Conform Setup
Important: You must set up the Body first
The Body must be conformed before the Head for everything to work correctly. Reversing the order may cause issues.
Open the MetaHuman character you created and follow the steps below.
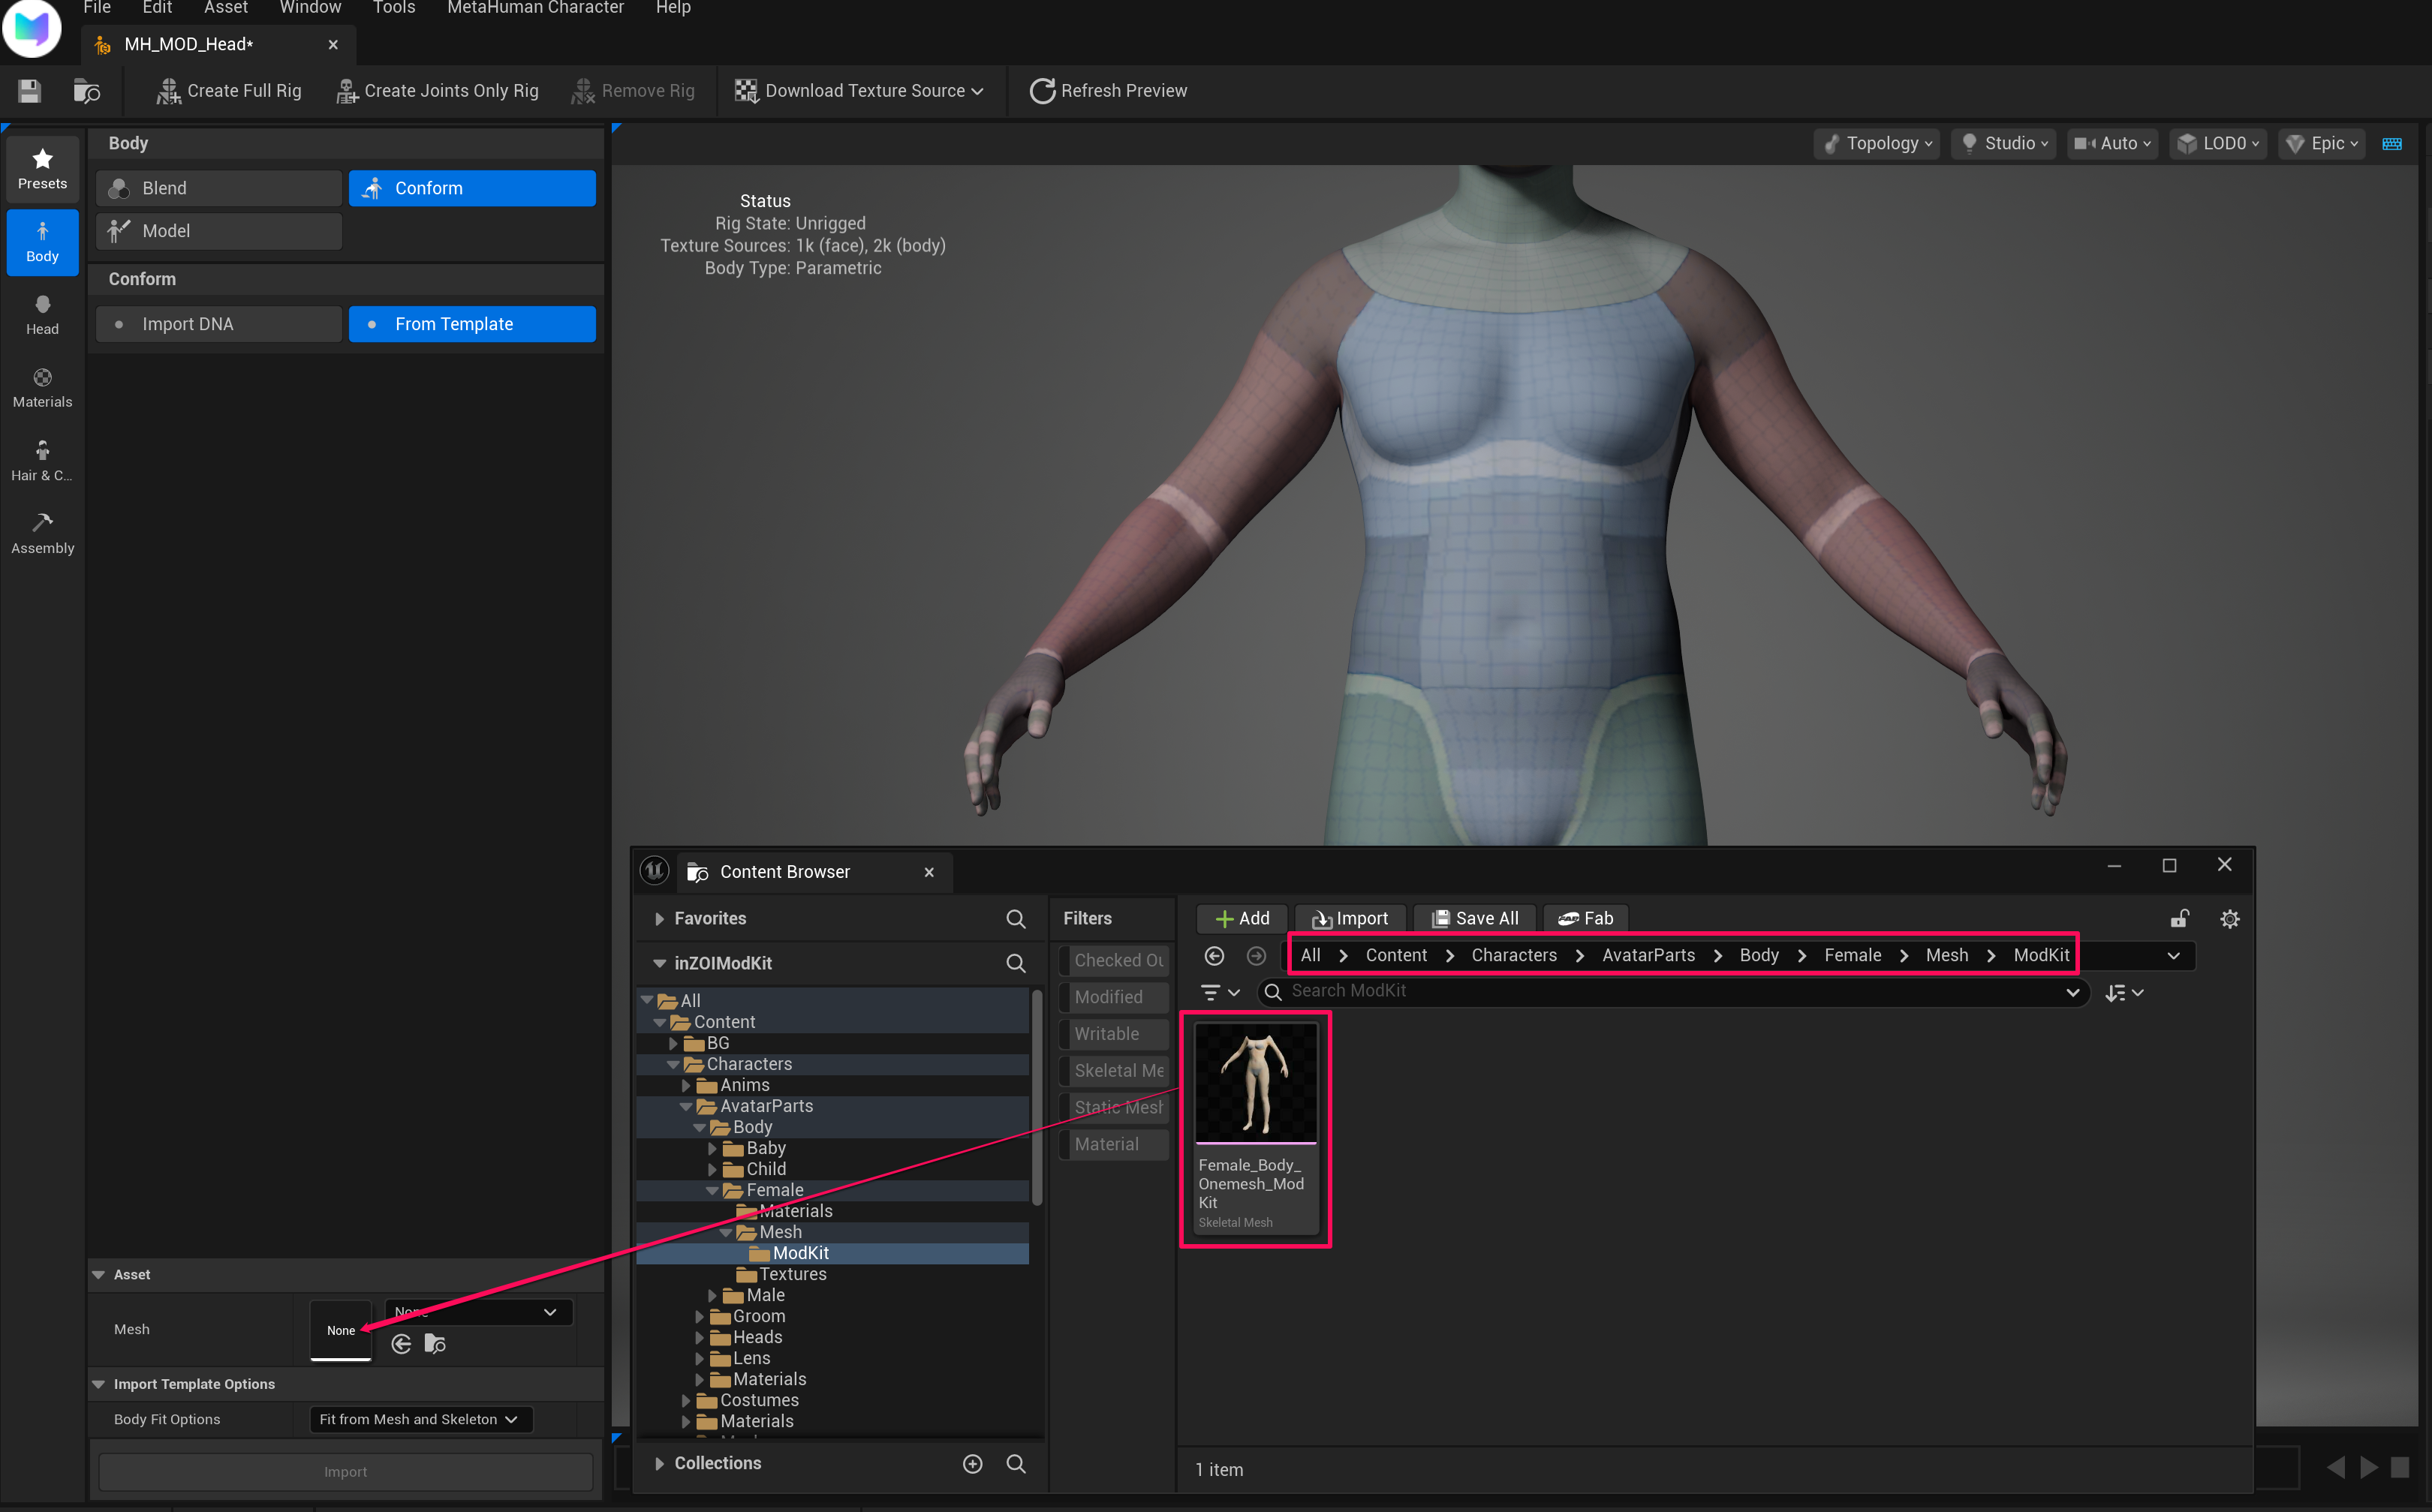
- Select Body → Conform → From Template
- In Asset → Mesh, assign the body mesh for the desired gender
Male
Characters/AvatarParts/Body/Male/Mesh/ModKit
Female
Characters/AvatarParts/Body/Female/Mesh/ModKit
4. Body Import
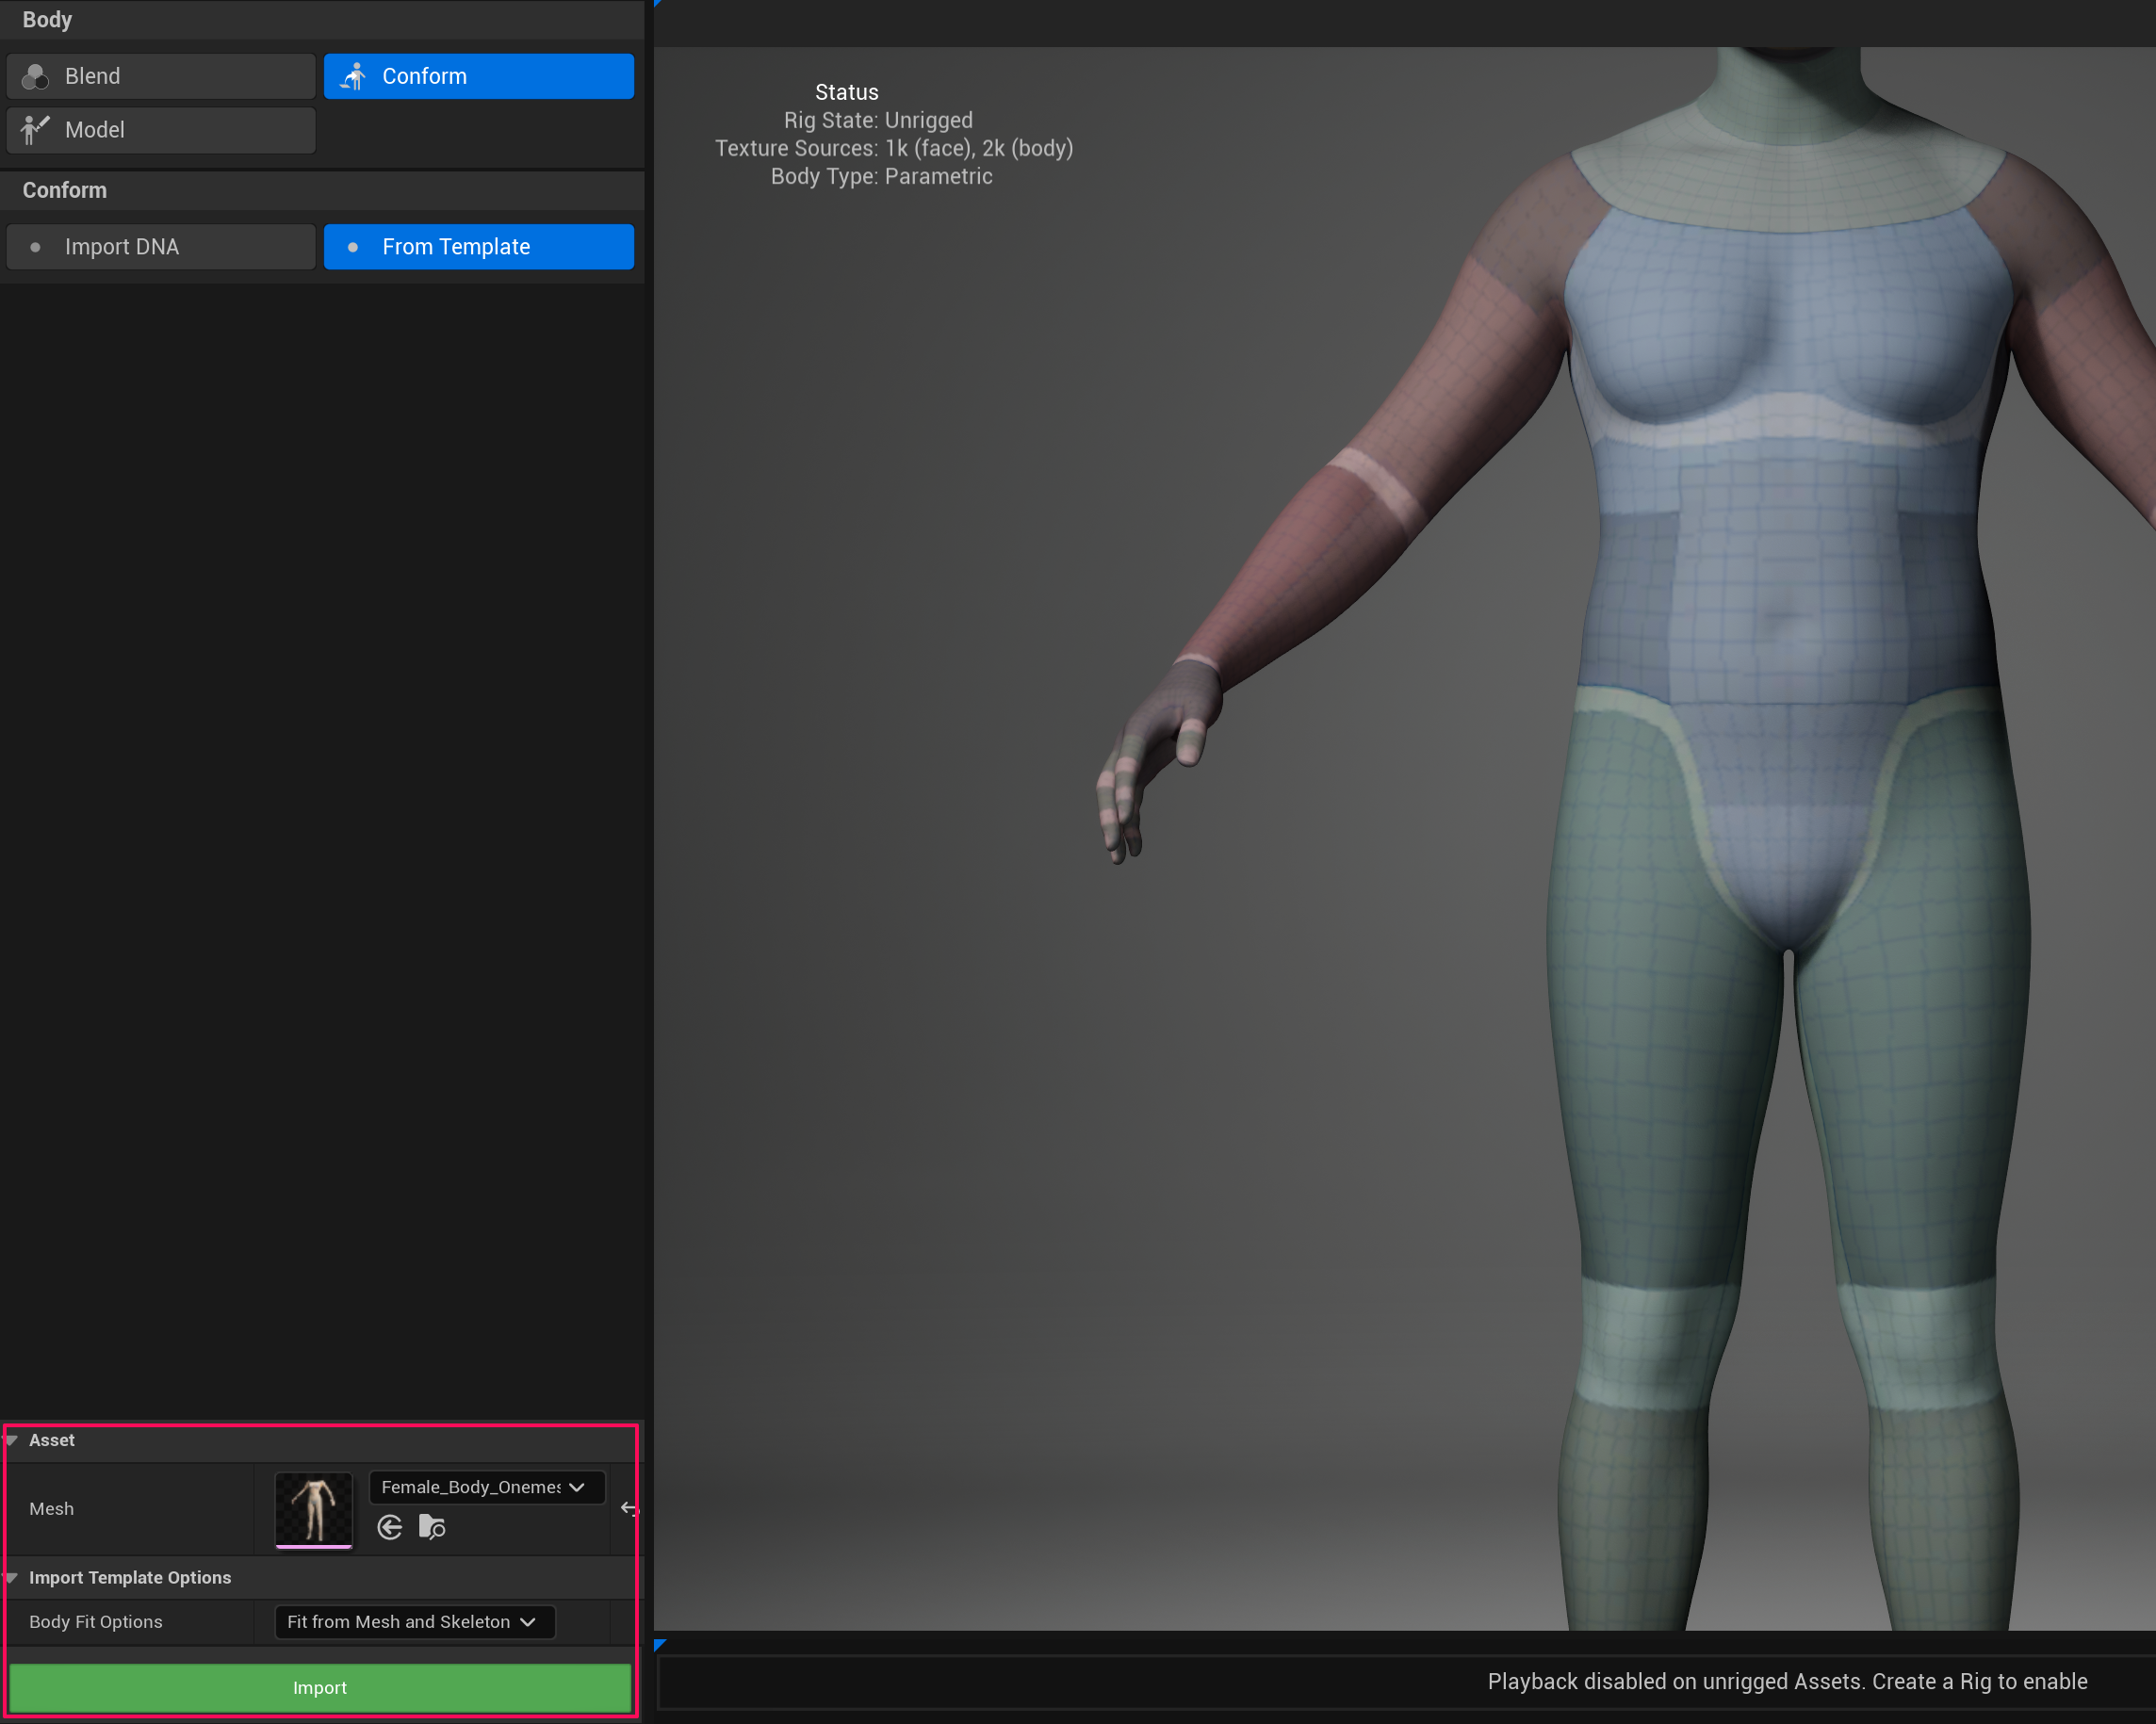
After assigning the body mesh, click the Import button.
Note
Leave Body Fit Options at the default value: Fit from Mesh and Skeleton.
5. Head Conform Setup
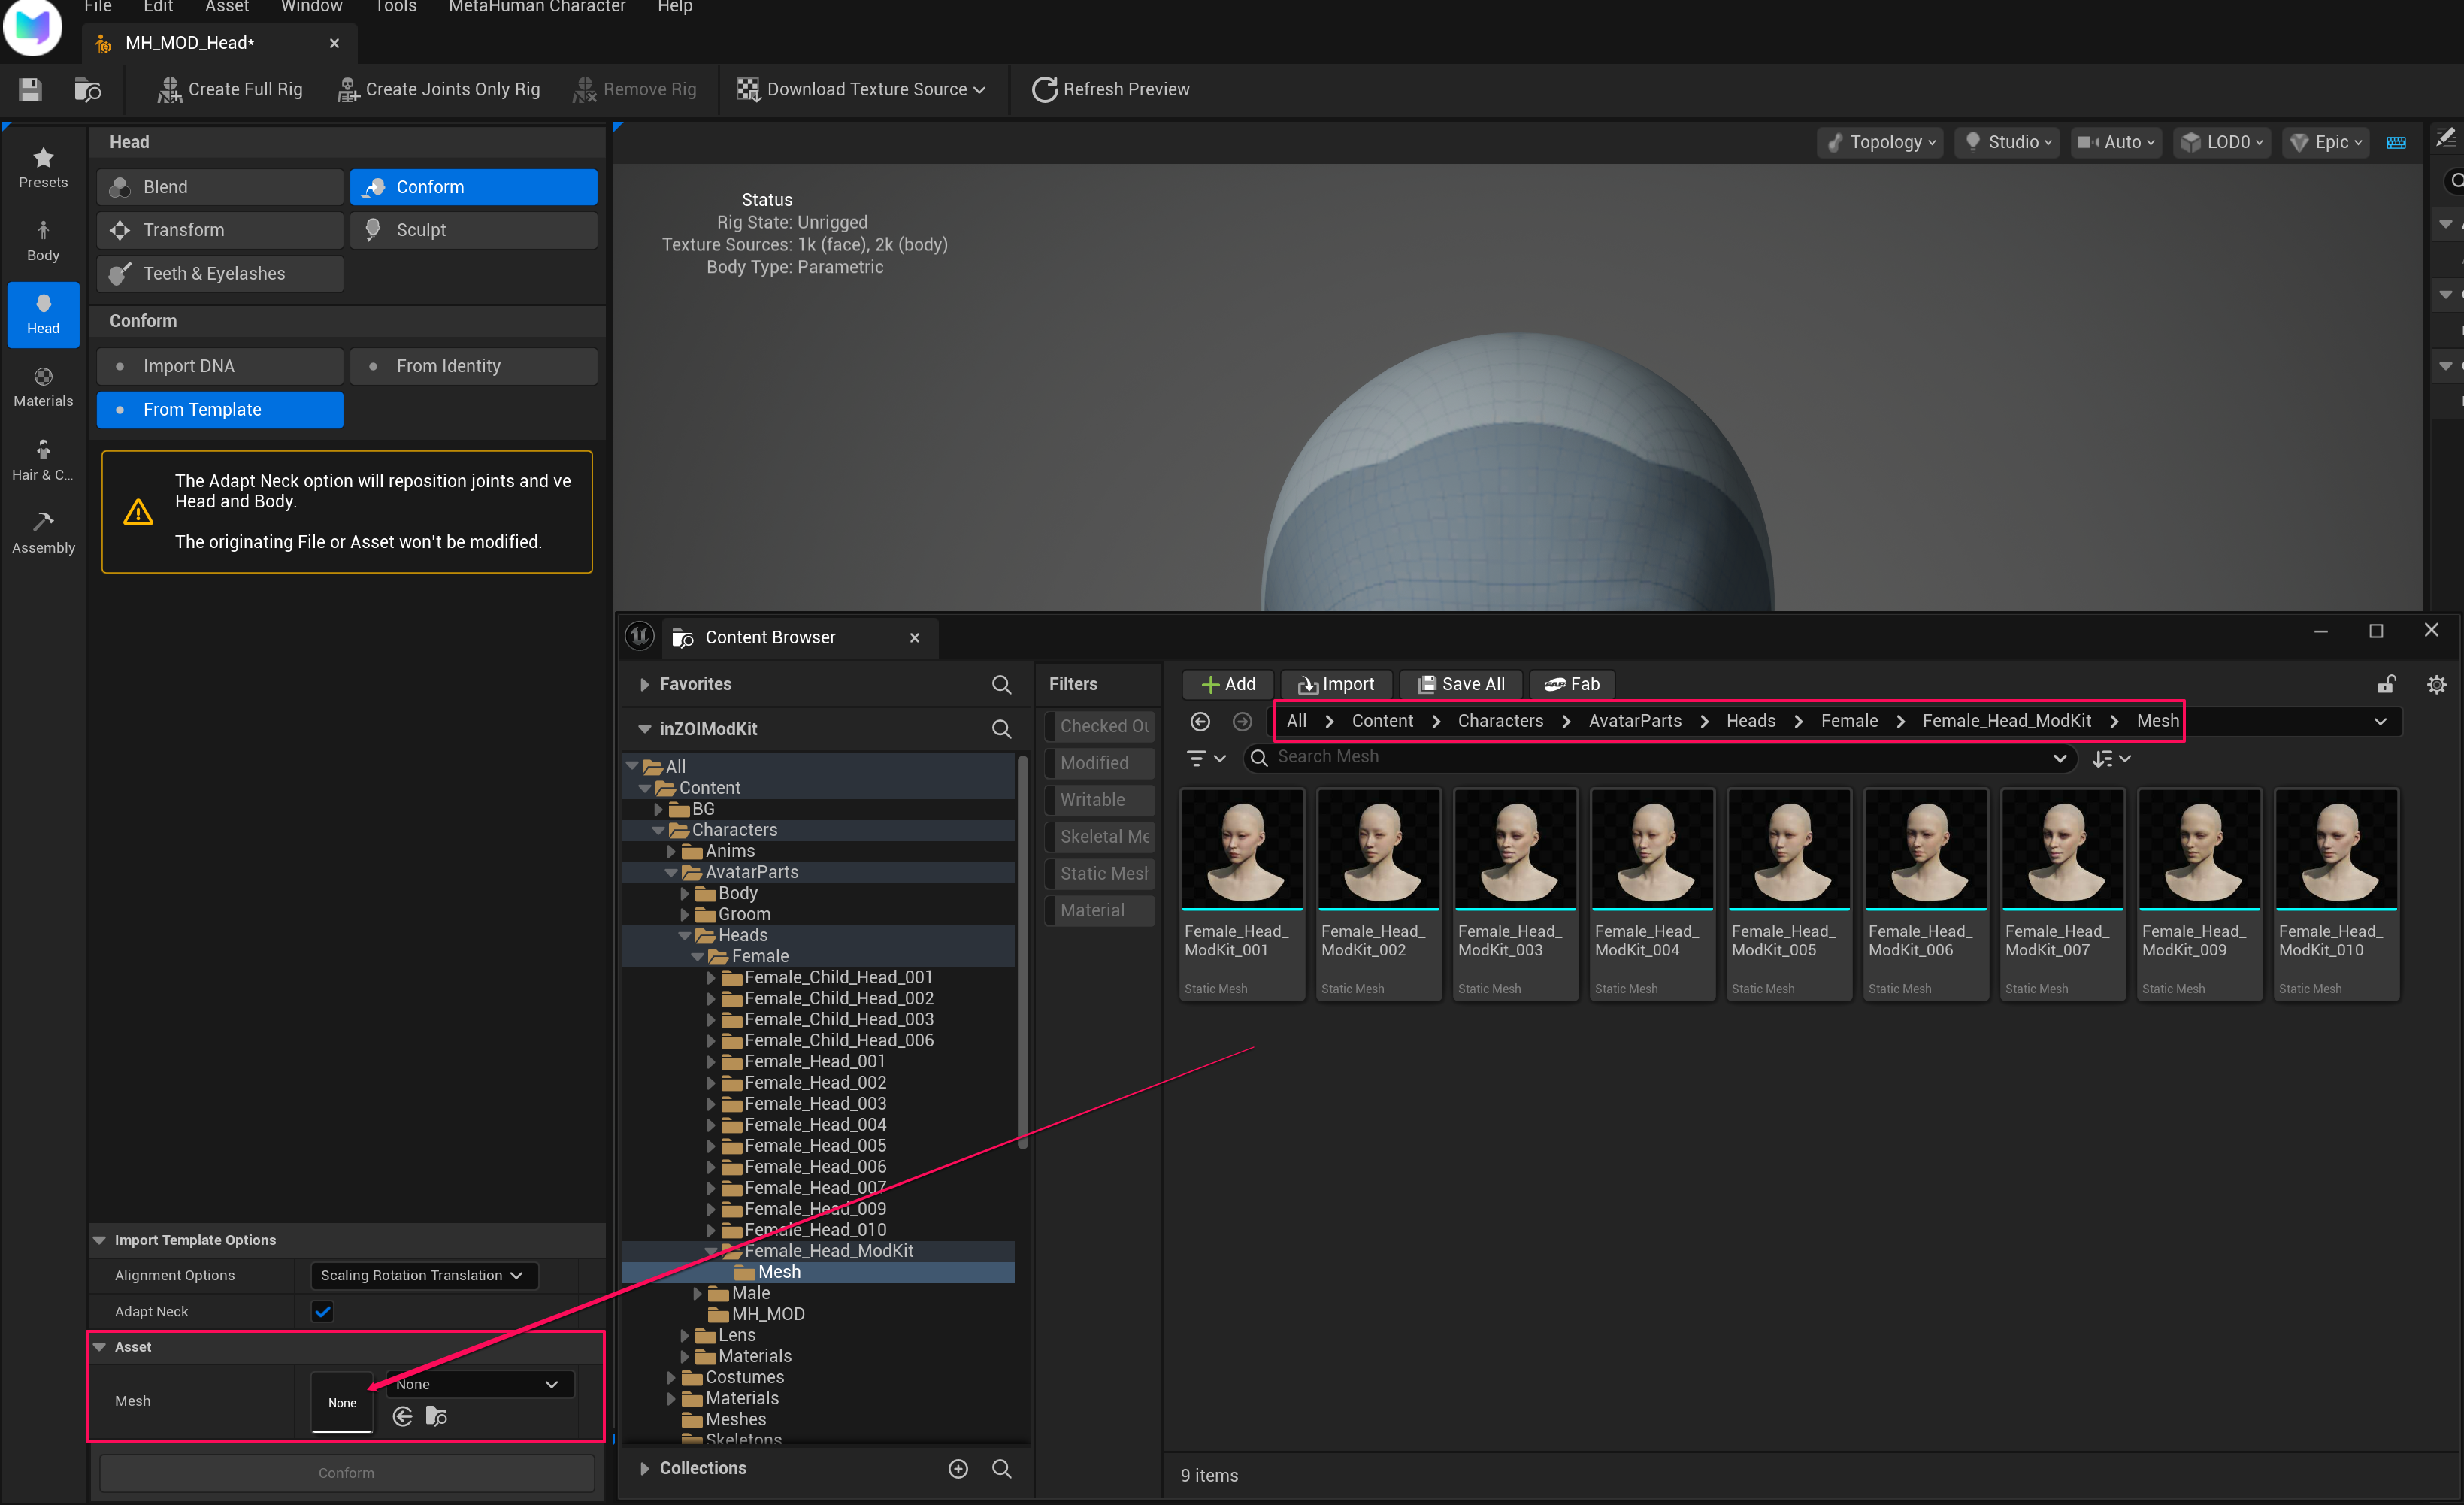
- Select Head → Conform → From Template
- In Asset → Mesh, assign the face mesh for the desired gender
Choose from one of the 9 inZOI face types.
Male
/All/Game/Characters/AvatarParts/Heads/Male/Male_Head_ModKit/Mesh
Female
/All/Game/Characters/AvatarParts/Heads/Female/Female_Head_ModKit/Mesh
6. Head Import Option Settings
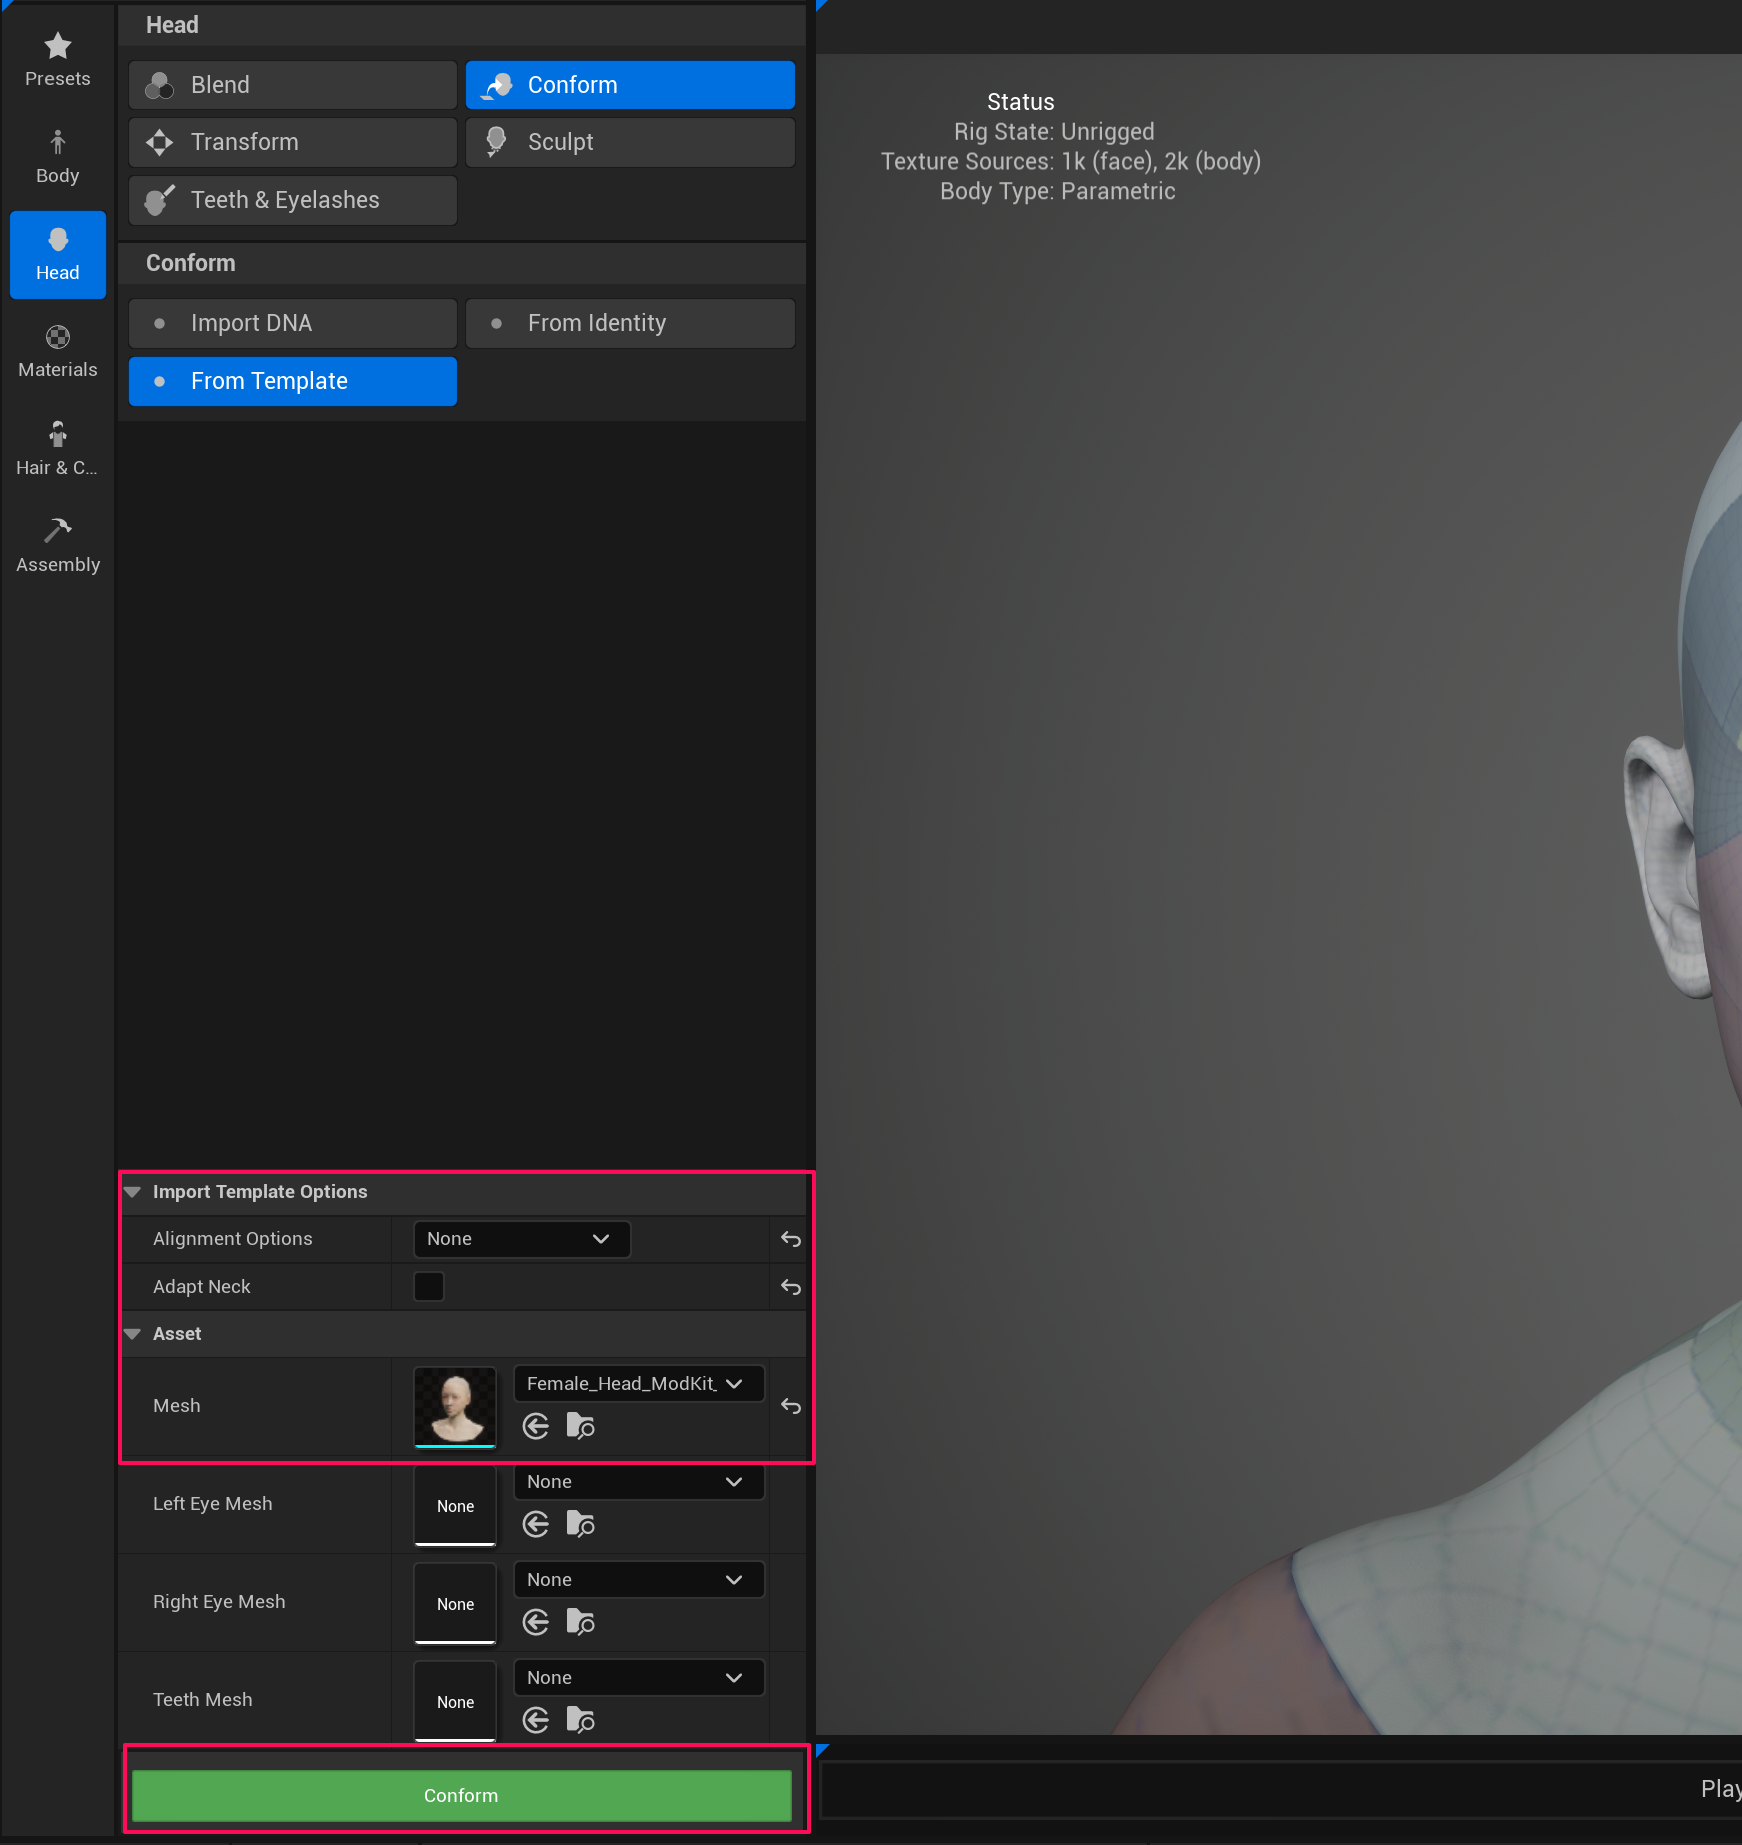
After assigning the face mesh, configure the following options under Import Template Options, then click Conform.
| Option | Value |
|---|---|
| Alignment Options | None |
| Adapt Neck | :material-checkbox-blank-outline: Unchecked |
7. Edit the Face (Sculpt / Transform)
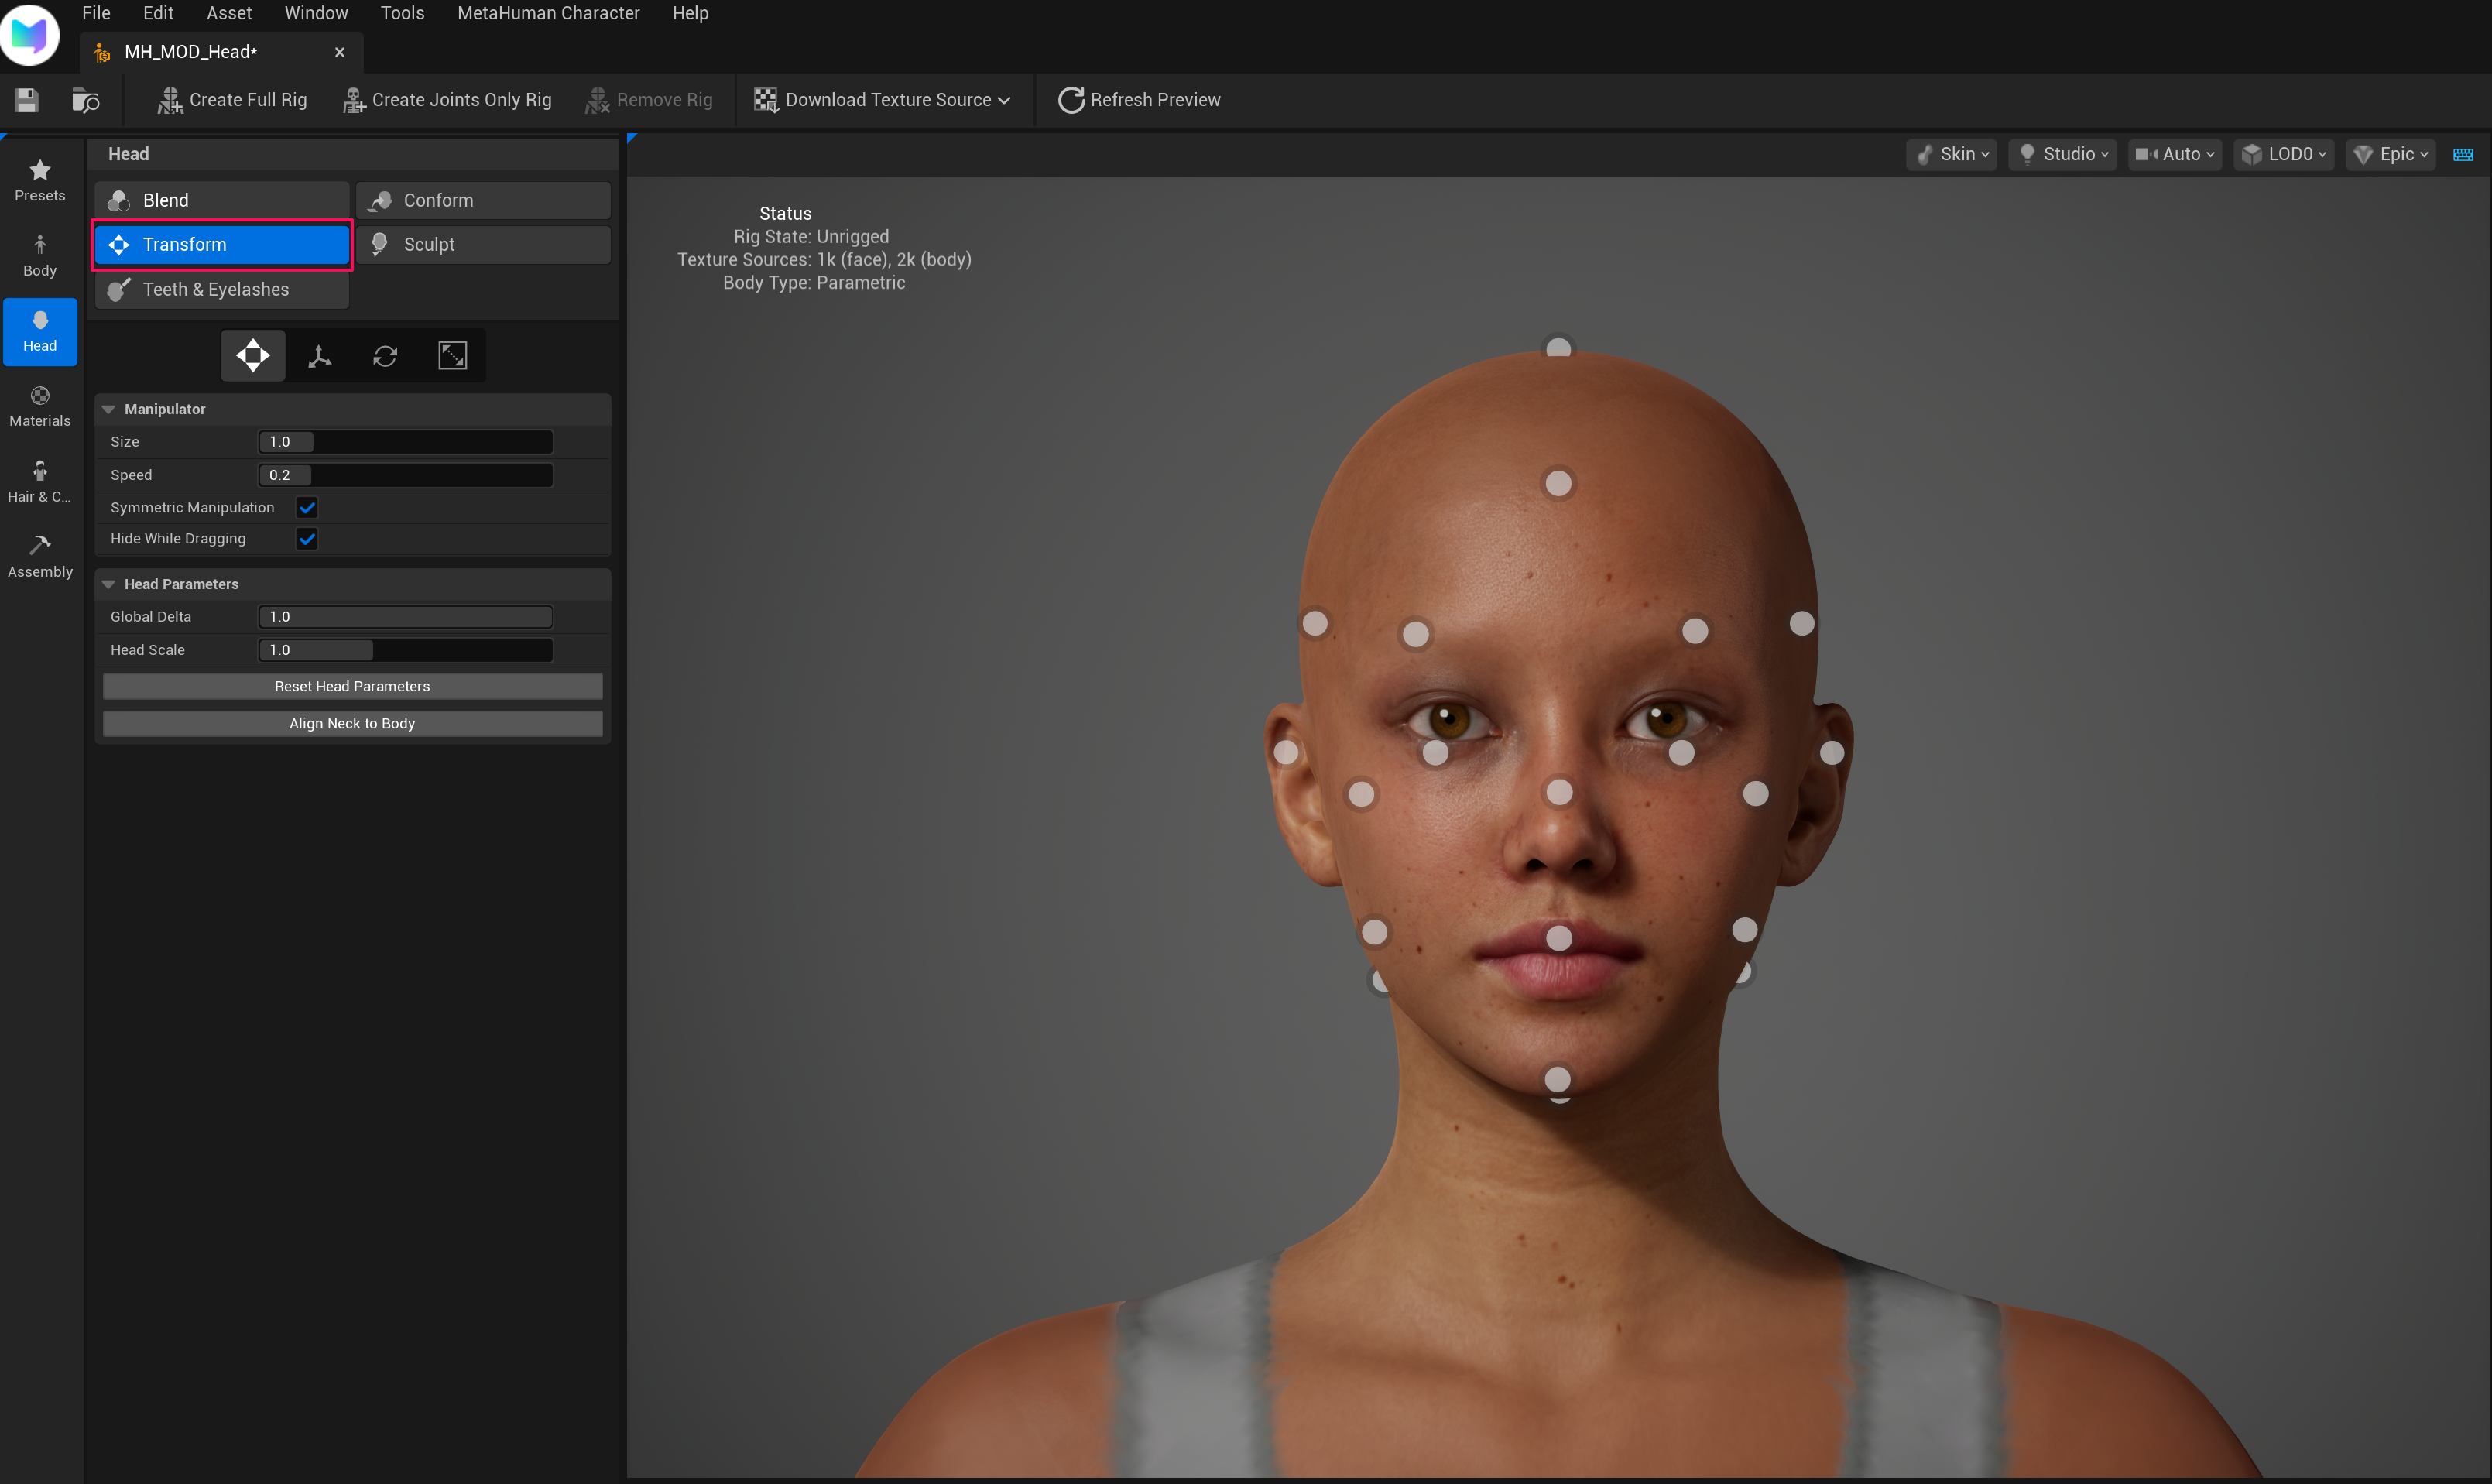
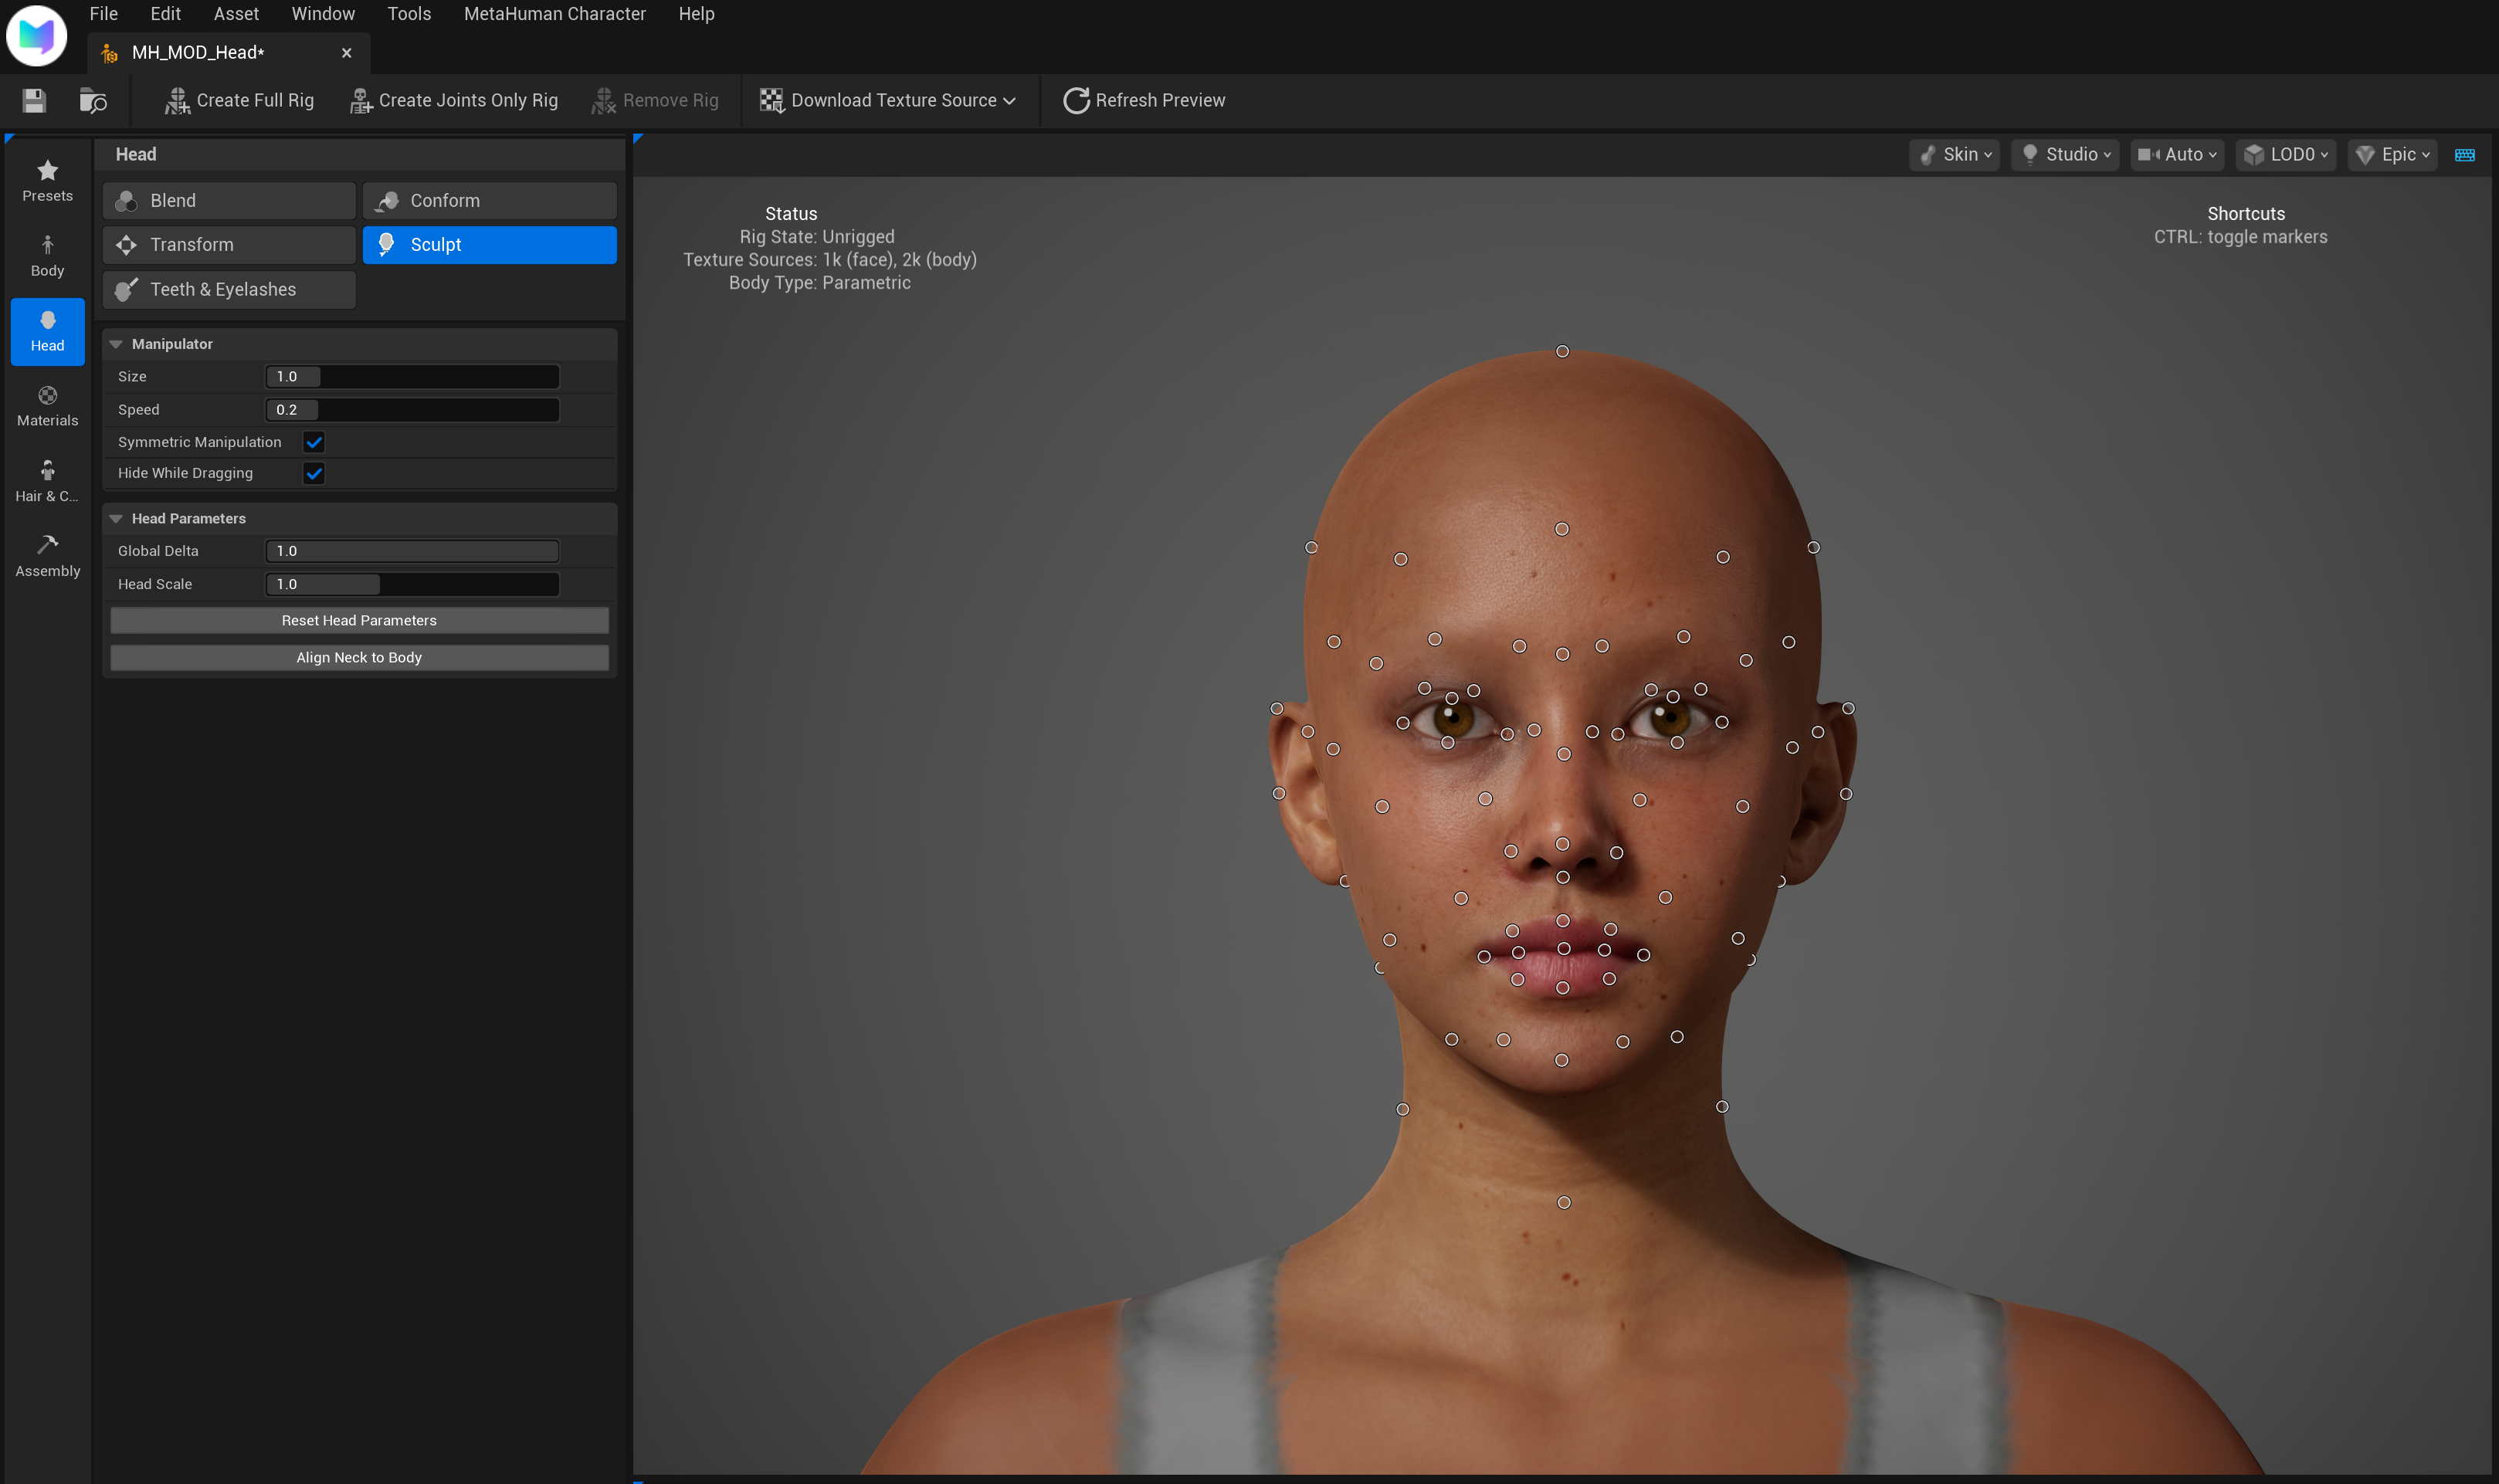
Once the setup is complete, use Head → Transform / Sculpt to mod the face.
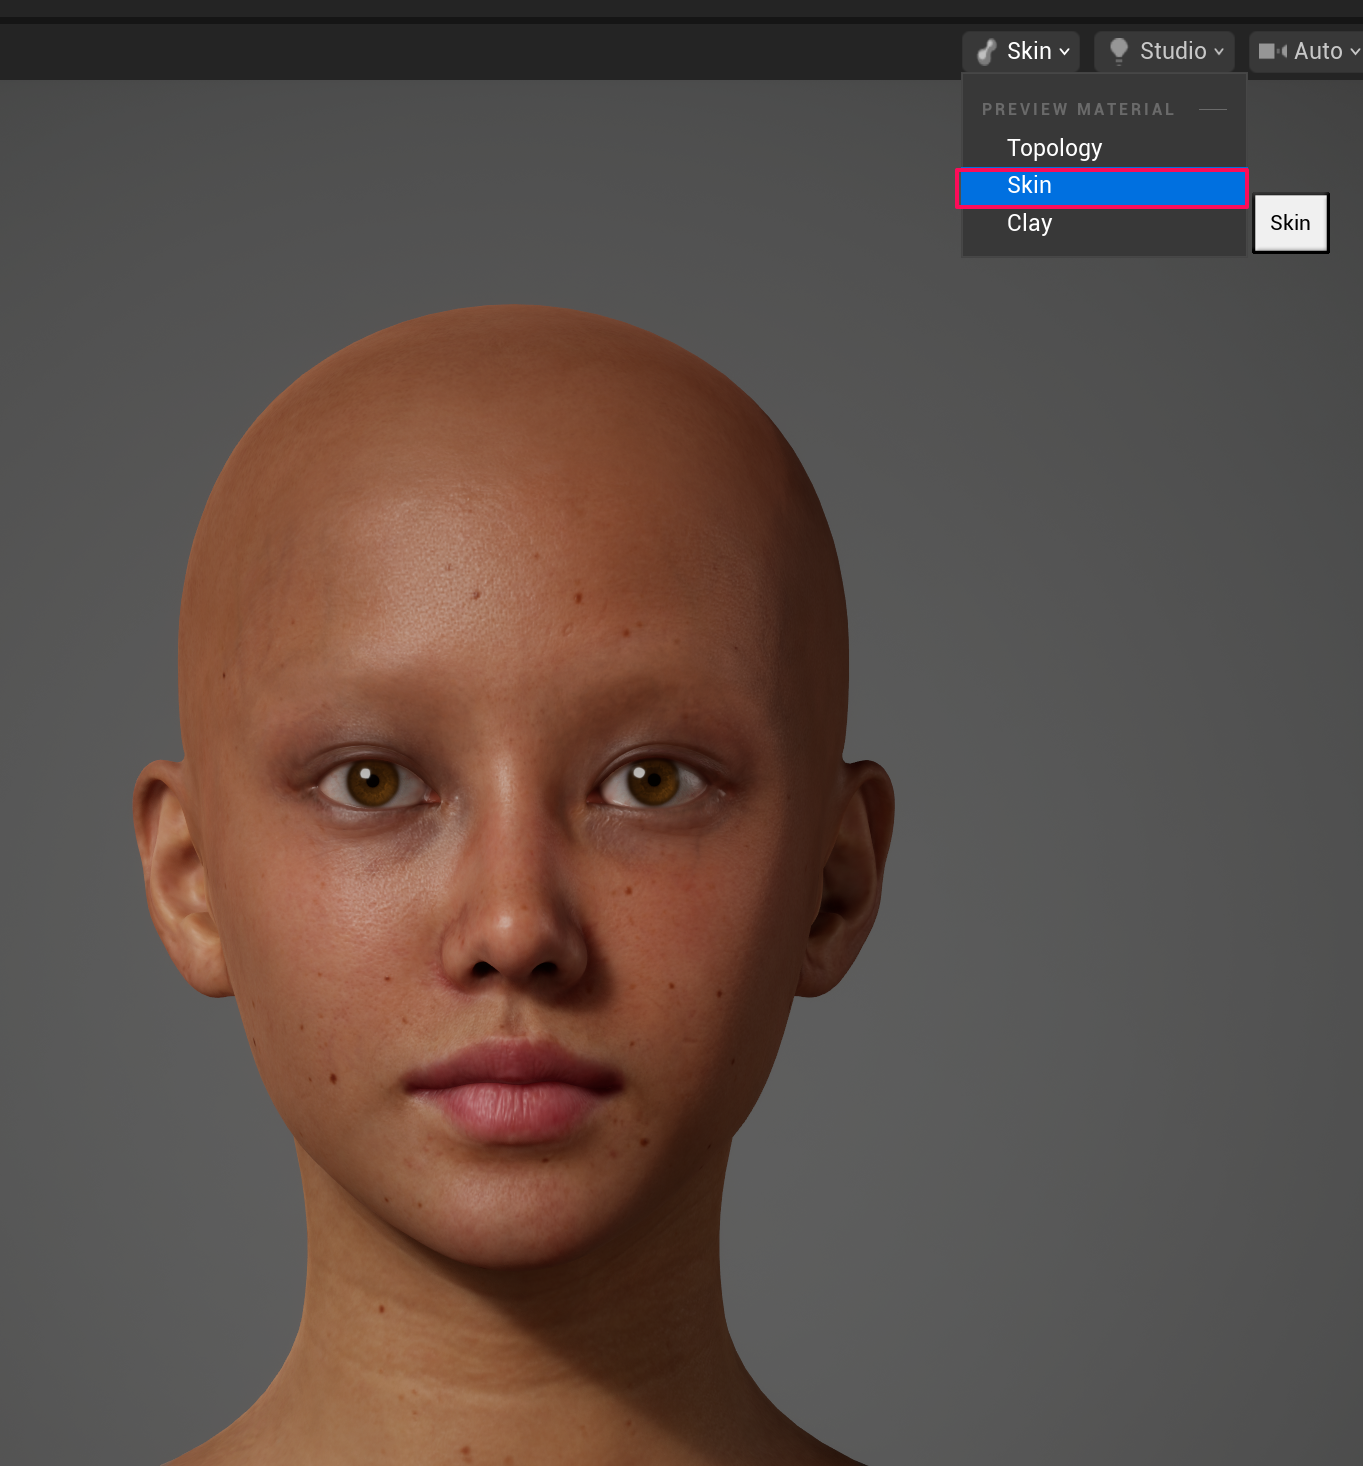
Editing in Skin Mode
Change the Topology option at the top to Skin to edit in skin mode.
8. Body Modding
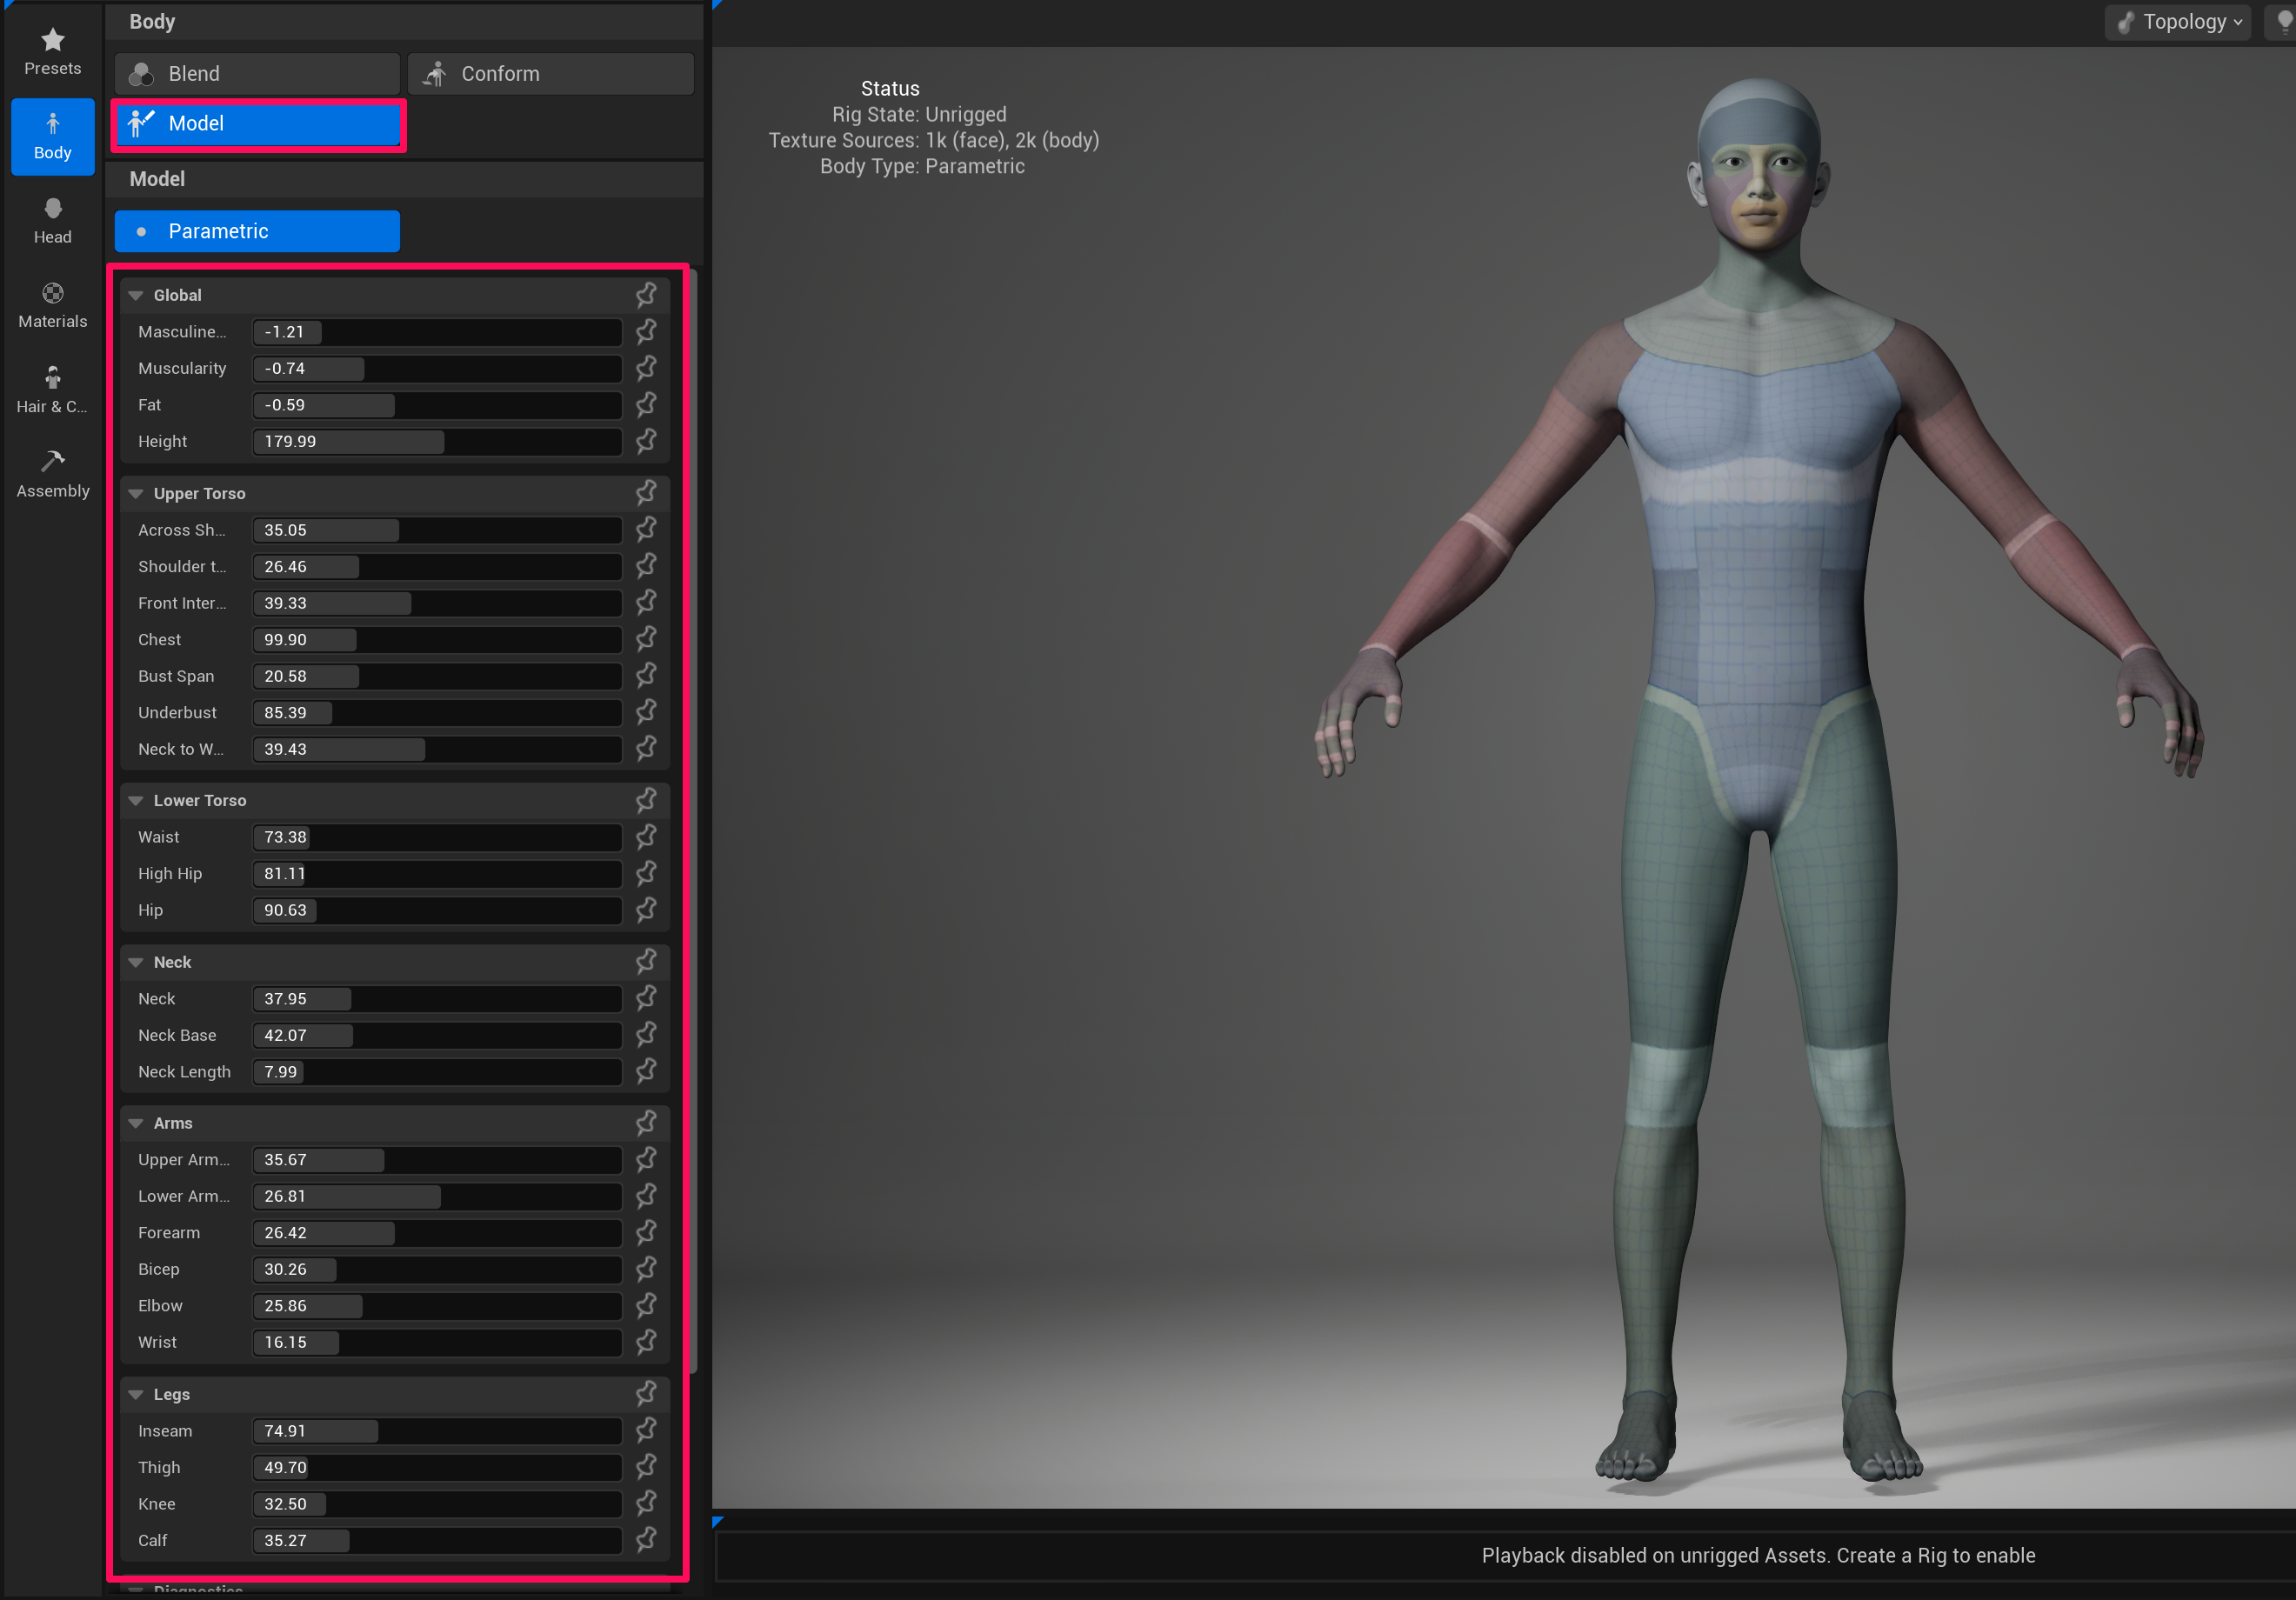
Once face editing is complete, switch to the Body tab to begin body modding.
Go to Body → Model → Parametric and adjust the values.
9. Download Texture Source
When editing is complete, click Download Texture Source at the top and select Download 2k Resolution Textures.

10. Create Joints Only Rig
Once the textures have finished downloading, click Create Joints Only Rig.

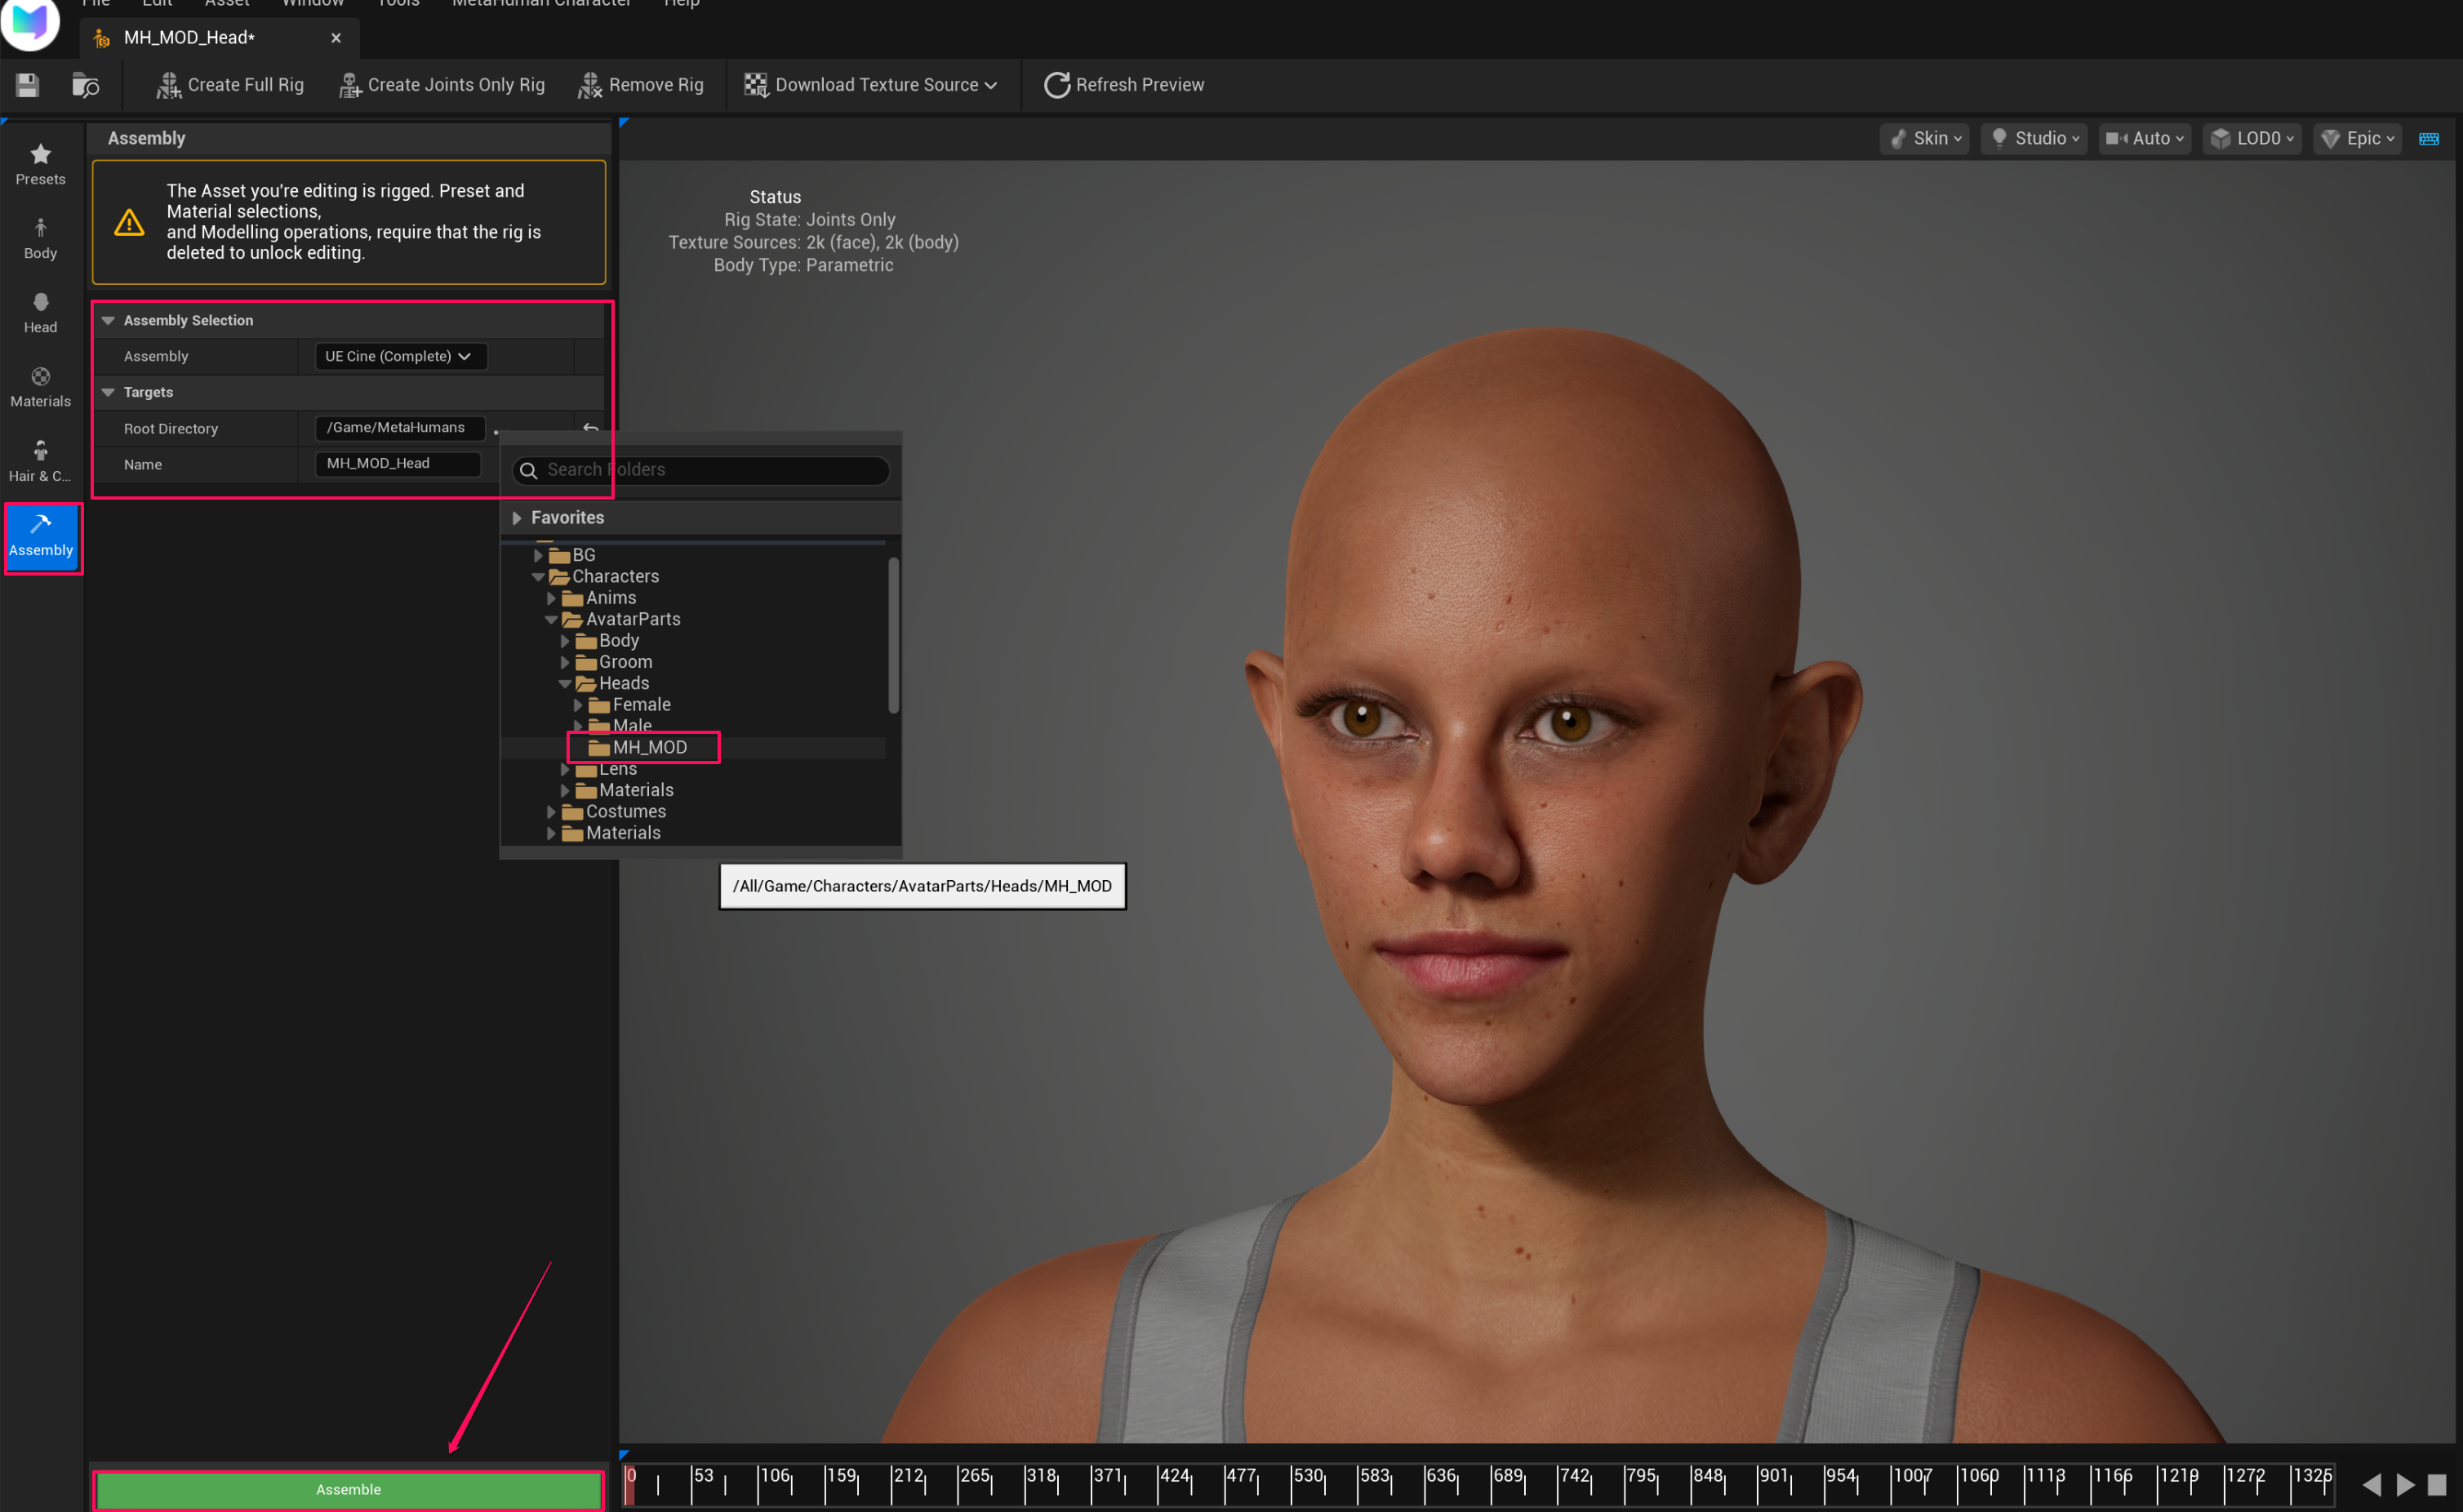
11. Assembly — Set Root Directory
When rigging is complete, go to the Assembly tab and set the path under Targets → Root Directory. (Using the same path as the folder you created at the beginning is recommended.)
After setting the path, click Assemble at the bottom.
12. Assembly Complete
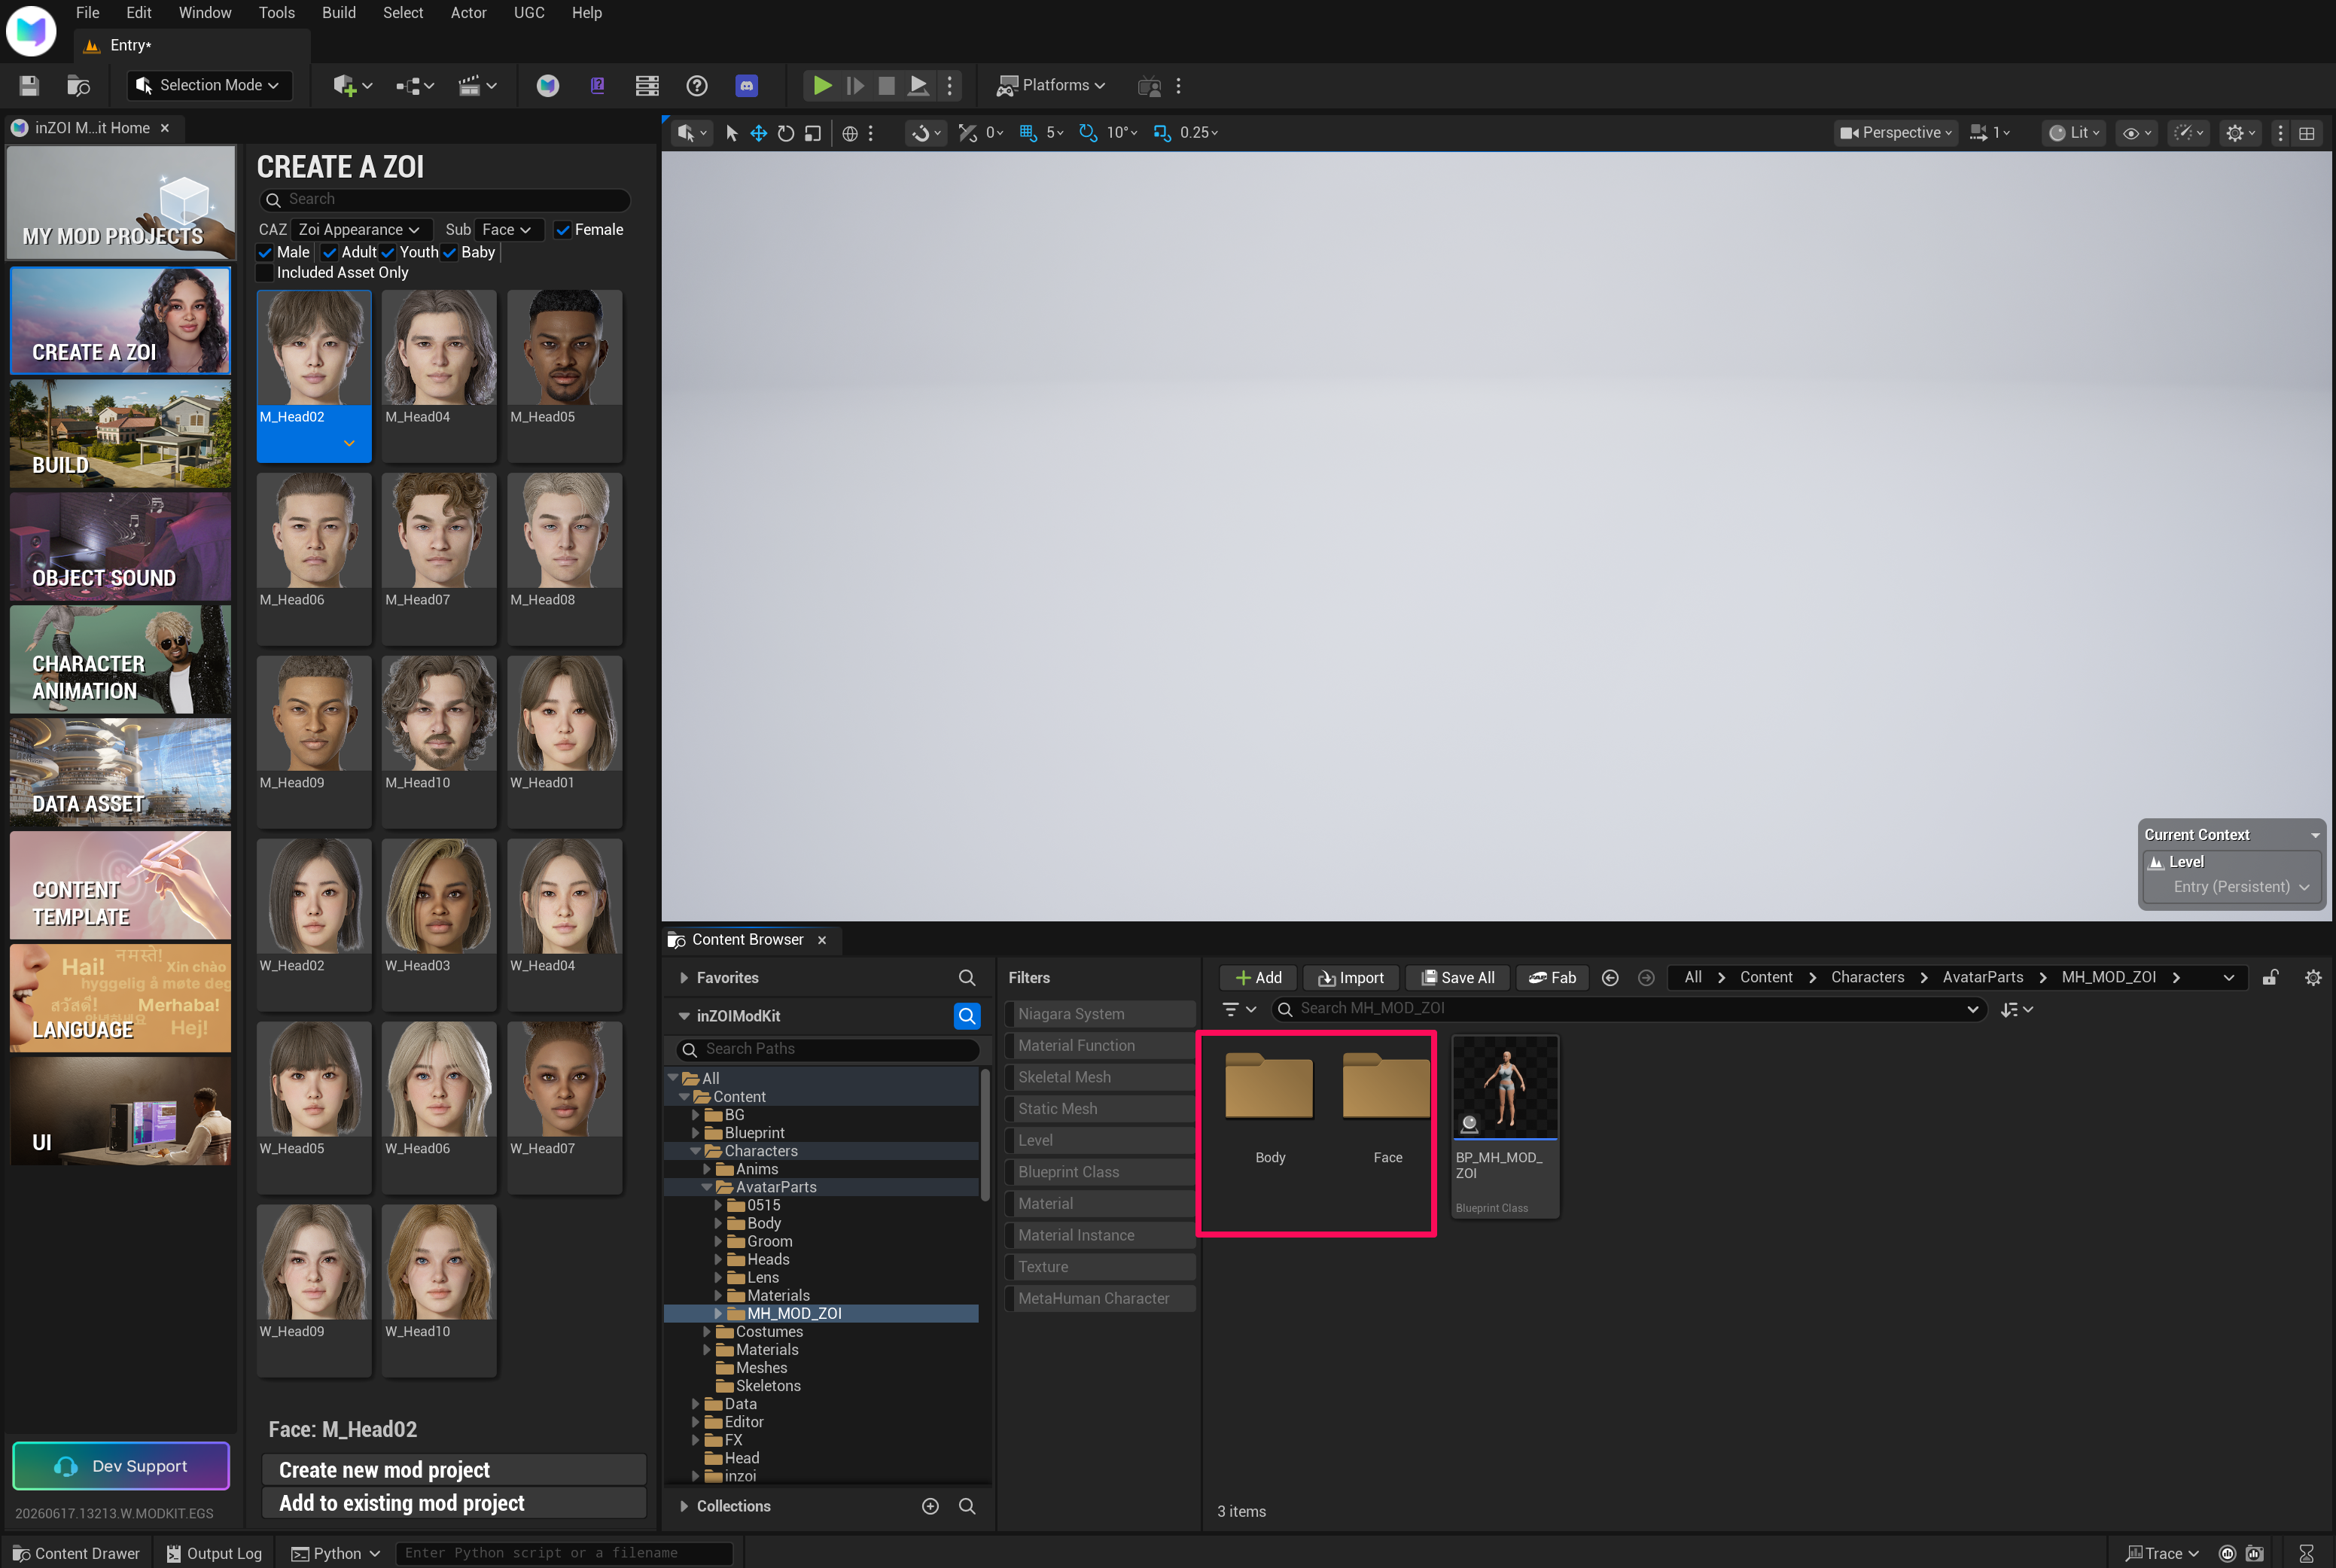
When Assemble finishes, a folder is created at the specified path.
- Face folder — contains the face skeletal mesh
- Body folder — contains the body skeletal mesh
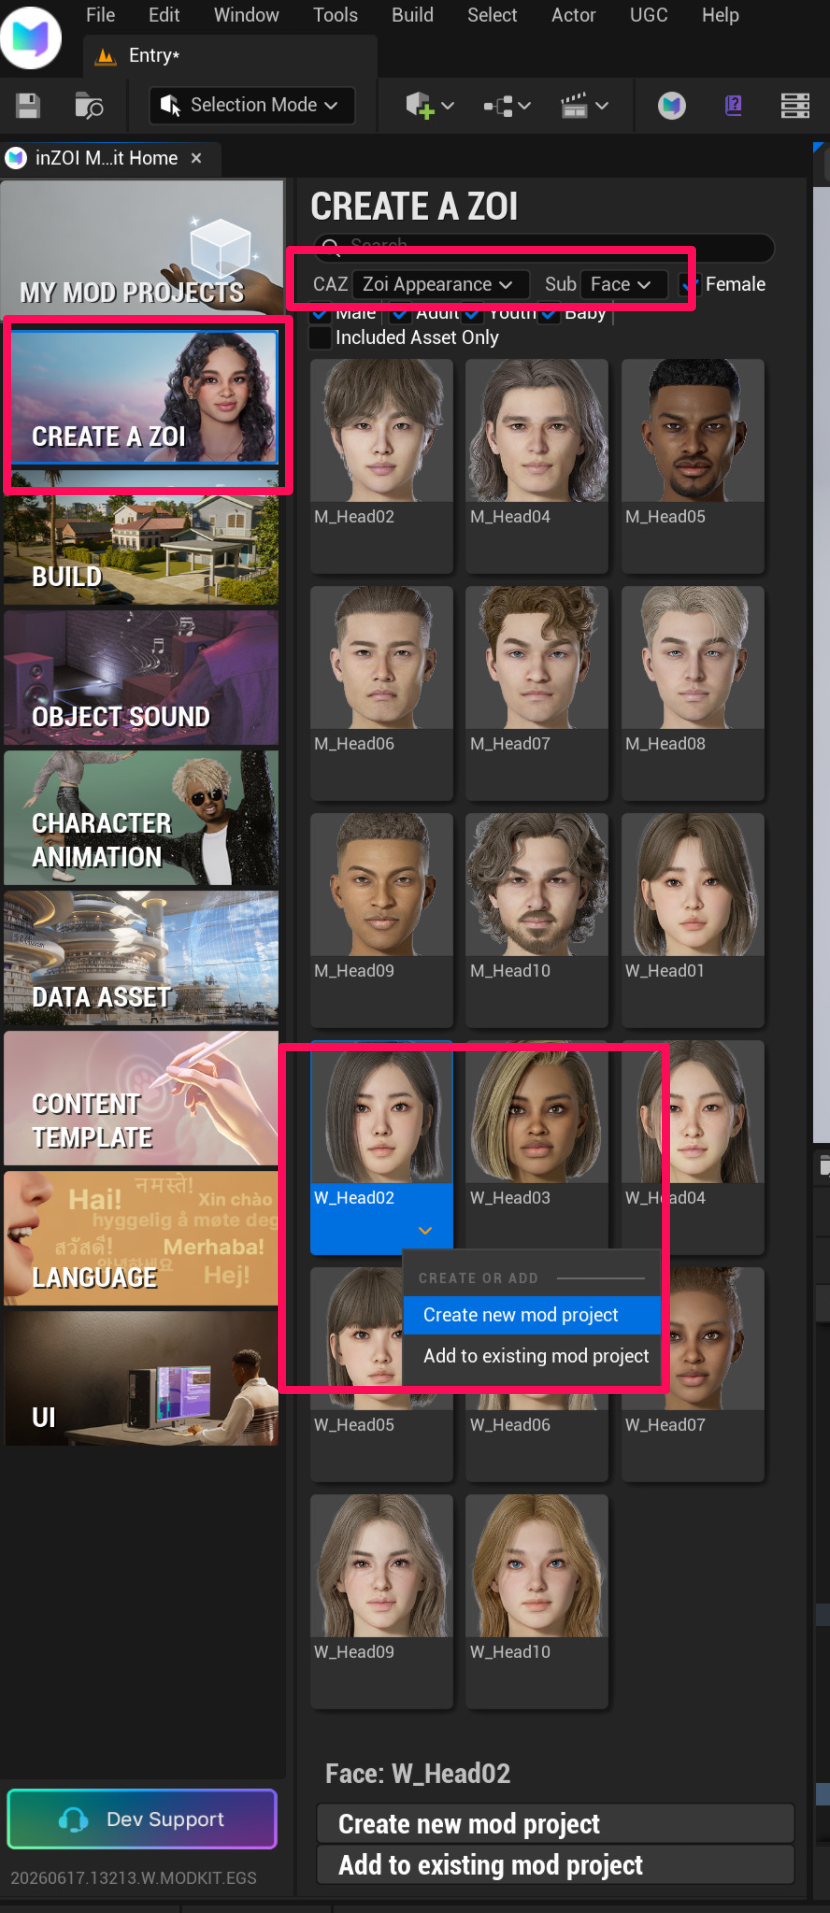
13. CREATE A ZOI — Select Face
In the ModKit, go to CREATE A ZOI → CAZ → FACE tab and select a face. (The material of the selected face will be used.)
After selecting, click Create new mod project to create the project.
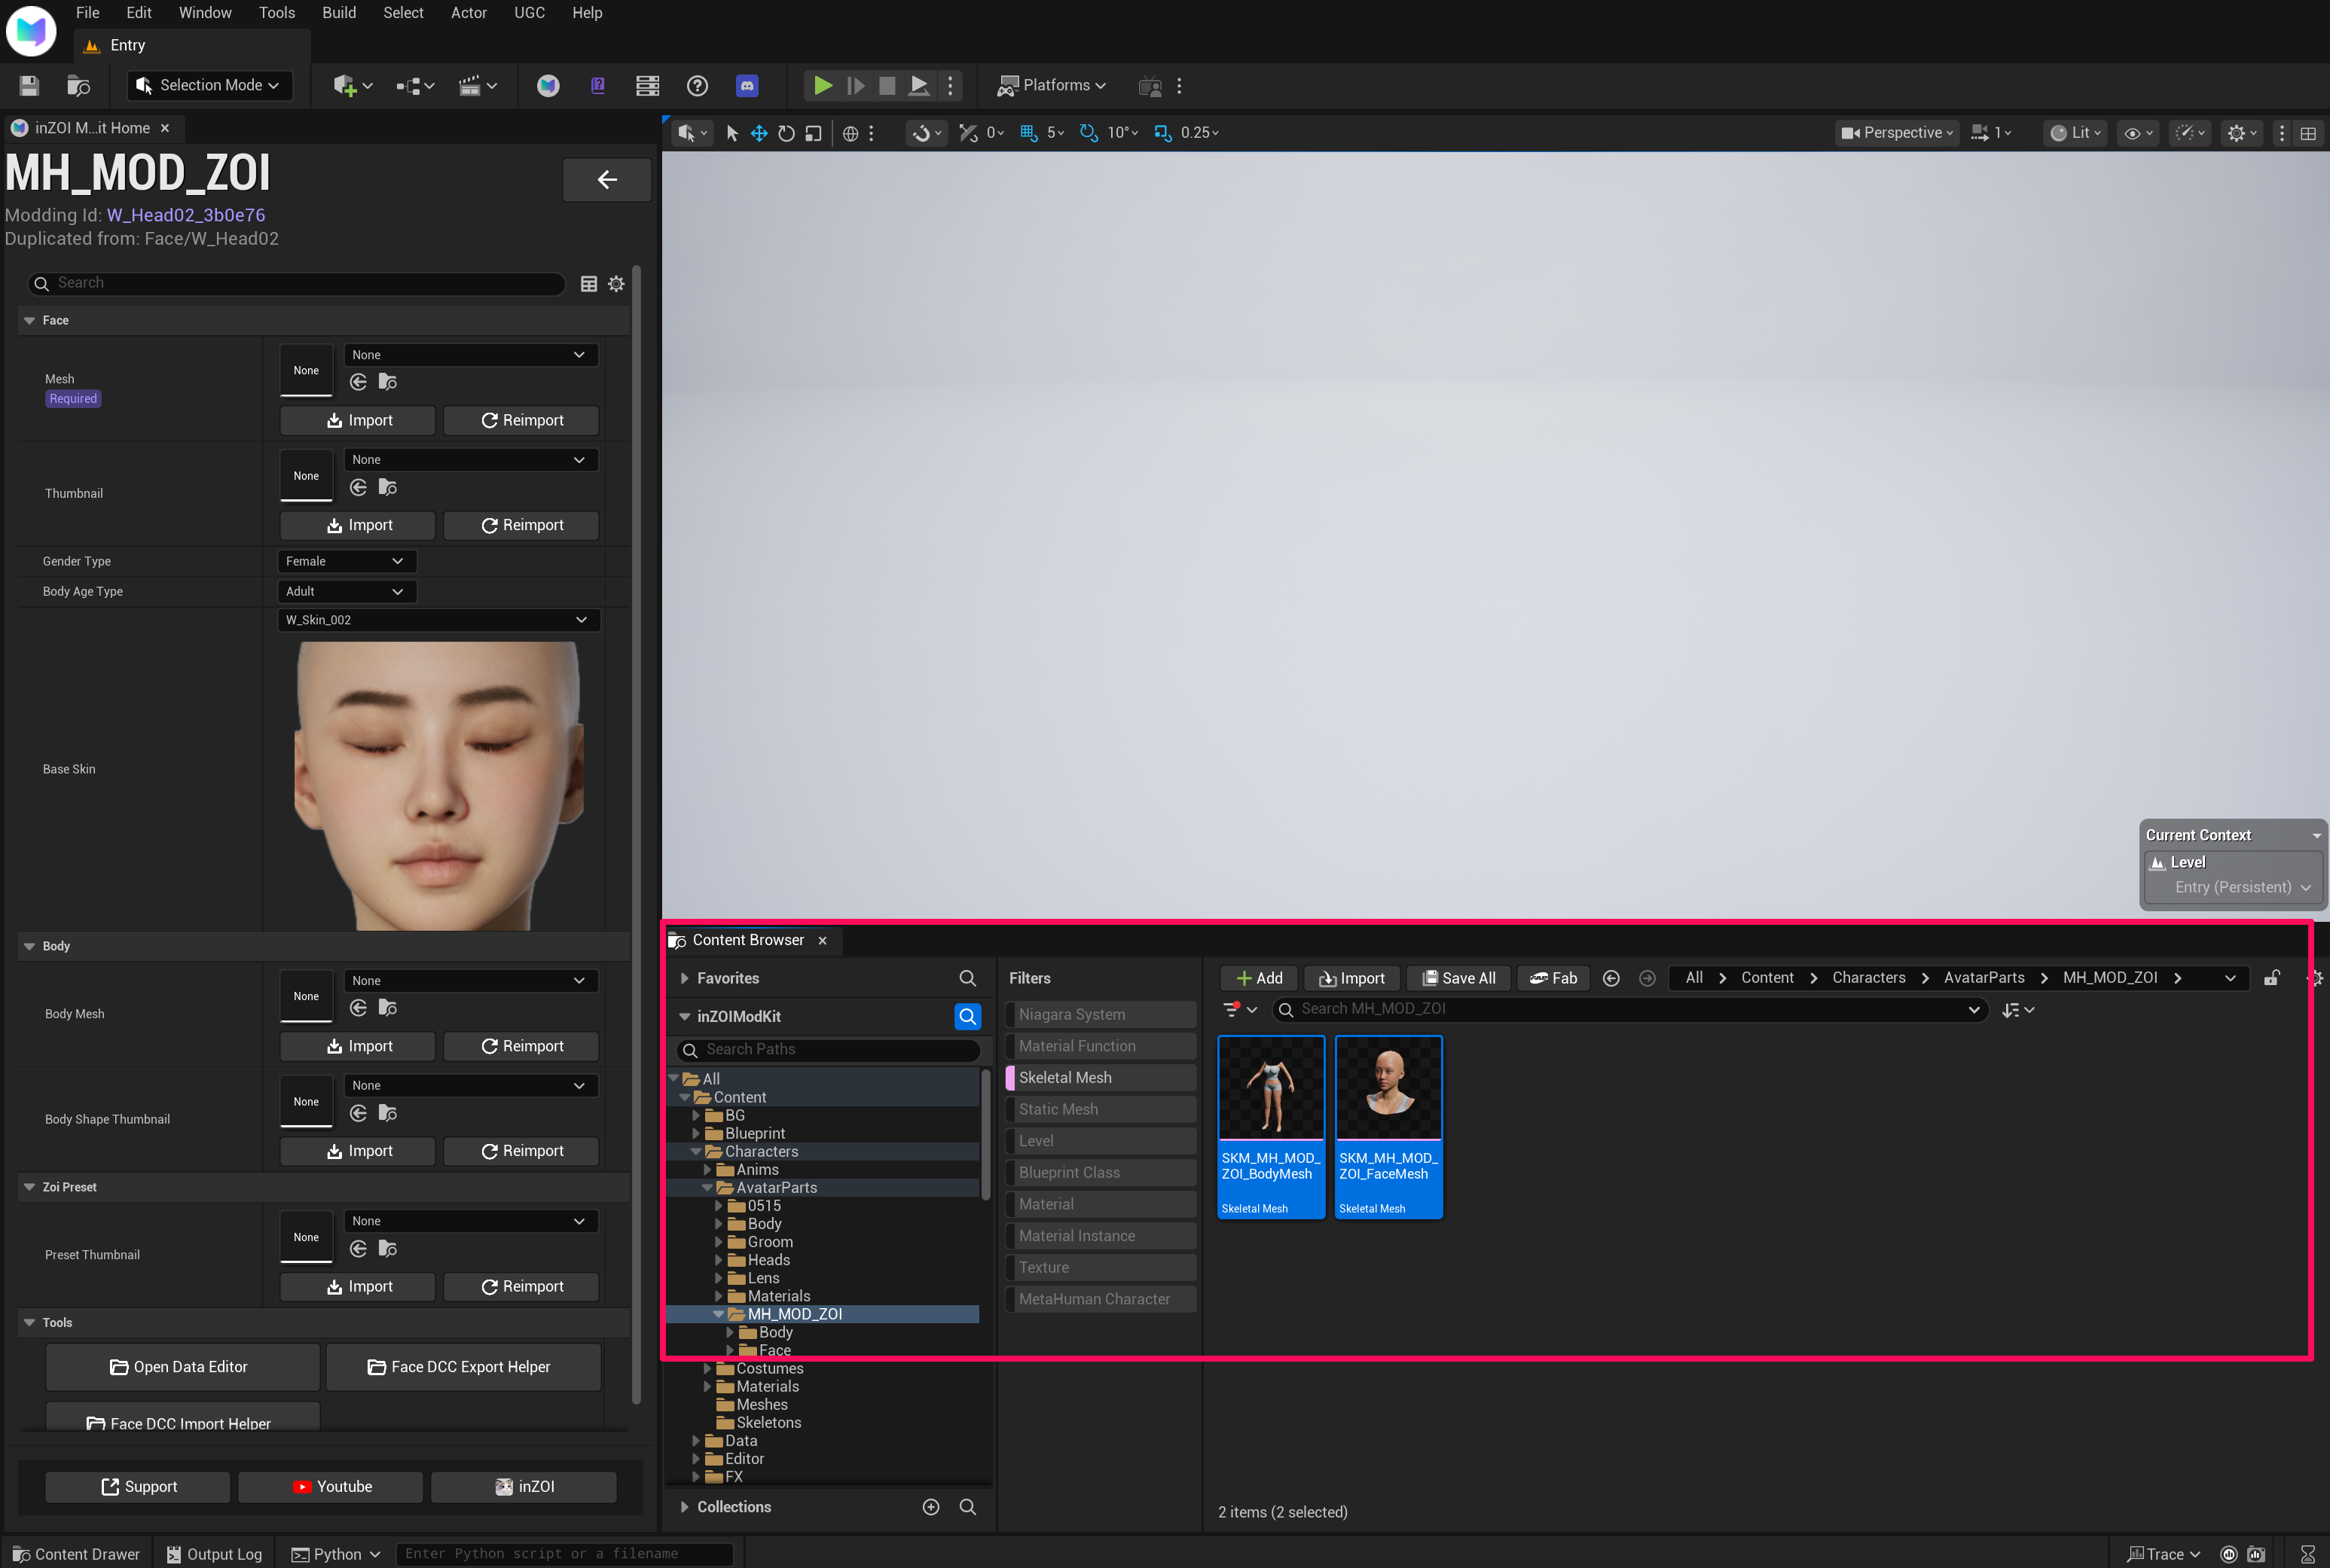
14. Move Skeletal Meshes to Mod Project
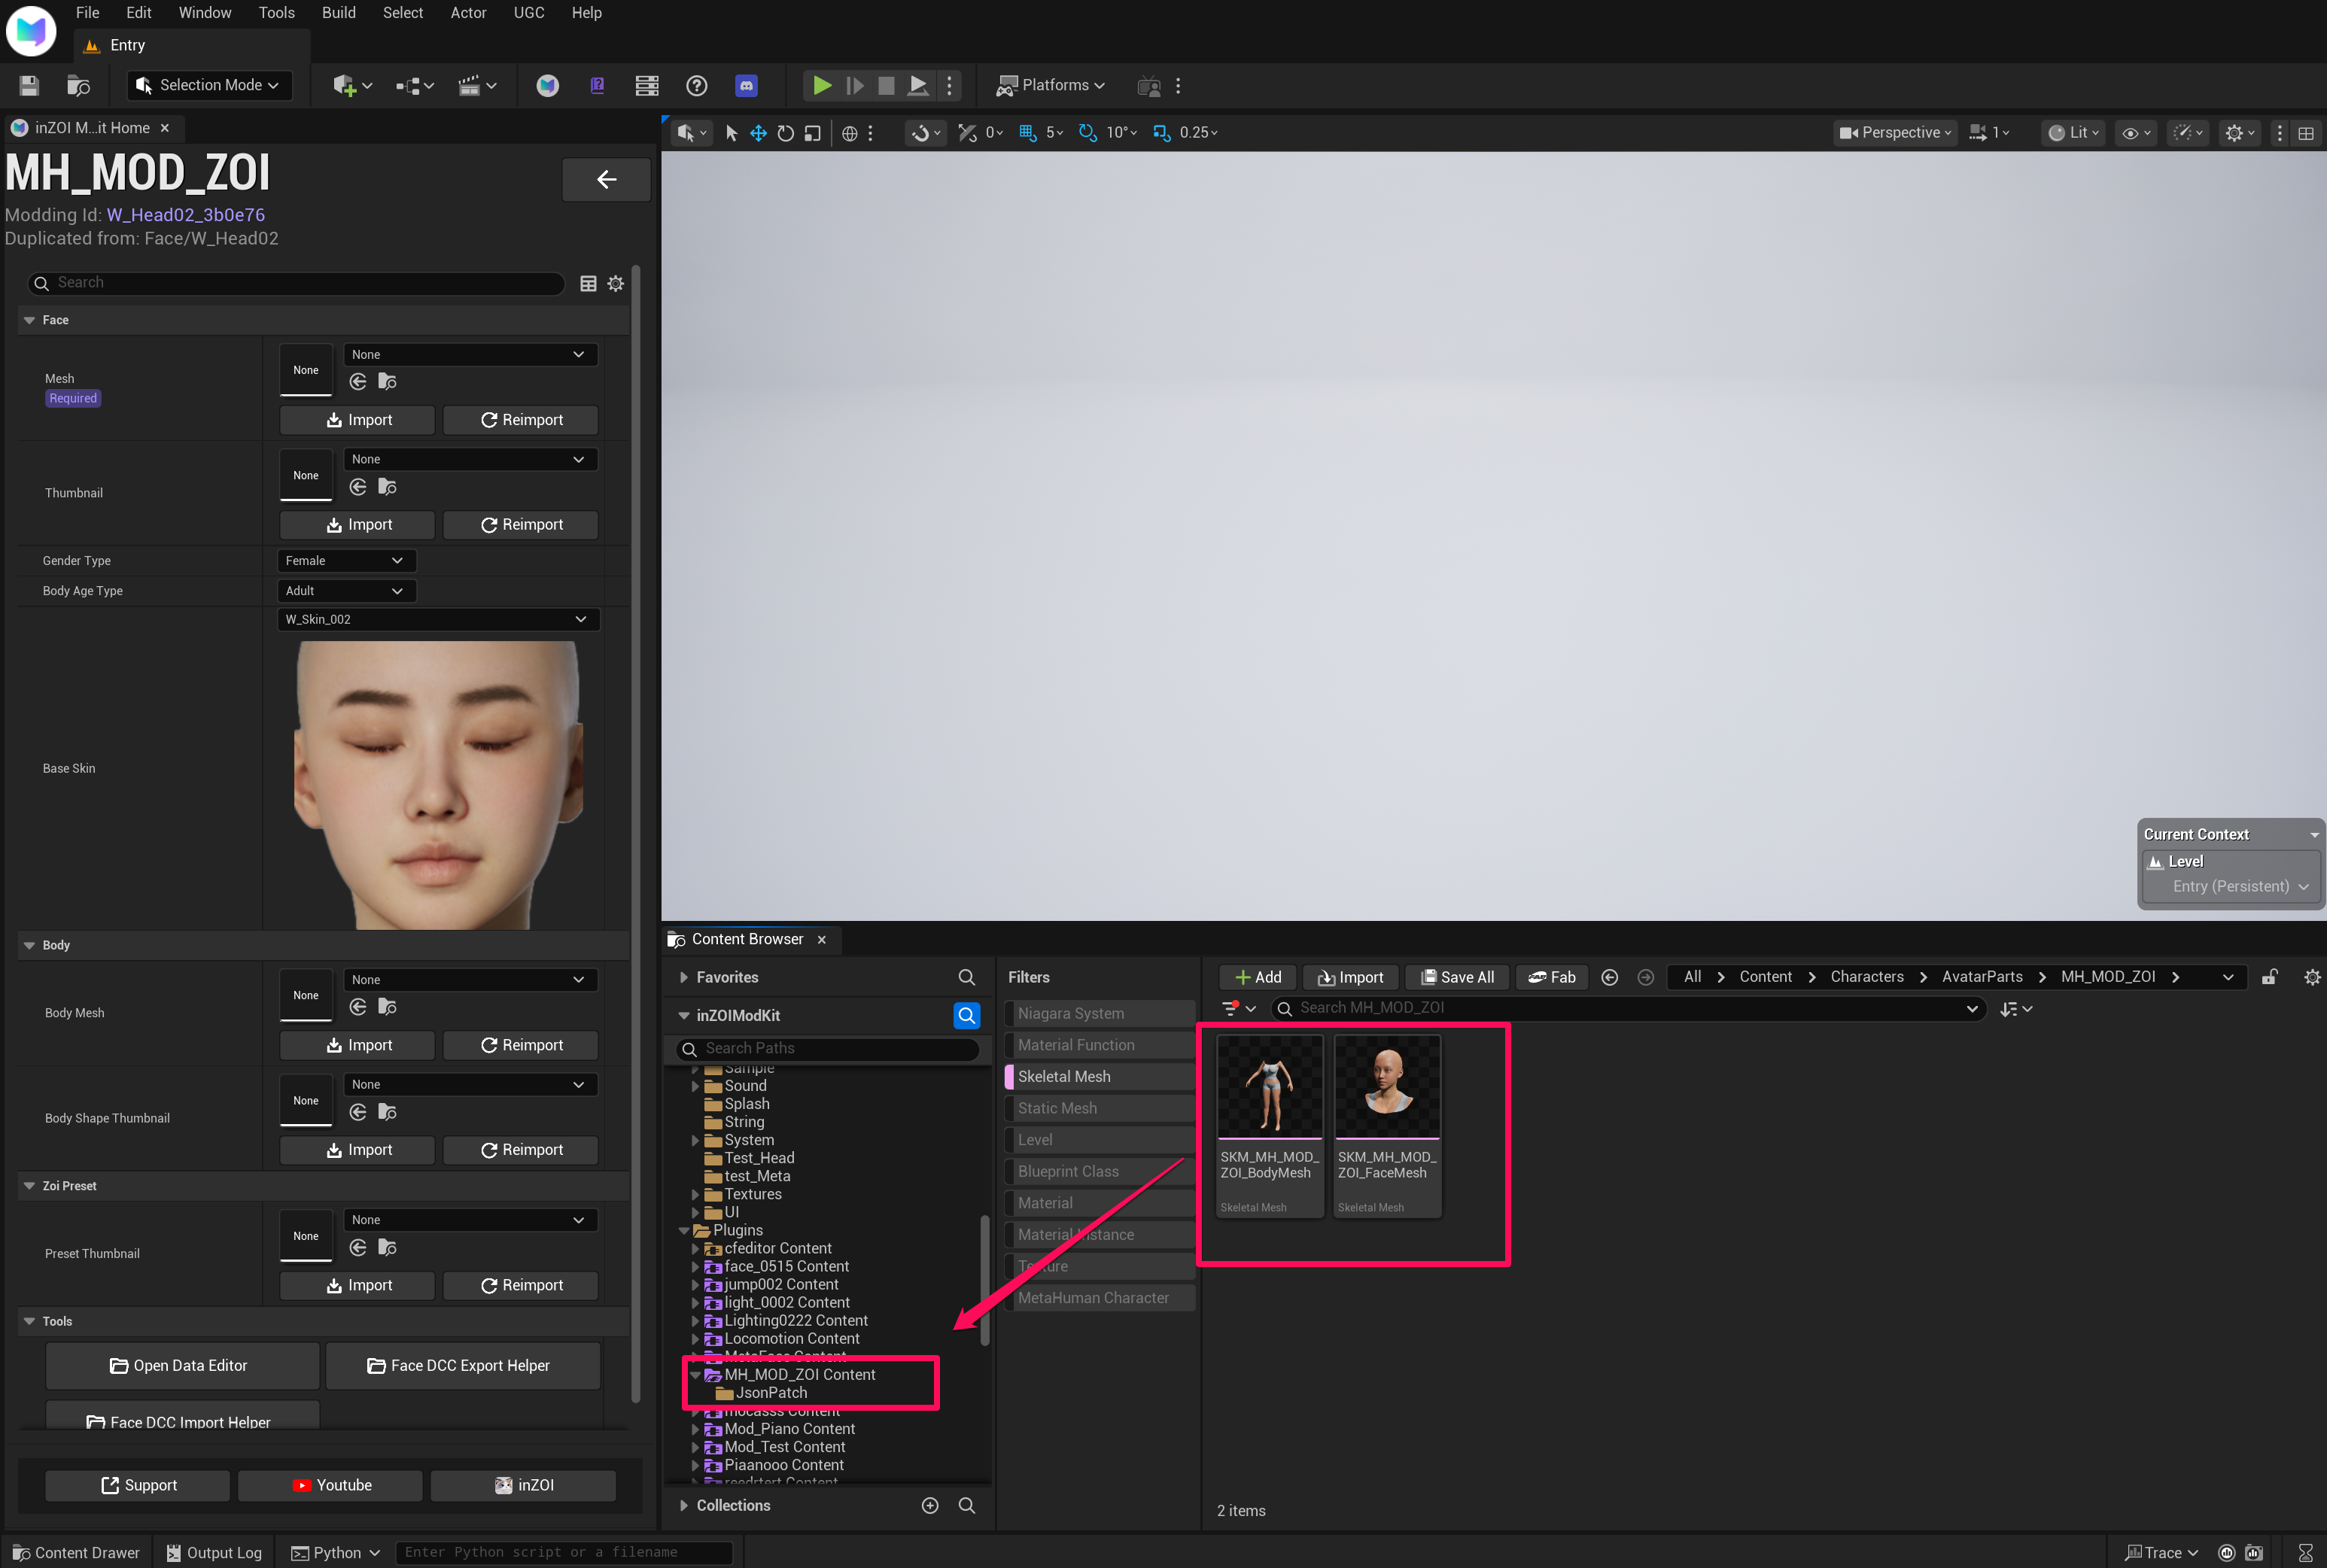
Move the skeletal meshes into the Face and Body folders of the created project.
Important: Mod Project Path
Navigate to Plugins → /All/Plugins/MH_MOD_ZOI (your generated mod file path).
15. Assign Skeleton to Body Skeletal Mesh
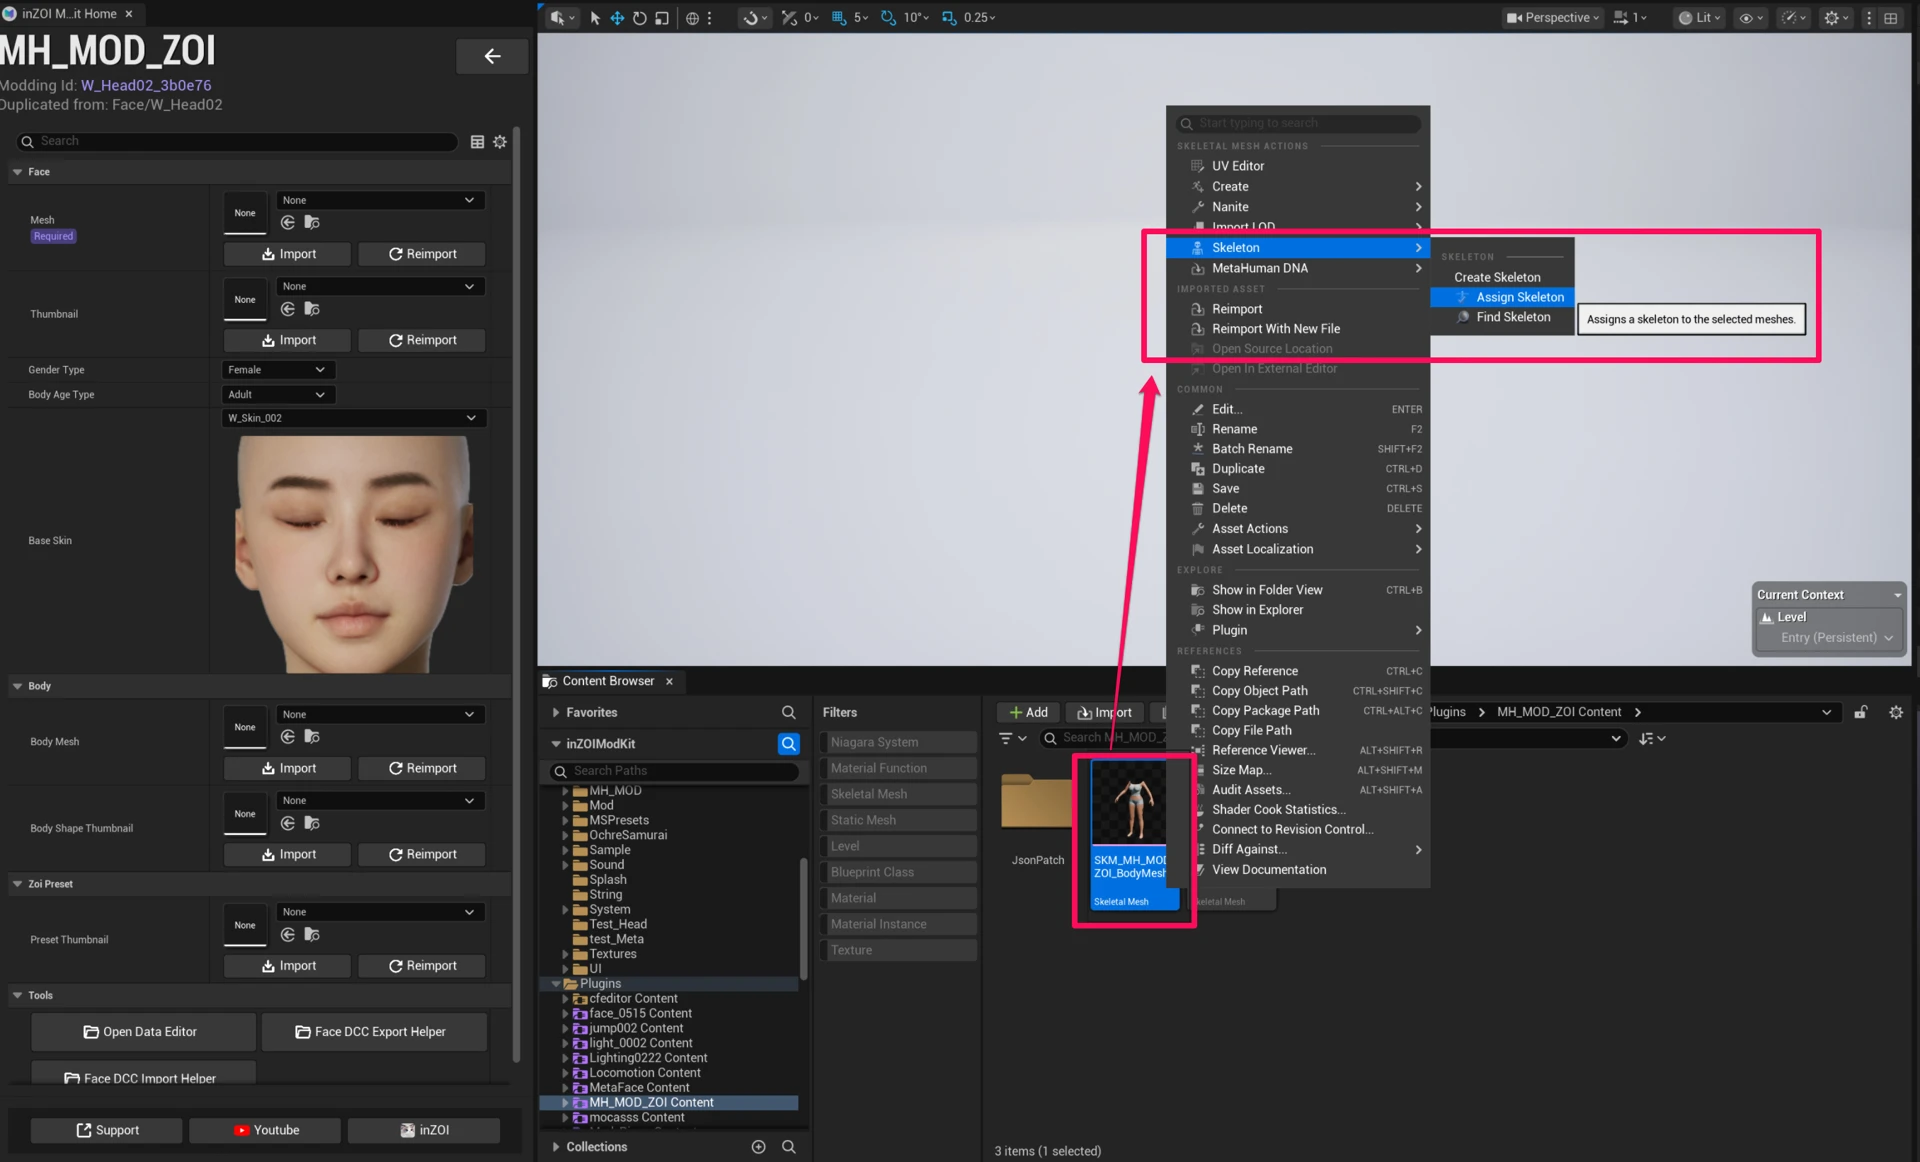
Once the skeletal meshes are moved into the mod project, right-click the body skeletal mesh and run Assign Skeleton.
Accept SK_Base (/Game/Characters/Skeletons/SK_Base.SK_Base).
Important
This step is required. Do not skip.
16. Set Face & Body Mesh in Modding Wizard
In the Face & Body modding wizard, assign the meshes in the following order: face skeletal mesh first, then body skeletal mesh.
Important
Head must be assigned before Body.
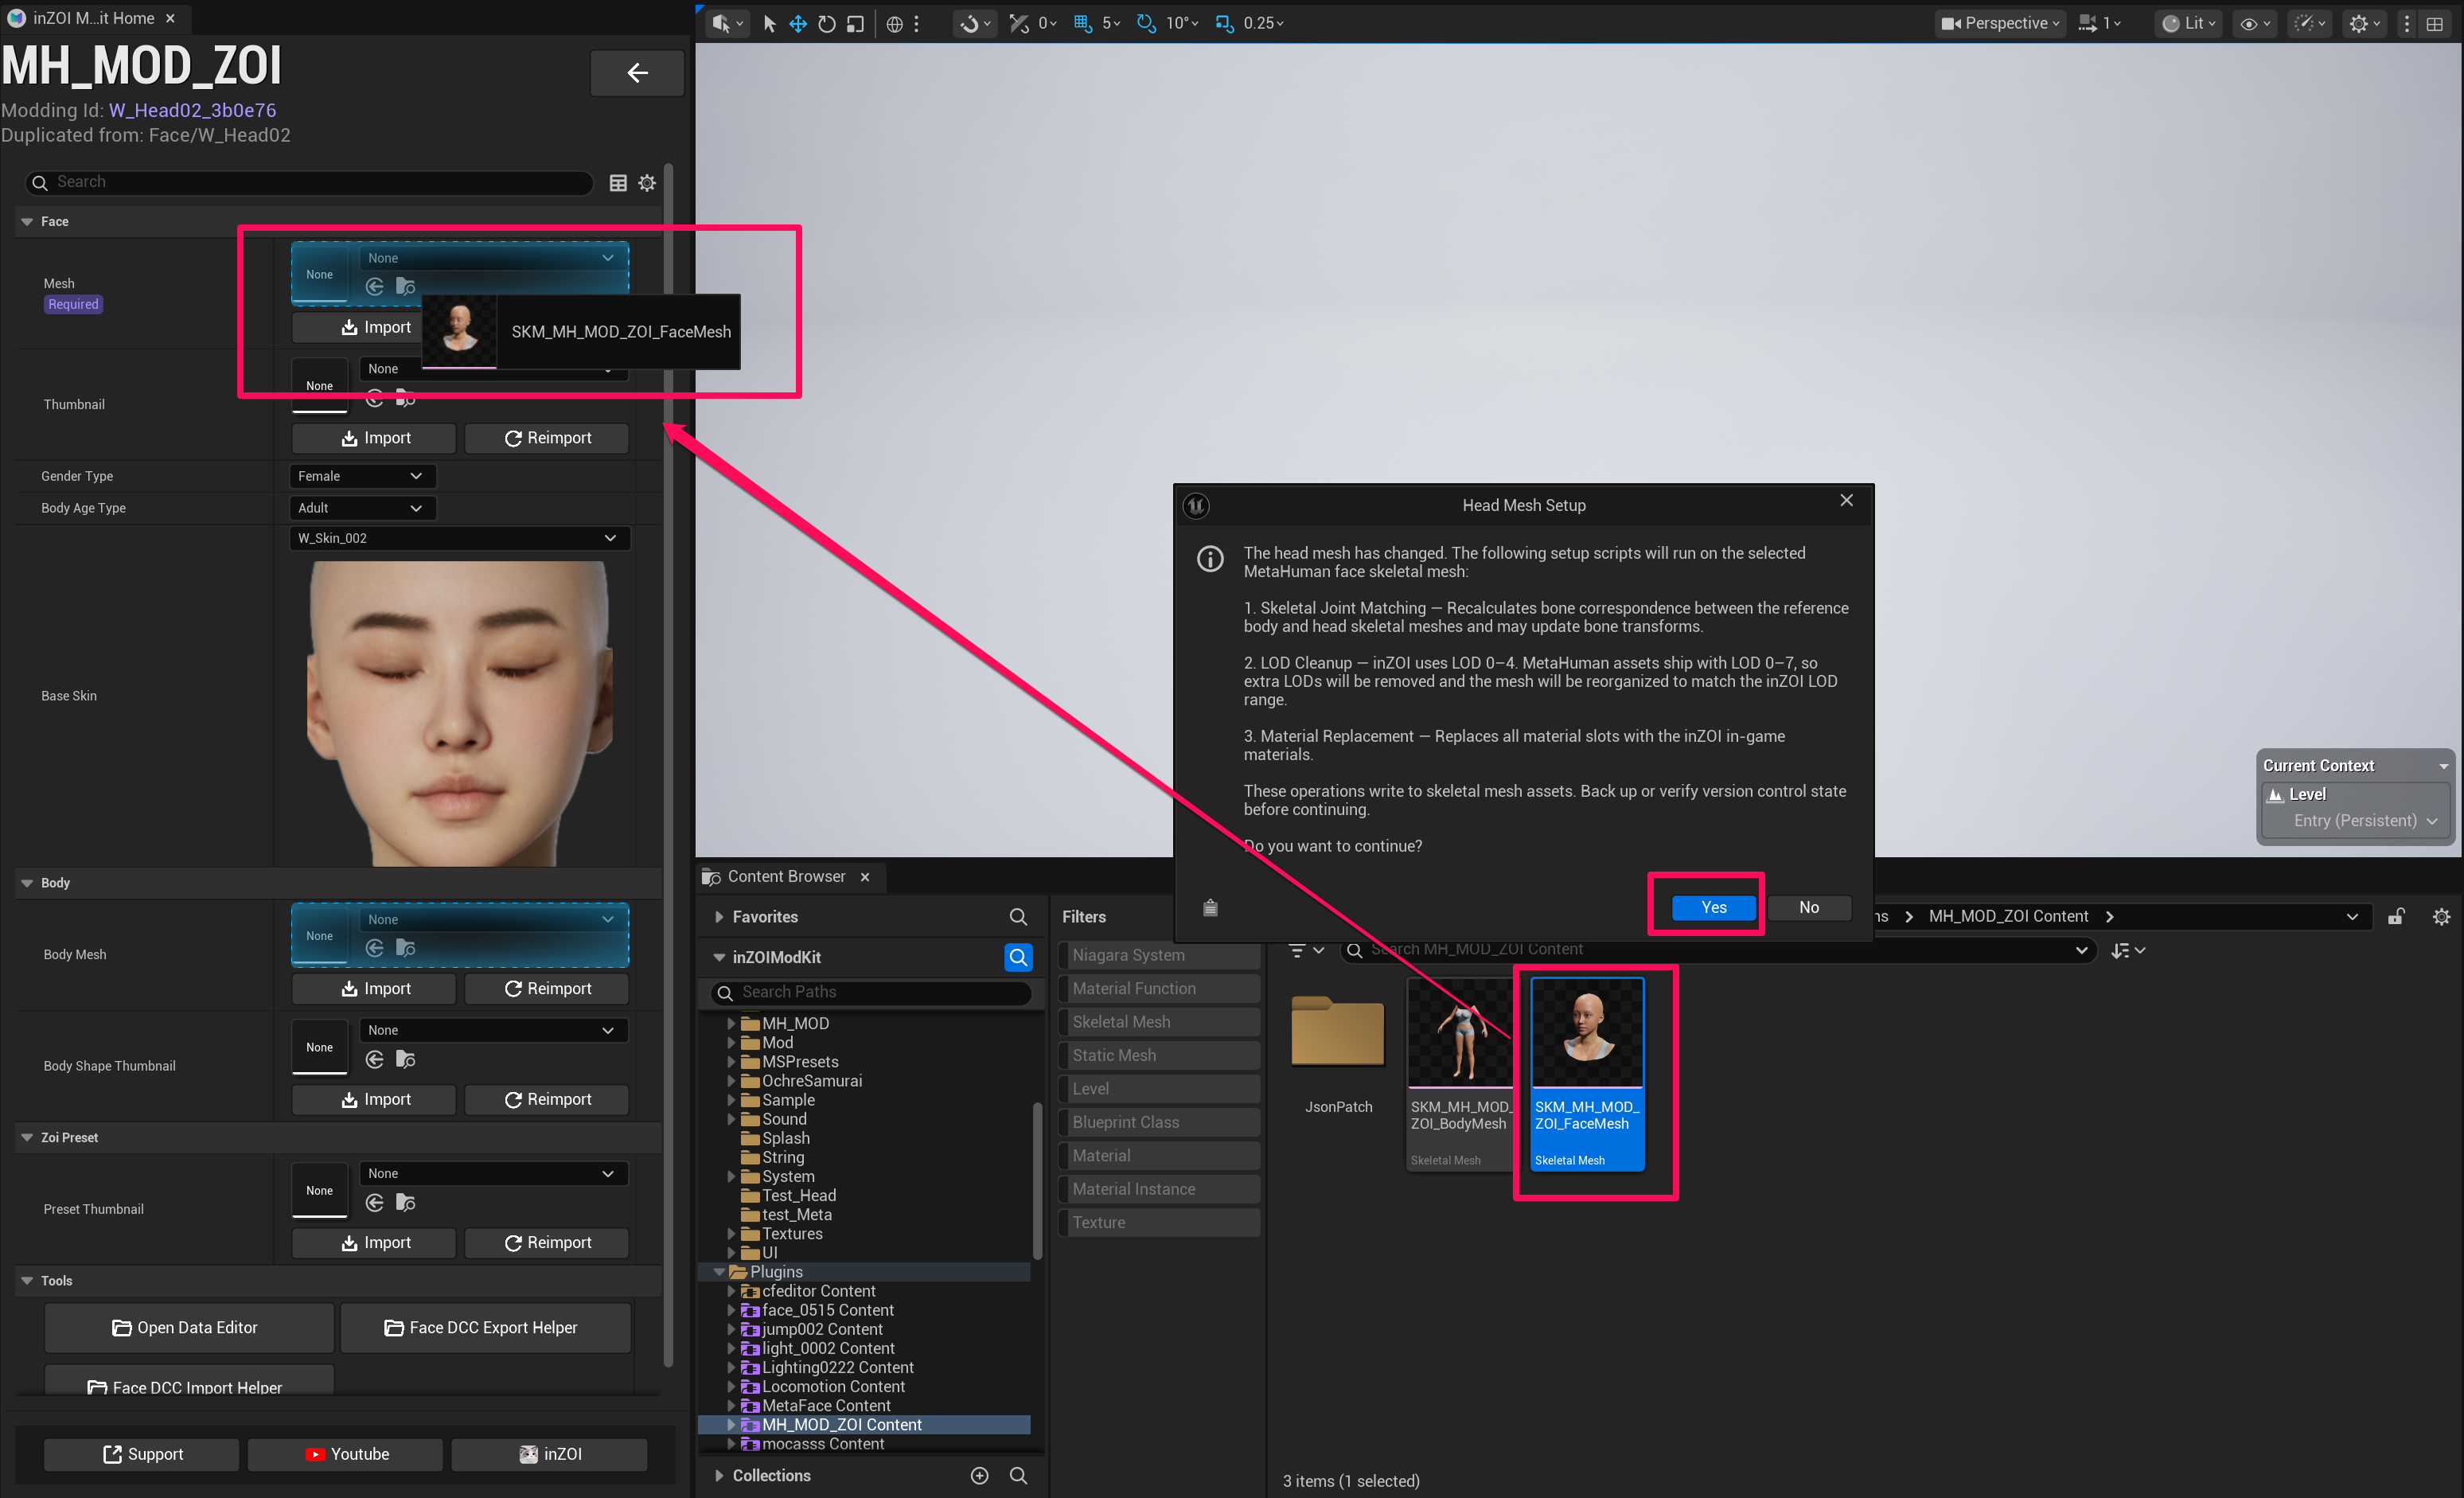
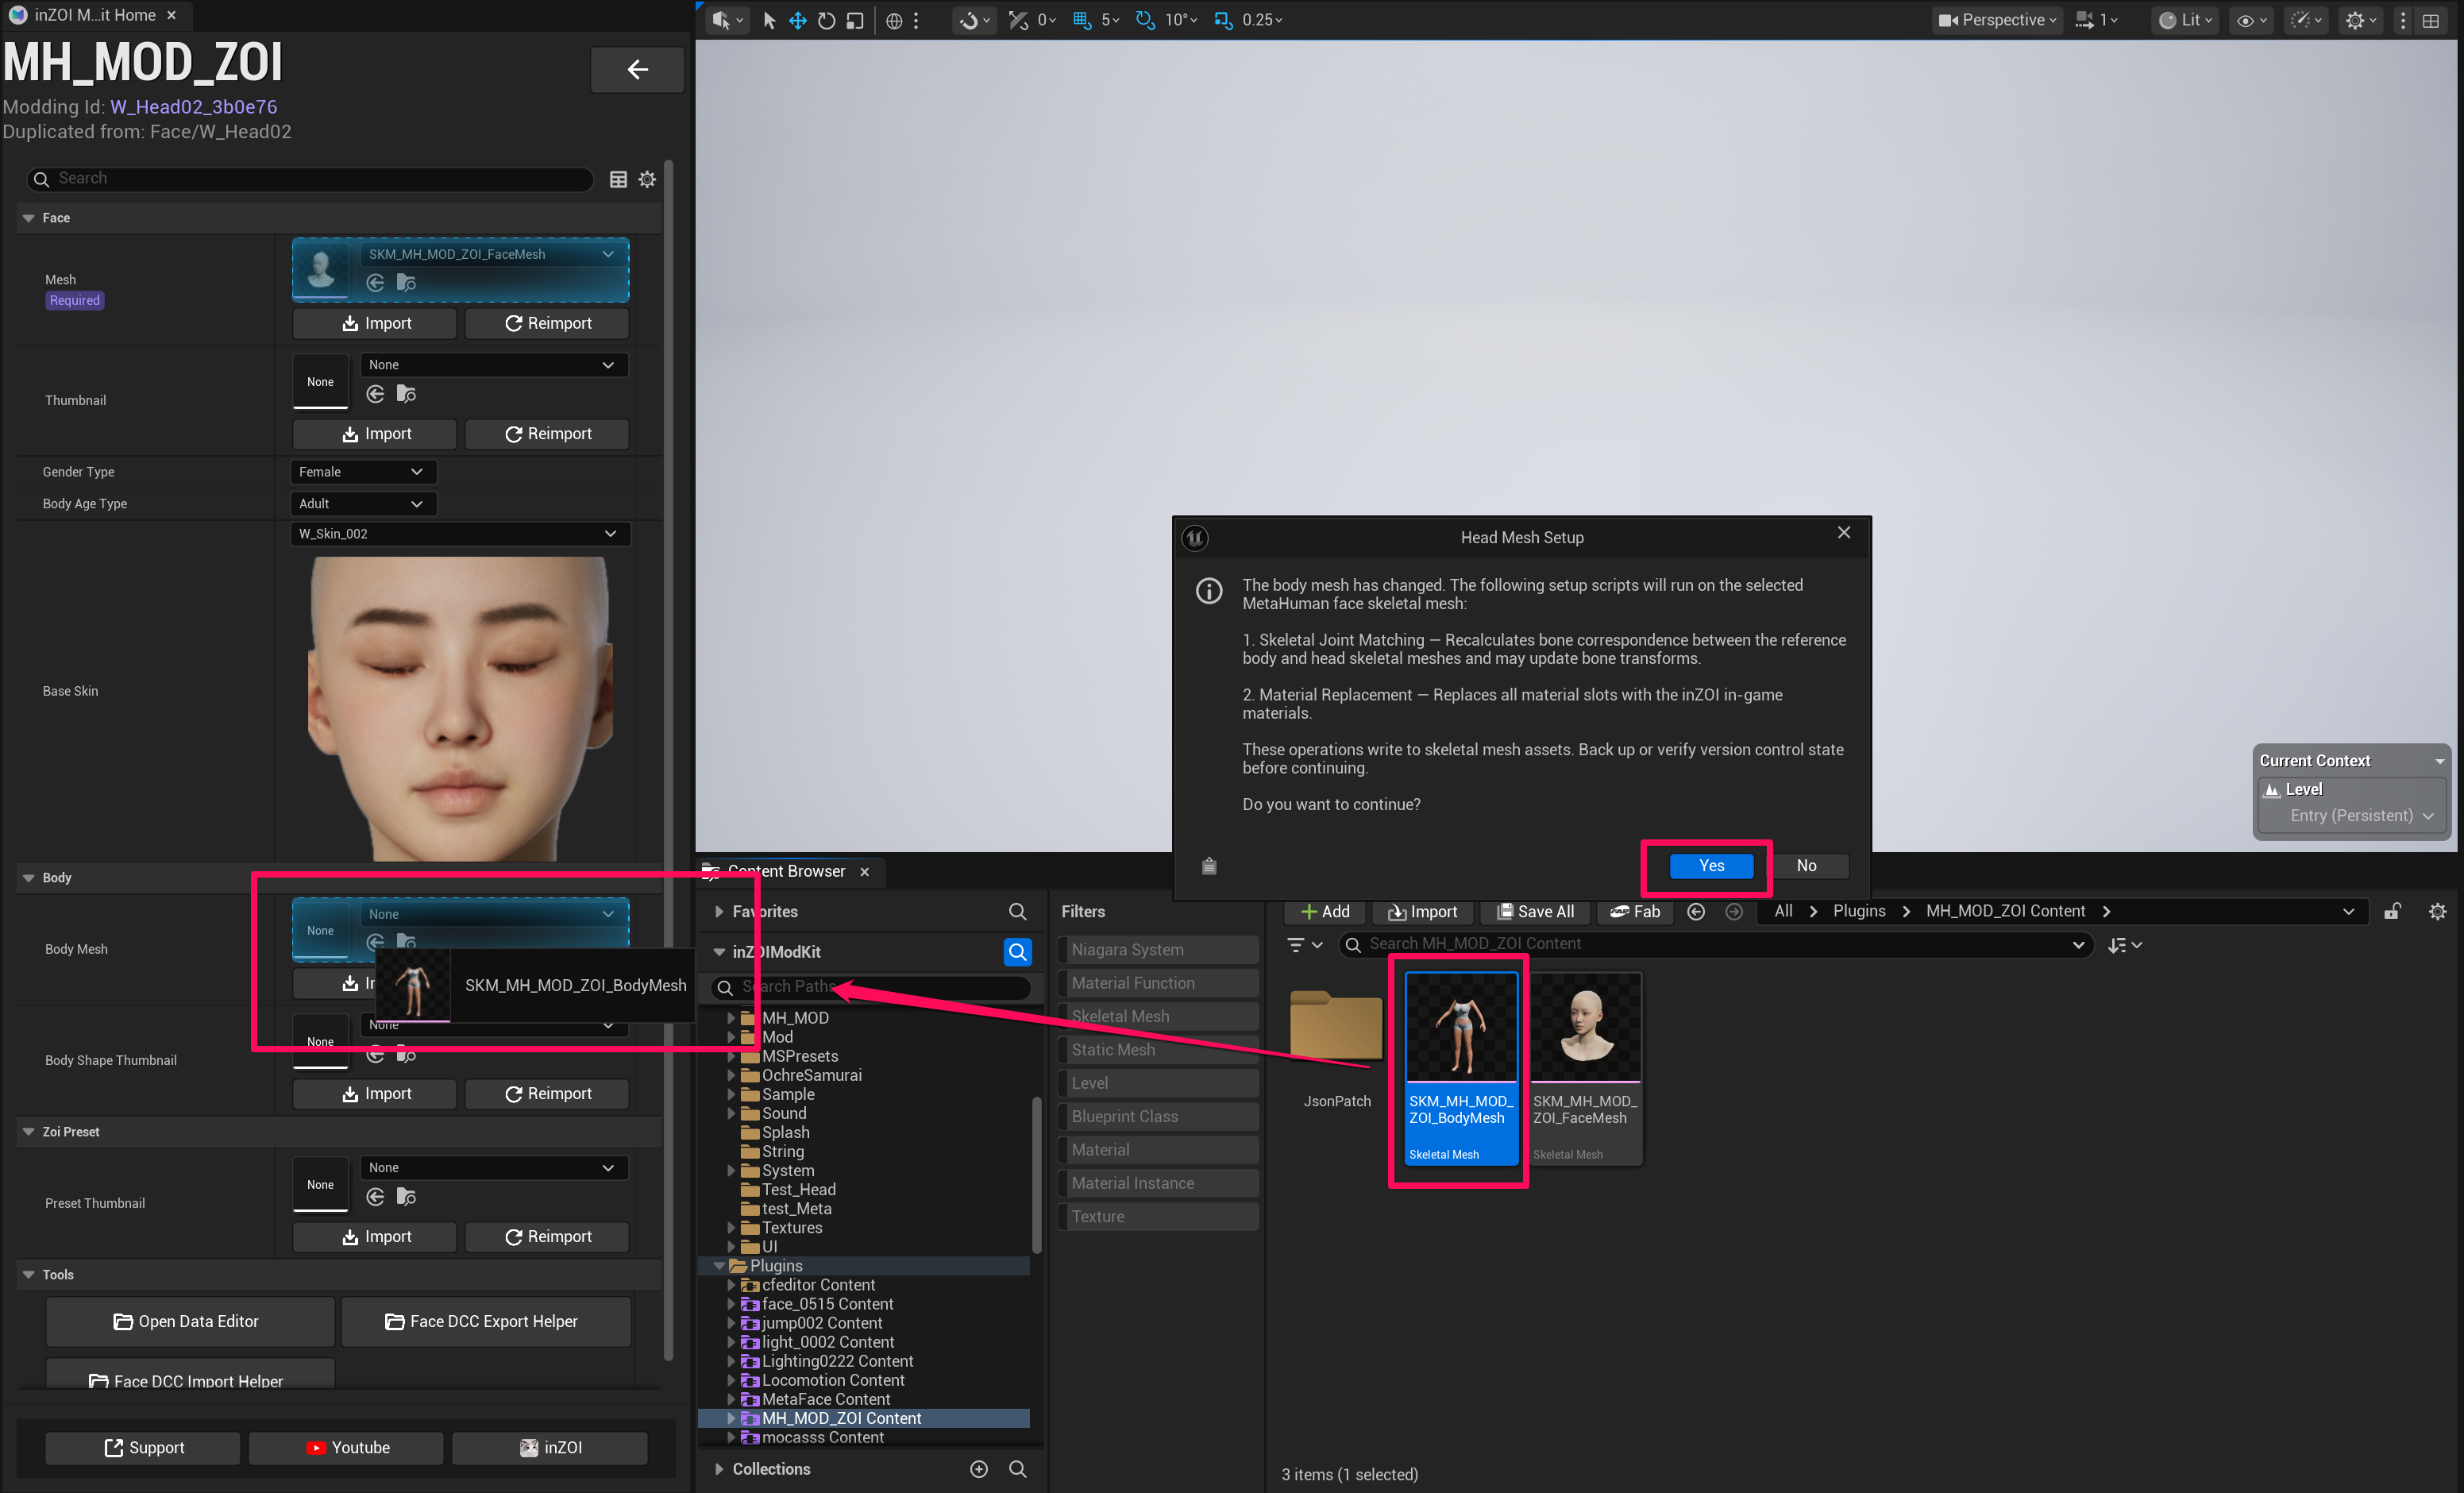
17. Set Thumbnails and Gender
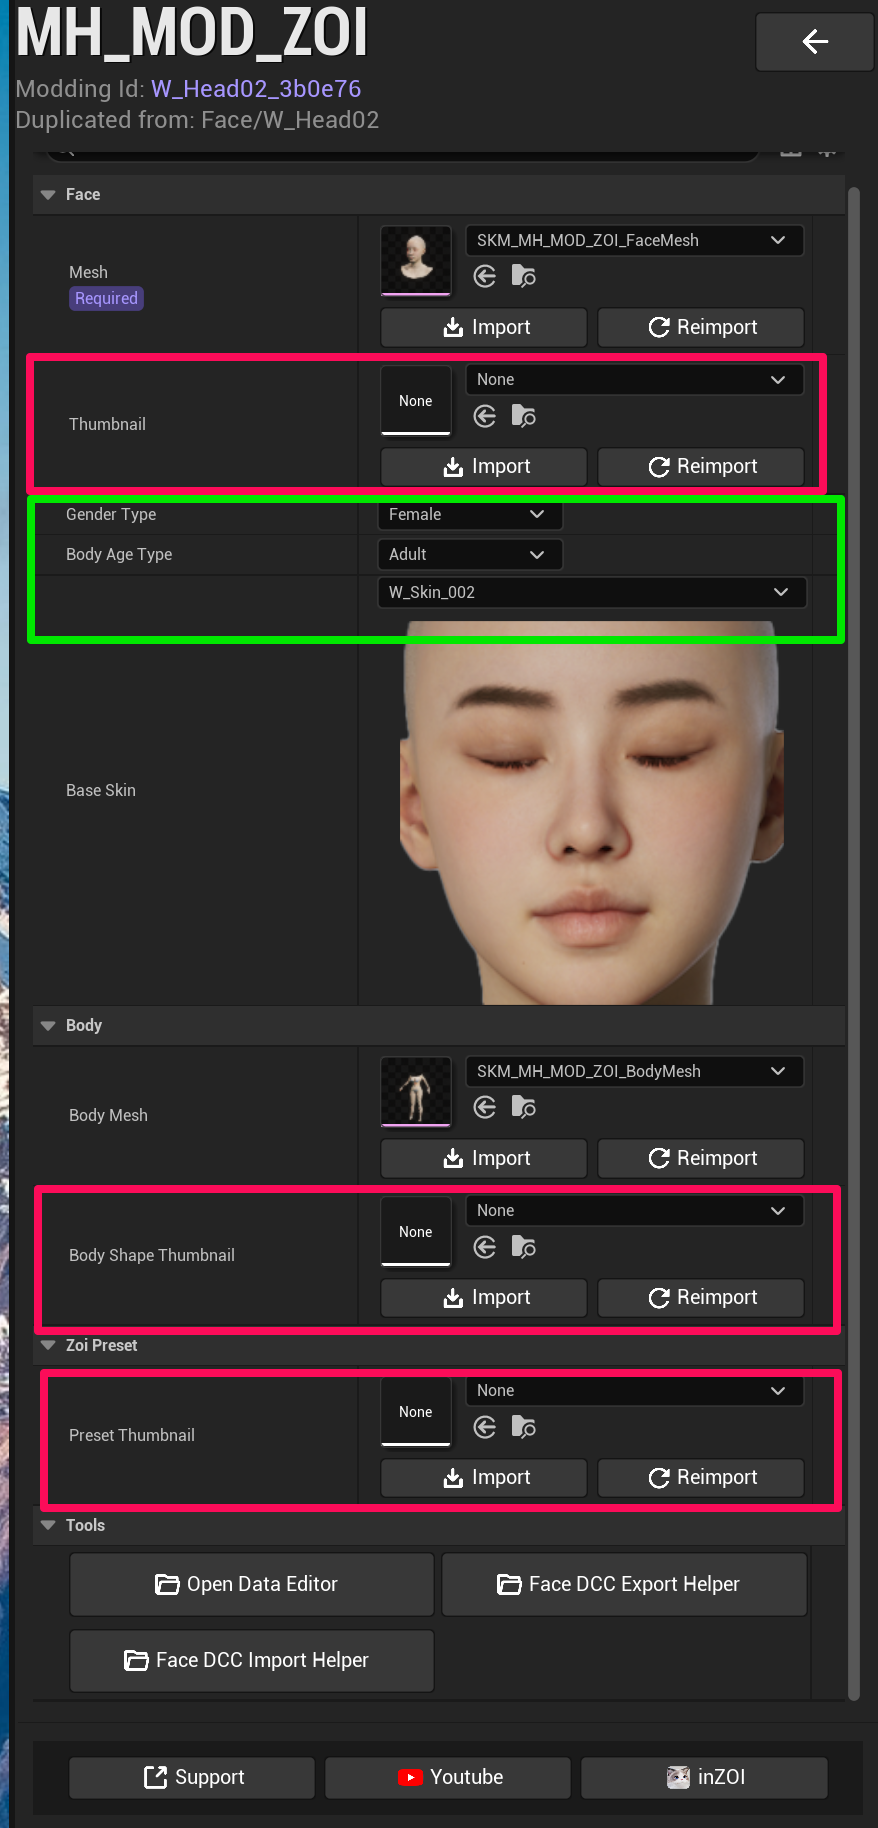
After assigning the meshes, set the following:
- Face thumbnail
- Body shape thumbnail
- Zoi preset thumbnail
Then go to Face Properties → Gender Type and select the appropriate gender.
18. Run Packaging
Once all settings are complete, run Packaging.