Overview
First, follow steps 1–7 of the MetaHuman 5.6 Face Modding Guide as you normally would.
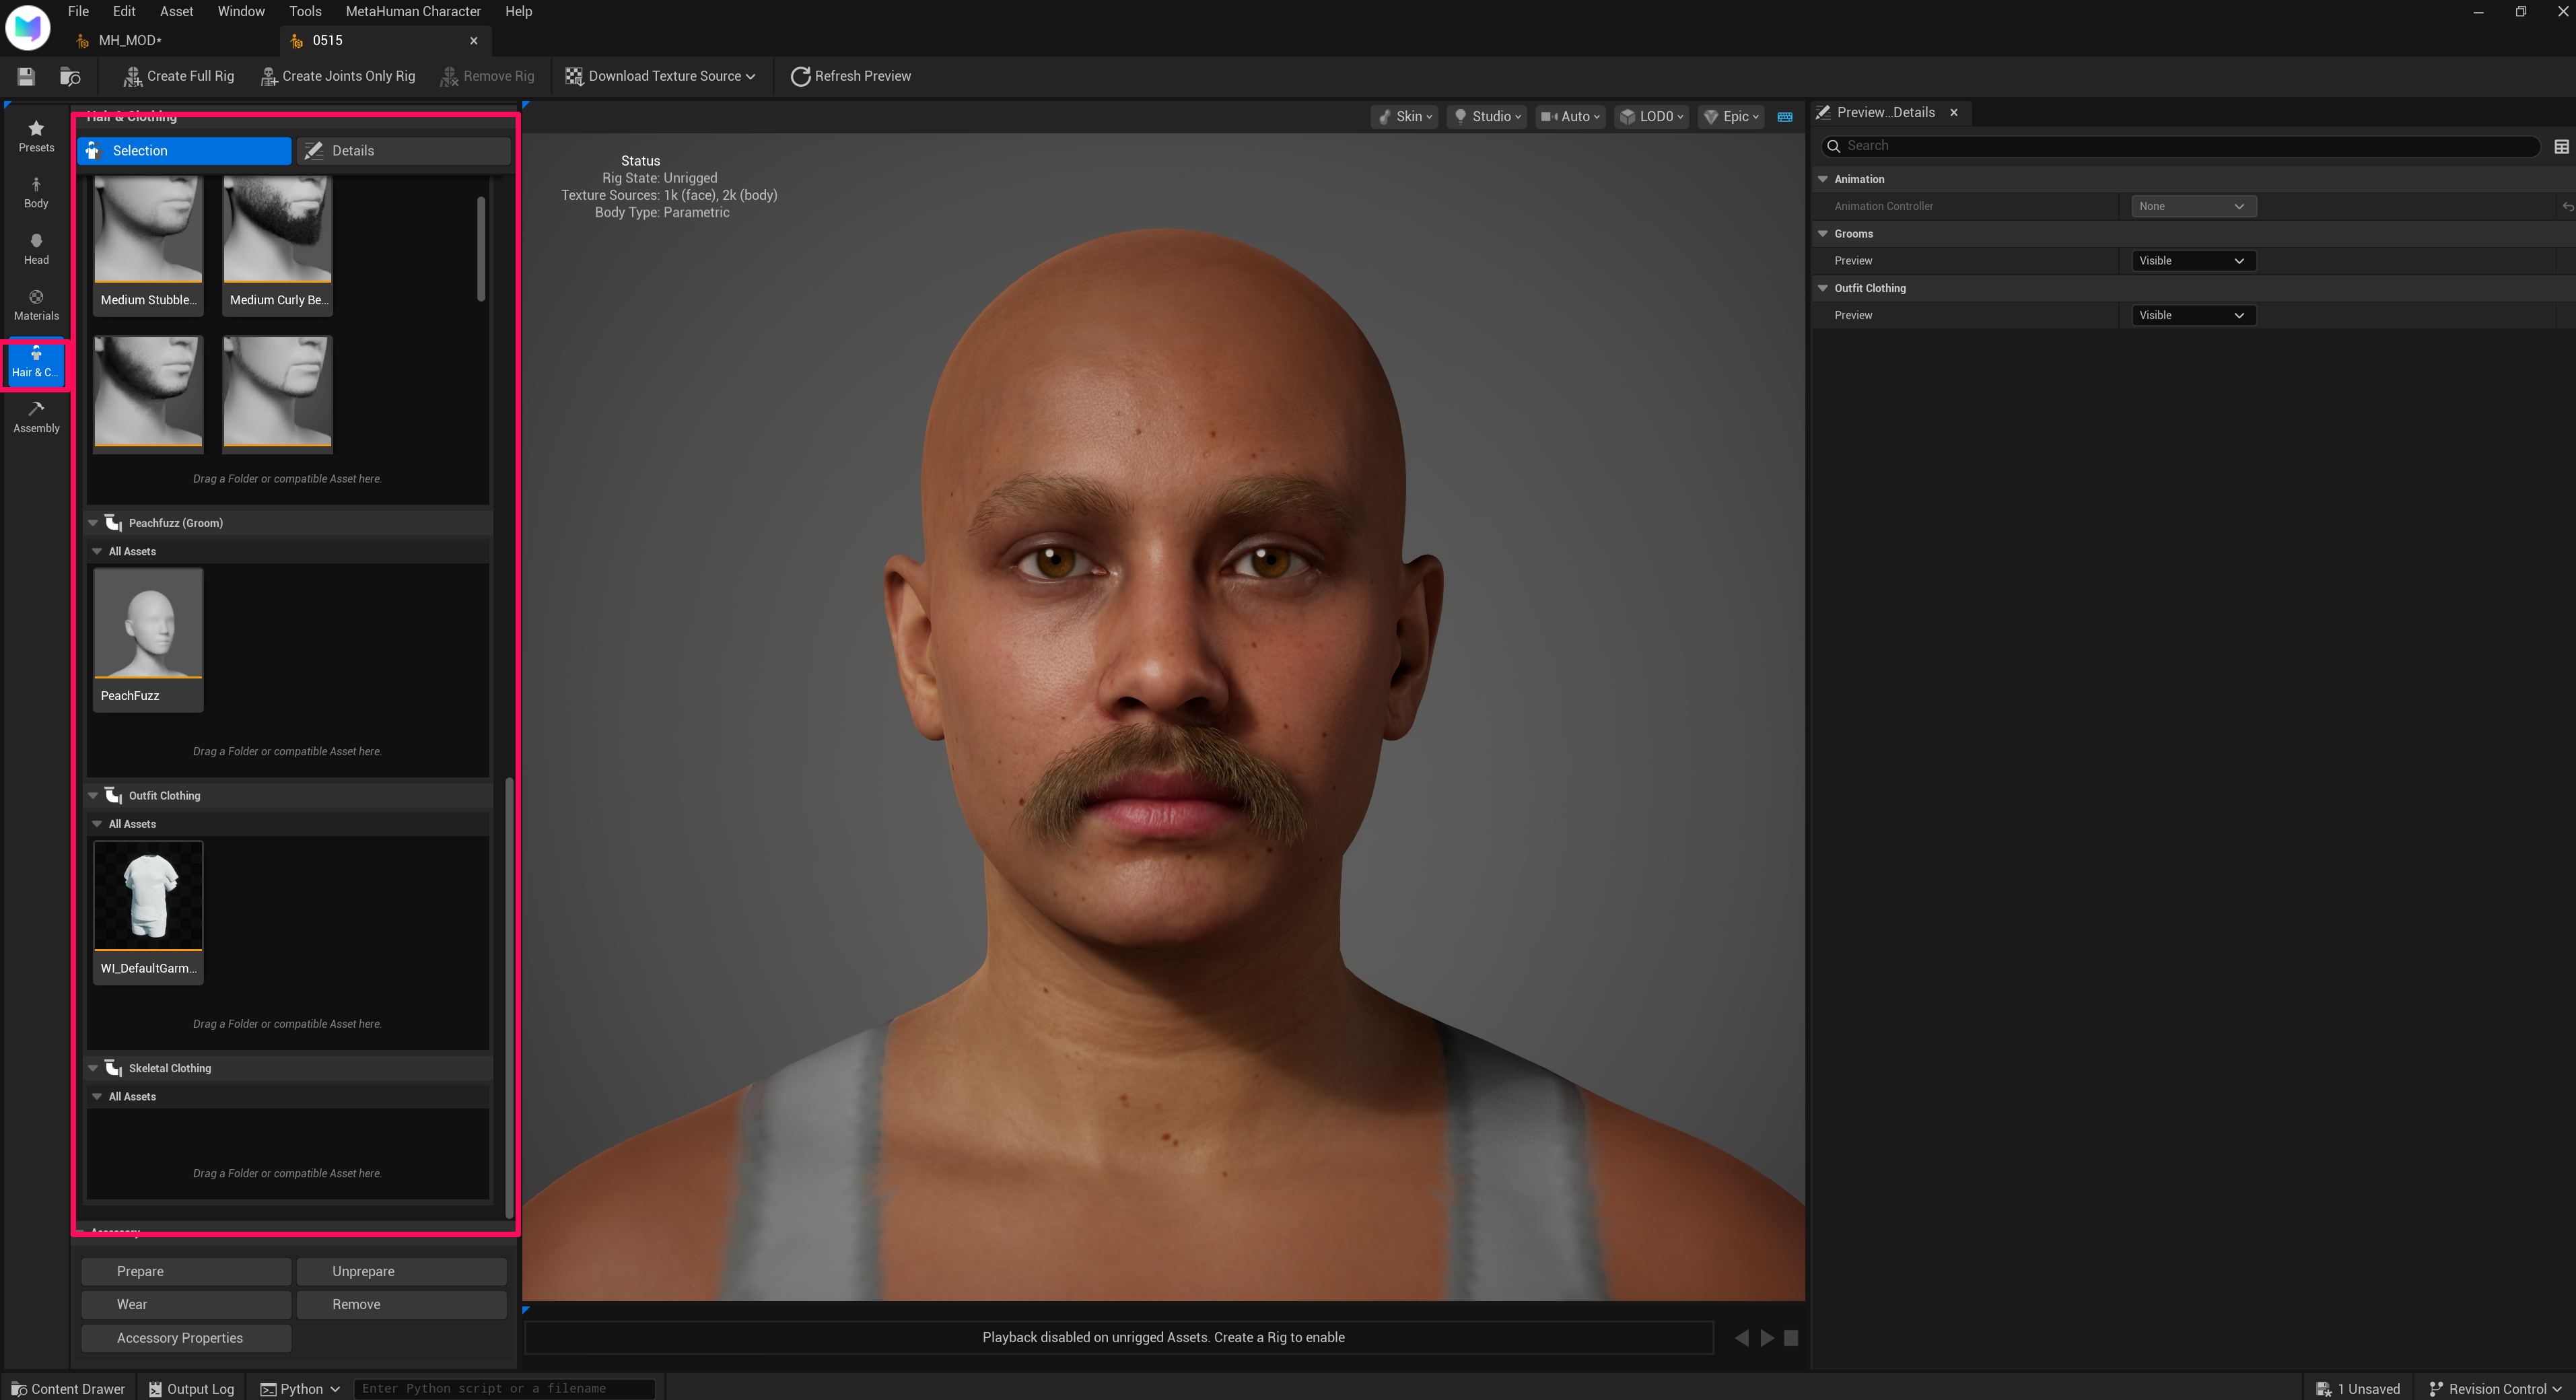
1. Select Facial Hair in Hair & Clothing Tab
Once you've finished the body and face setup using the standard face modding process, open the Hair & Clothing tab and select Eyebrows, Eyelashes, Mustache, and Beard. (Hair is created separately.)
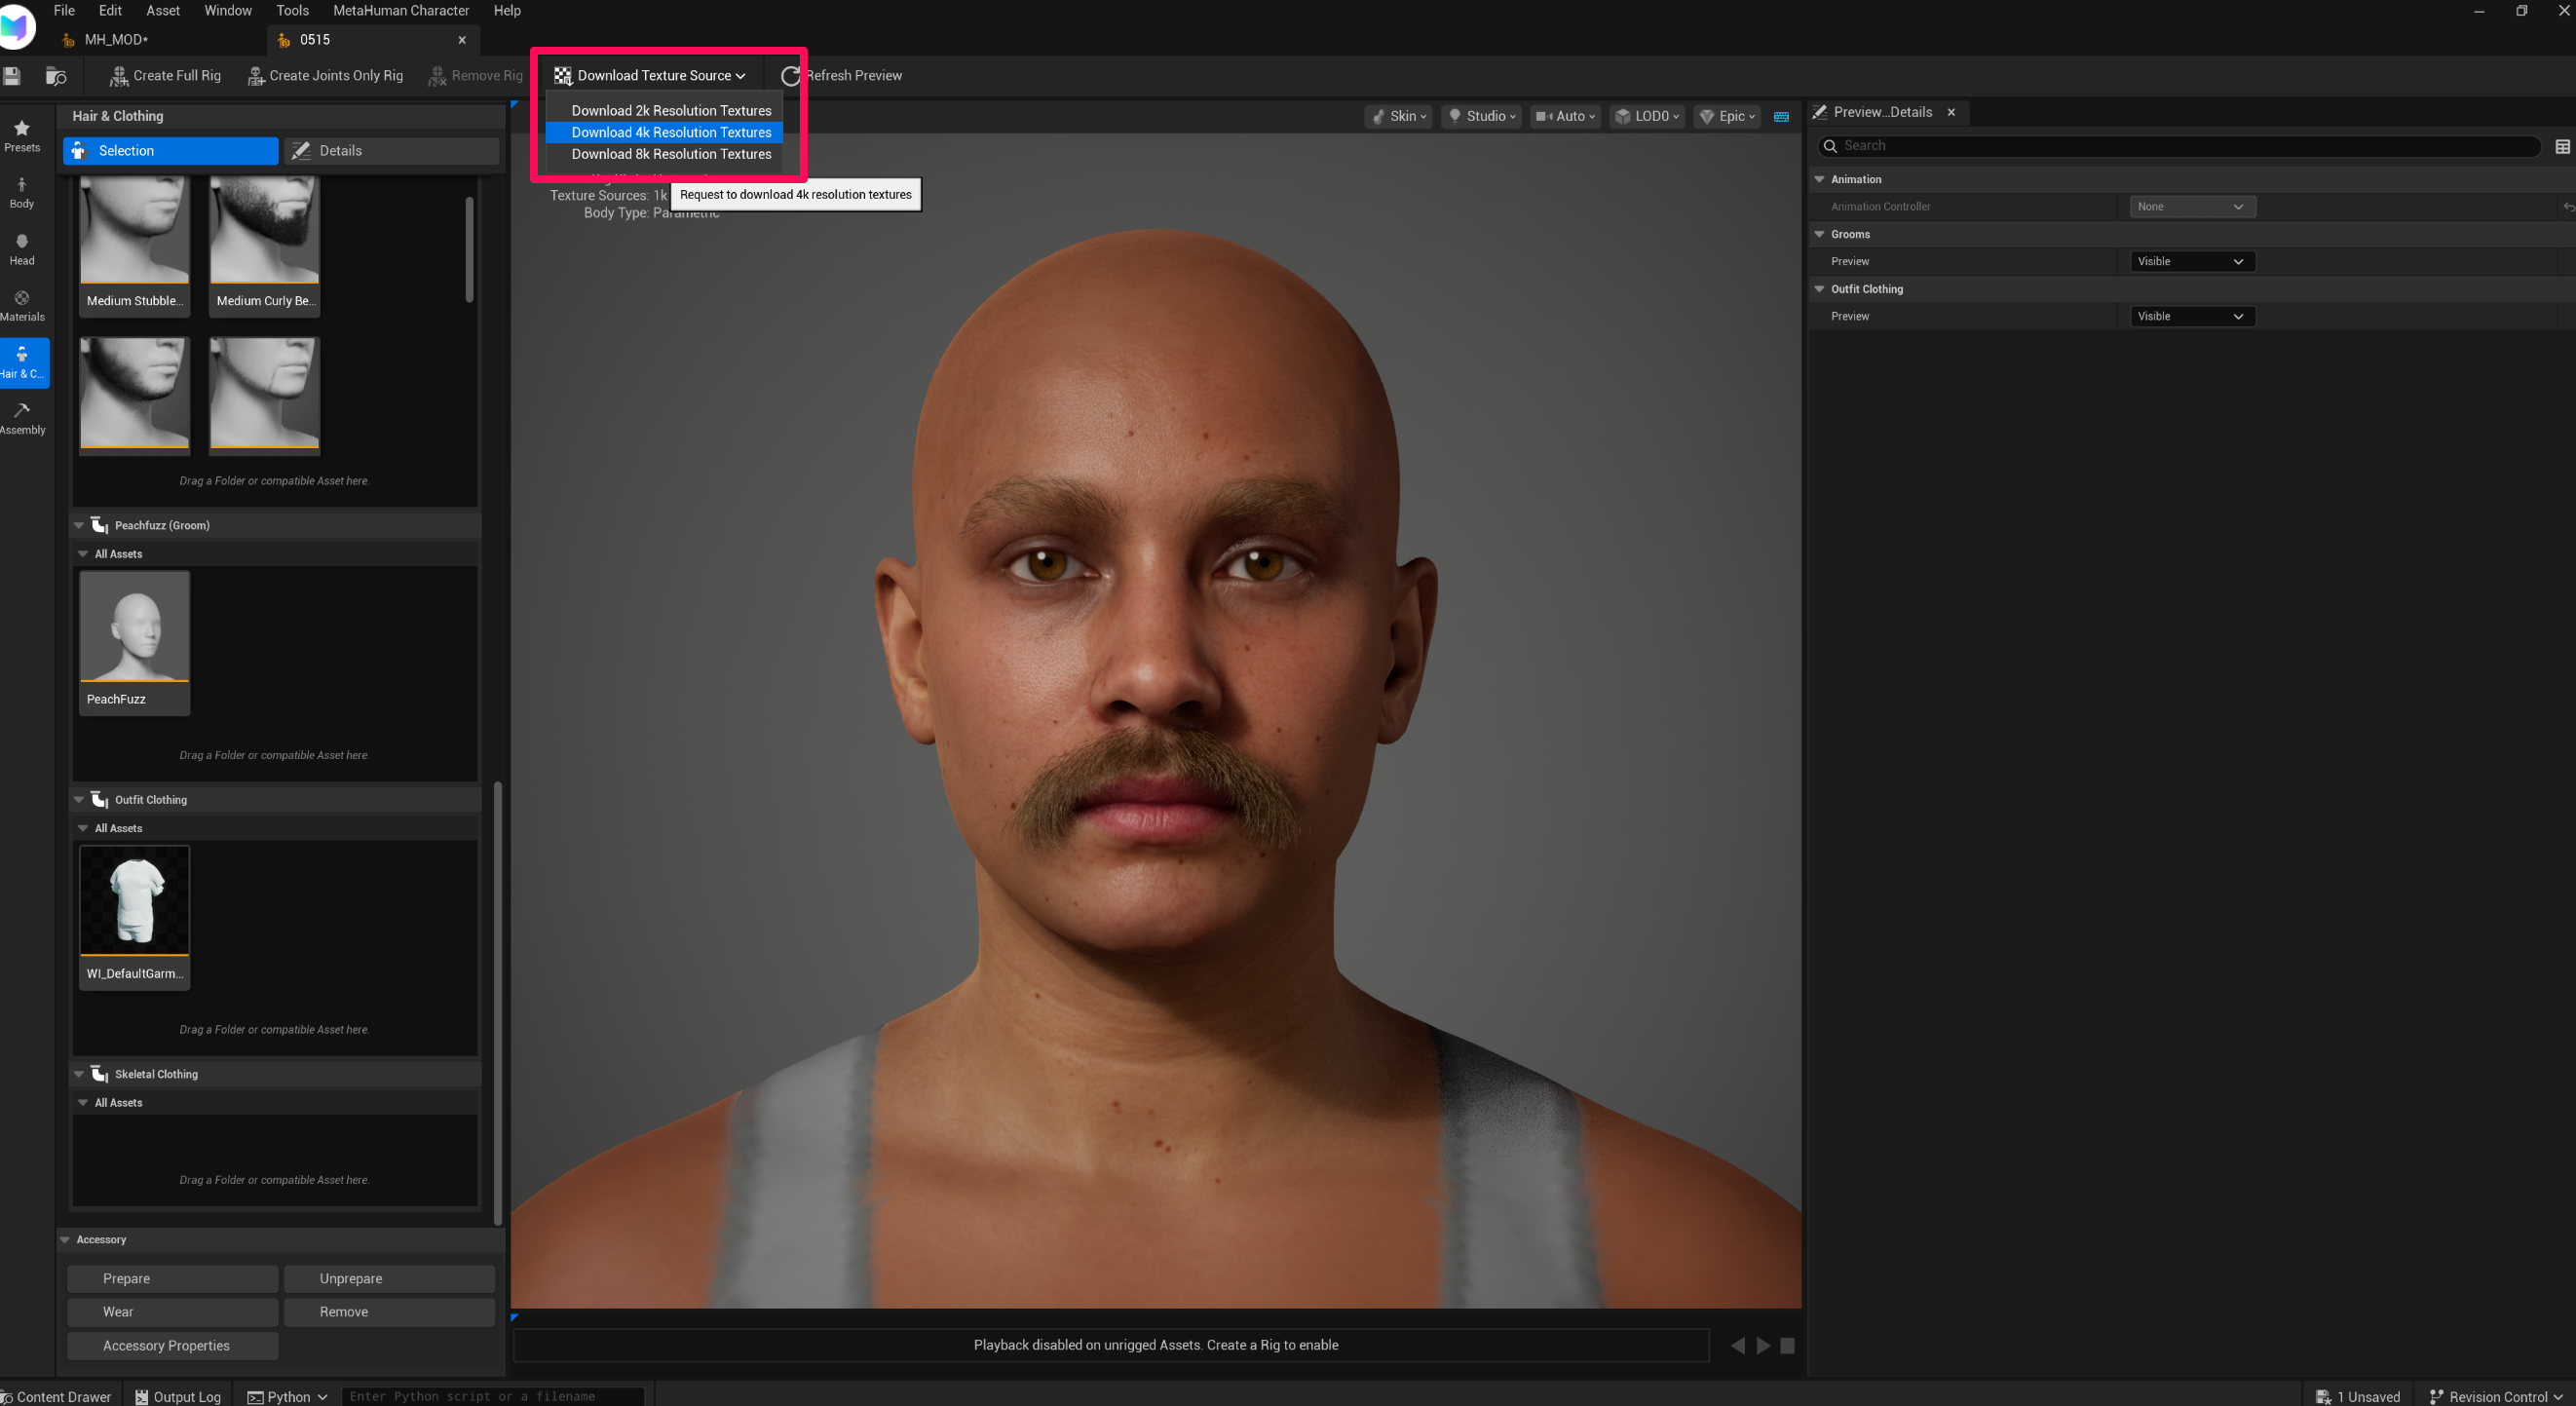
2. Download Texture Source
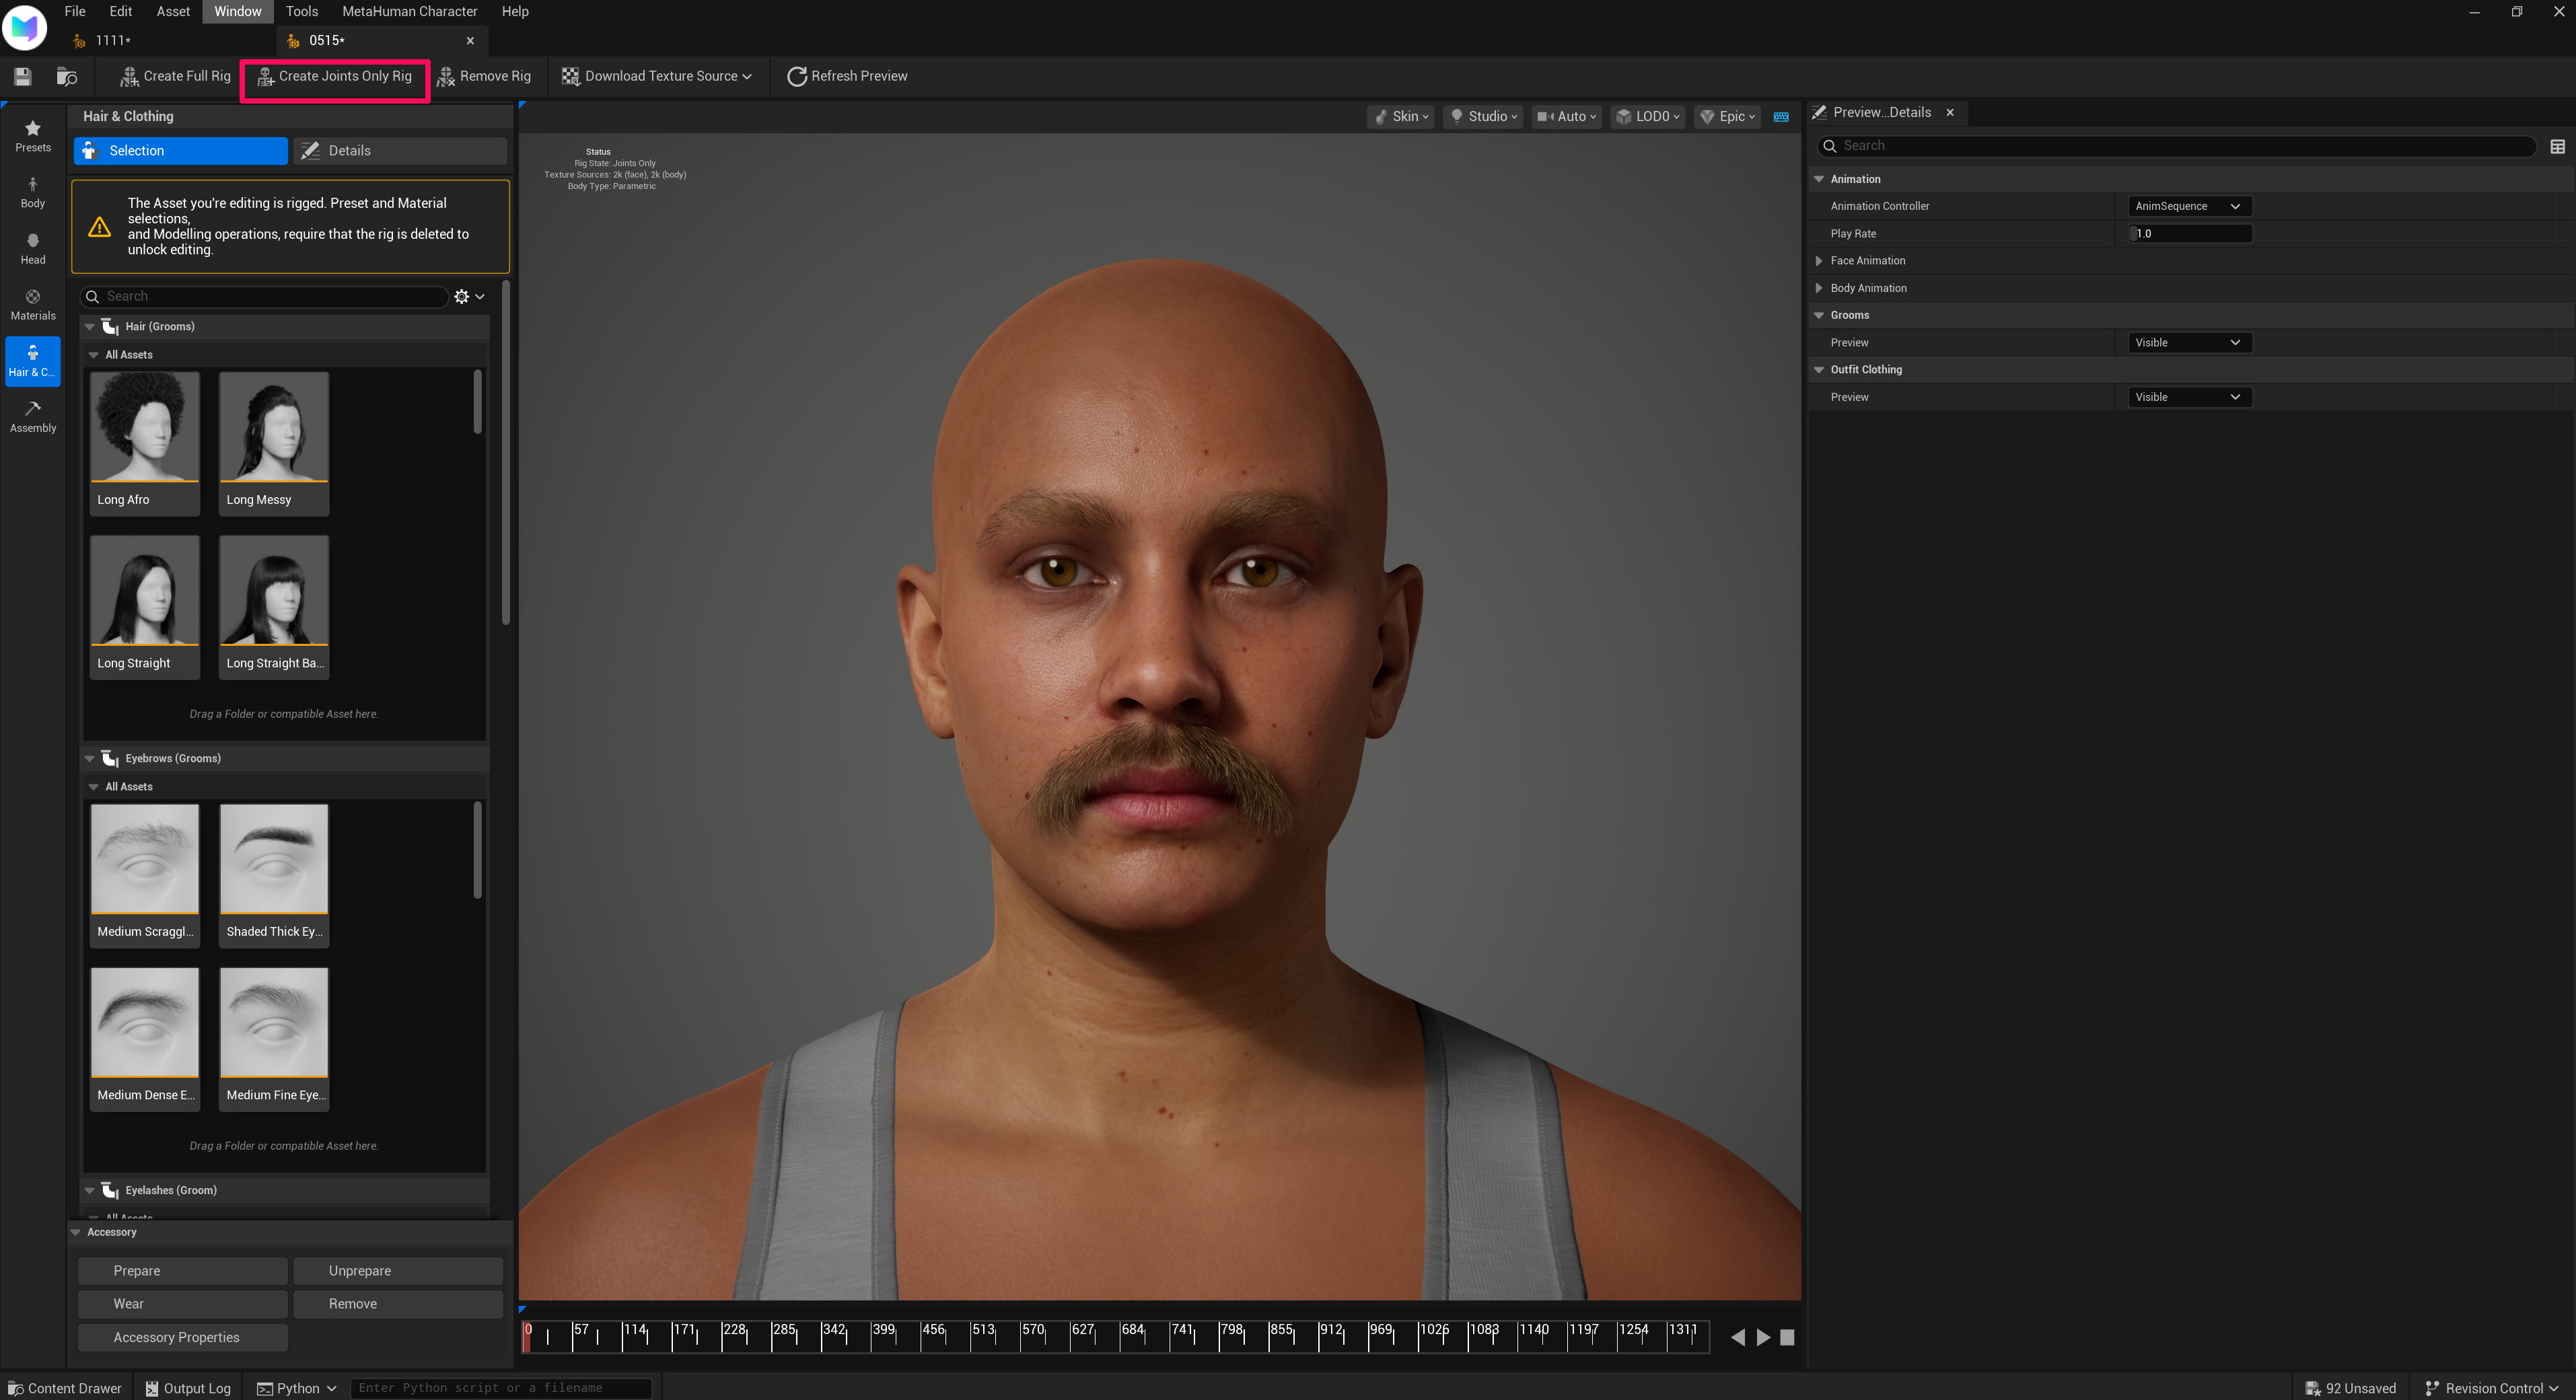
3. Run Create Joints Only Rig
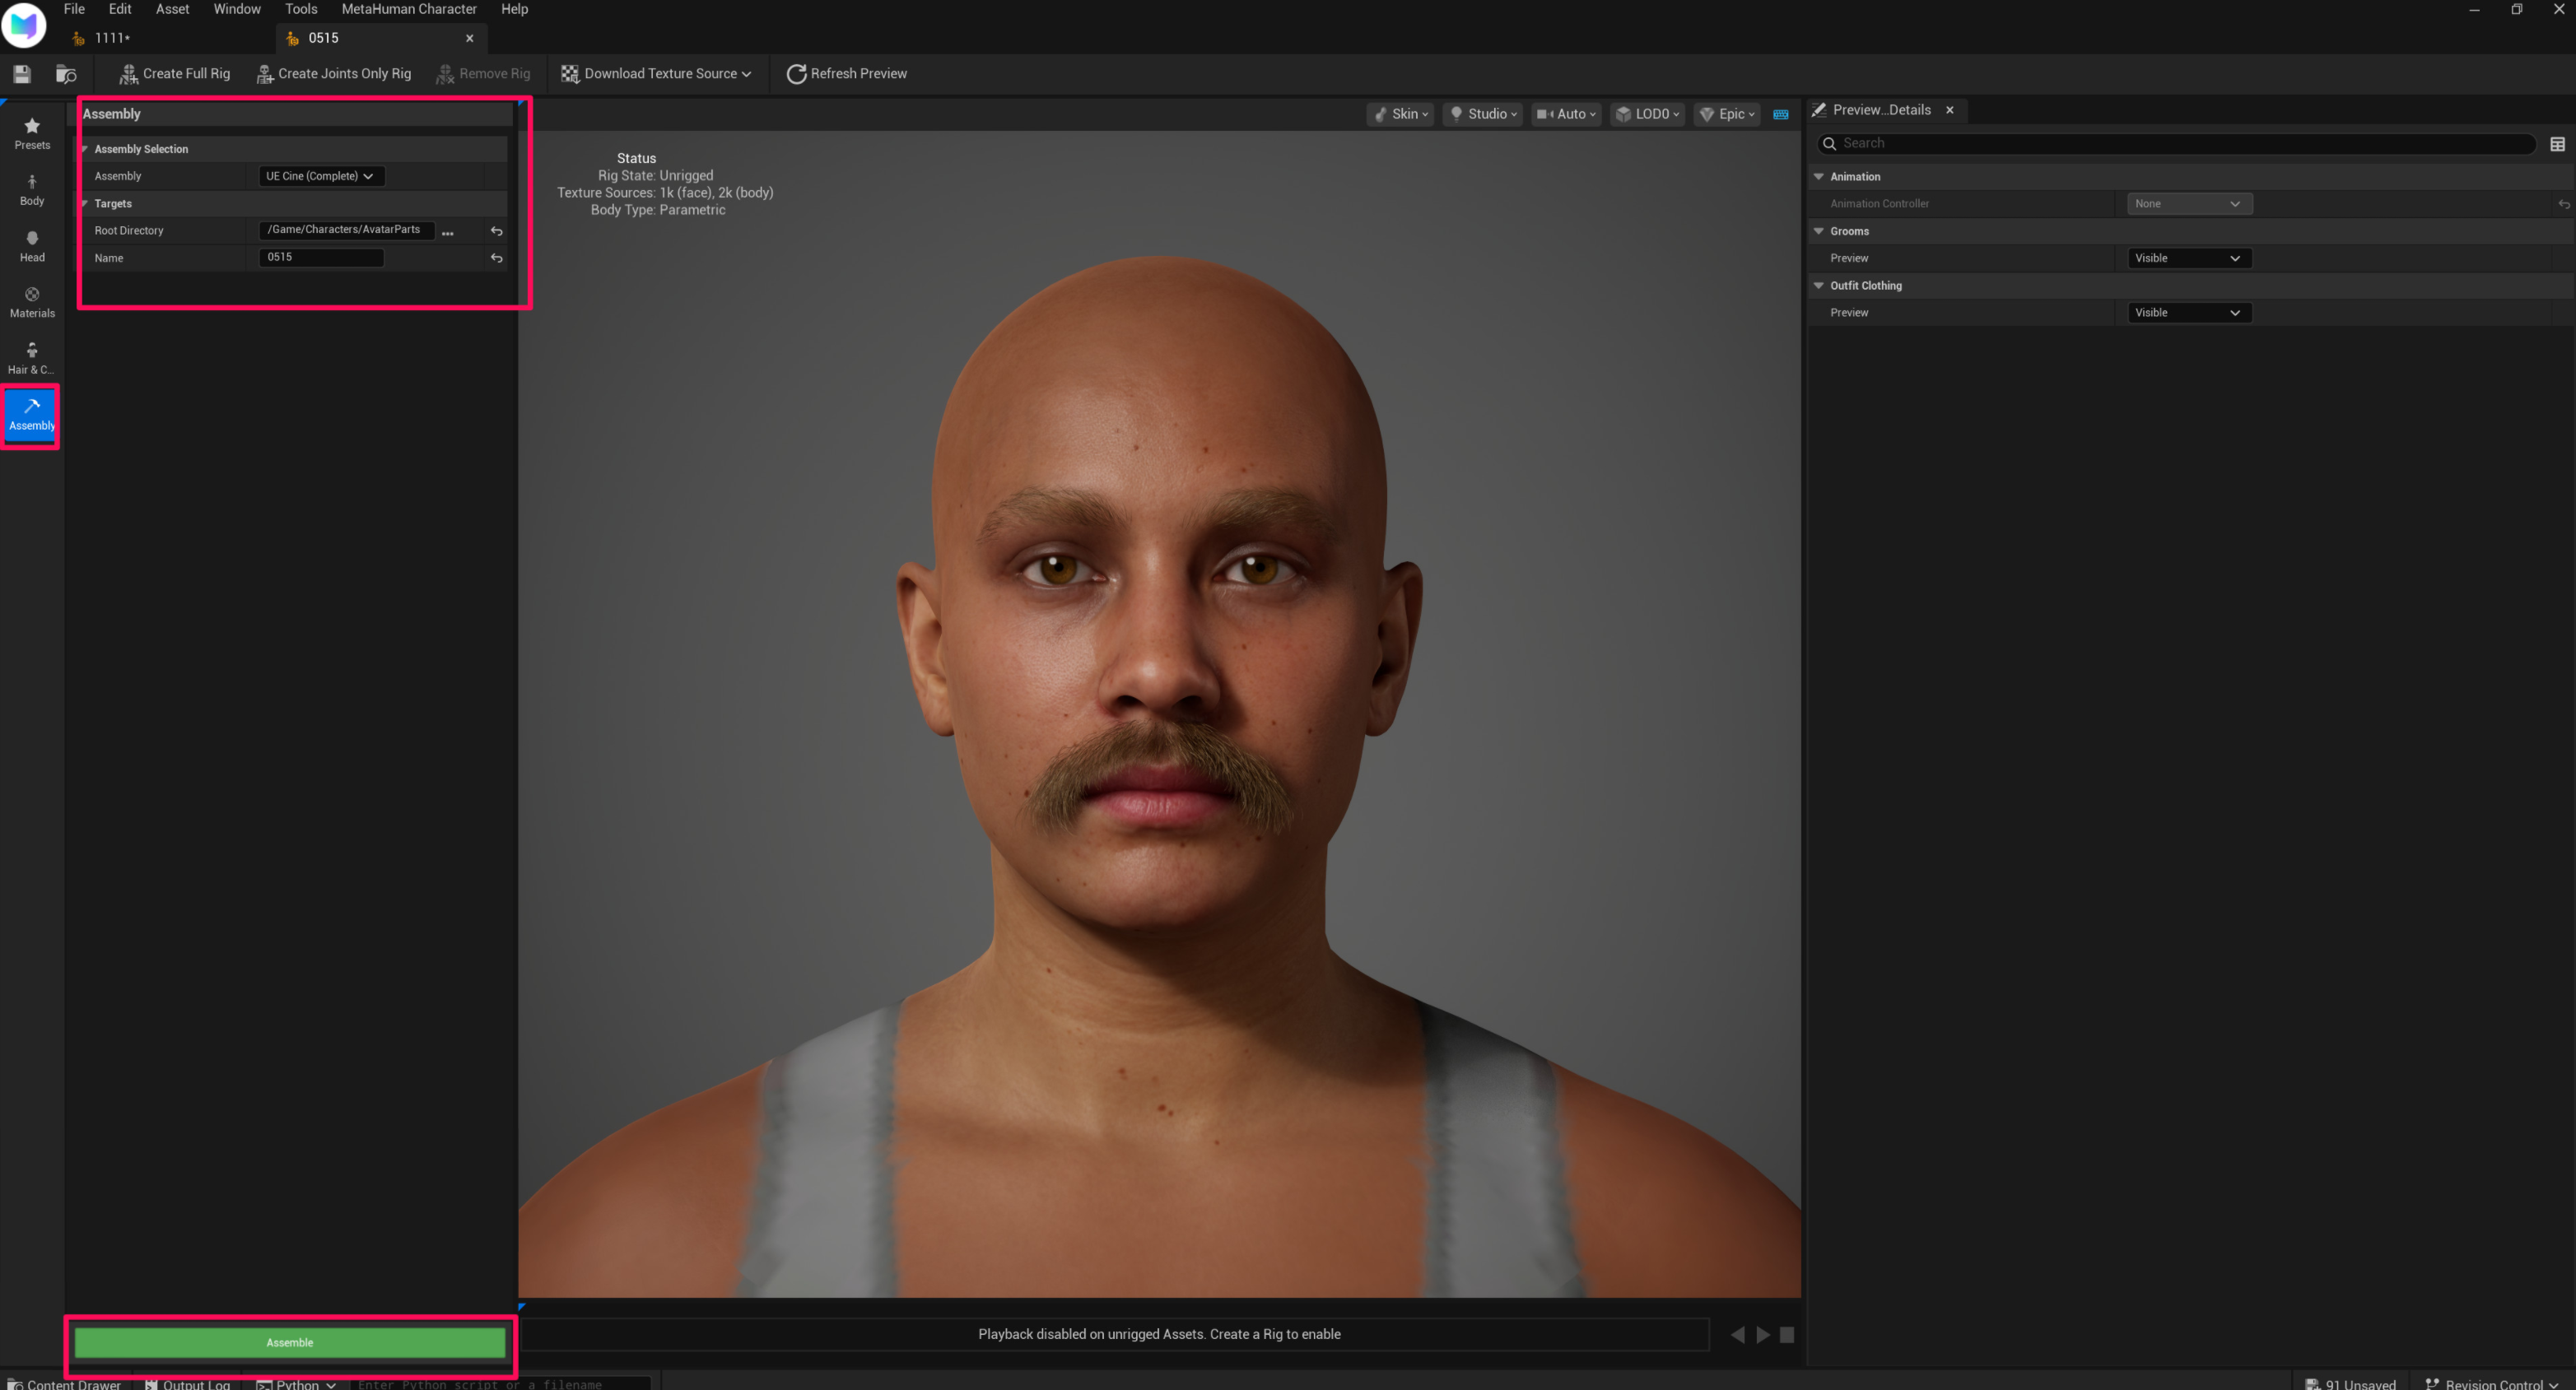
4. Assembly — Set Resource Paths
In the Assembly section, set the resource paths for the eyebrow and beard assets you created.
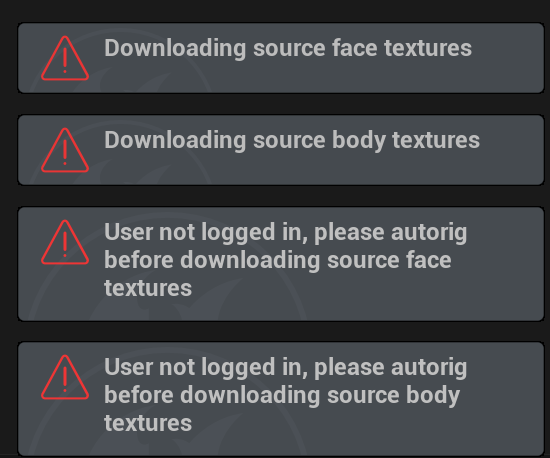
5. Epic Login Required (if error appears)
If the following error appears, you'll need to sign in to Epic.
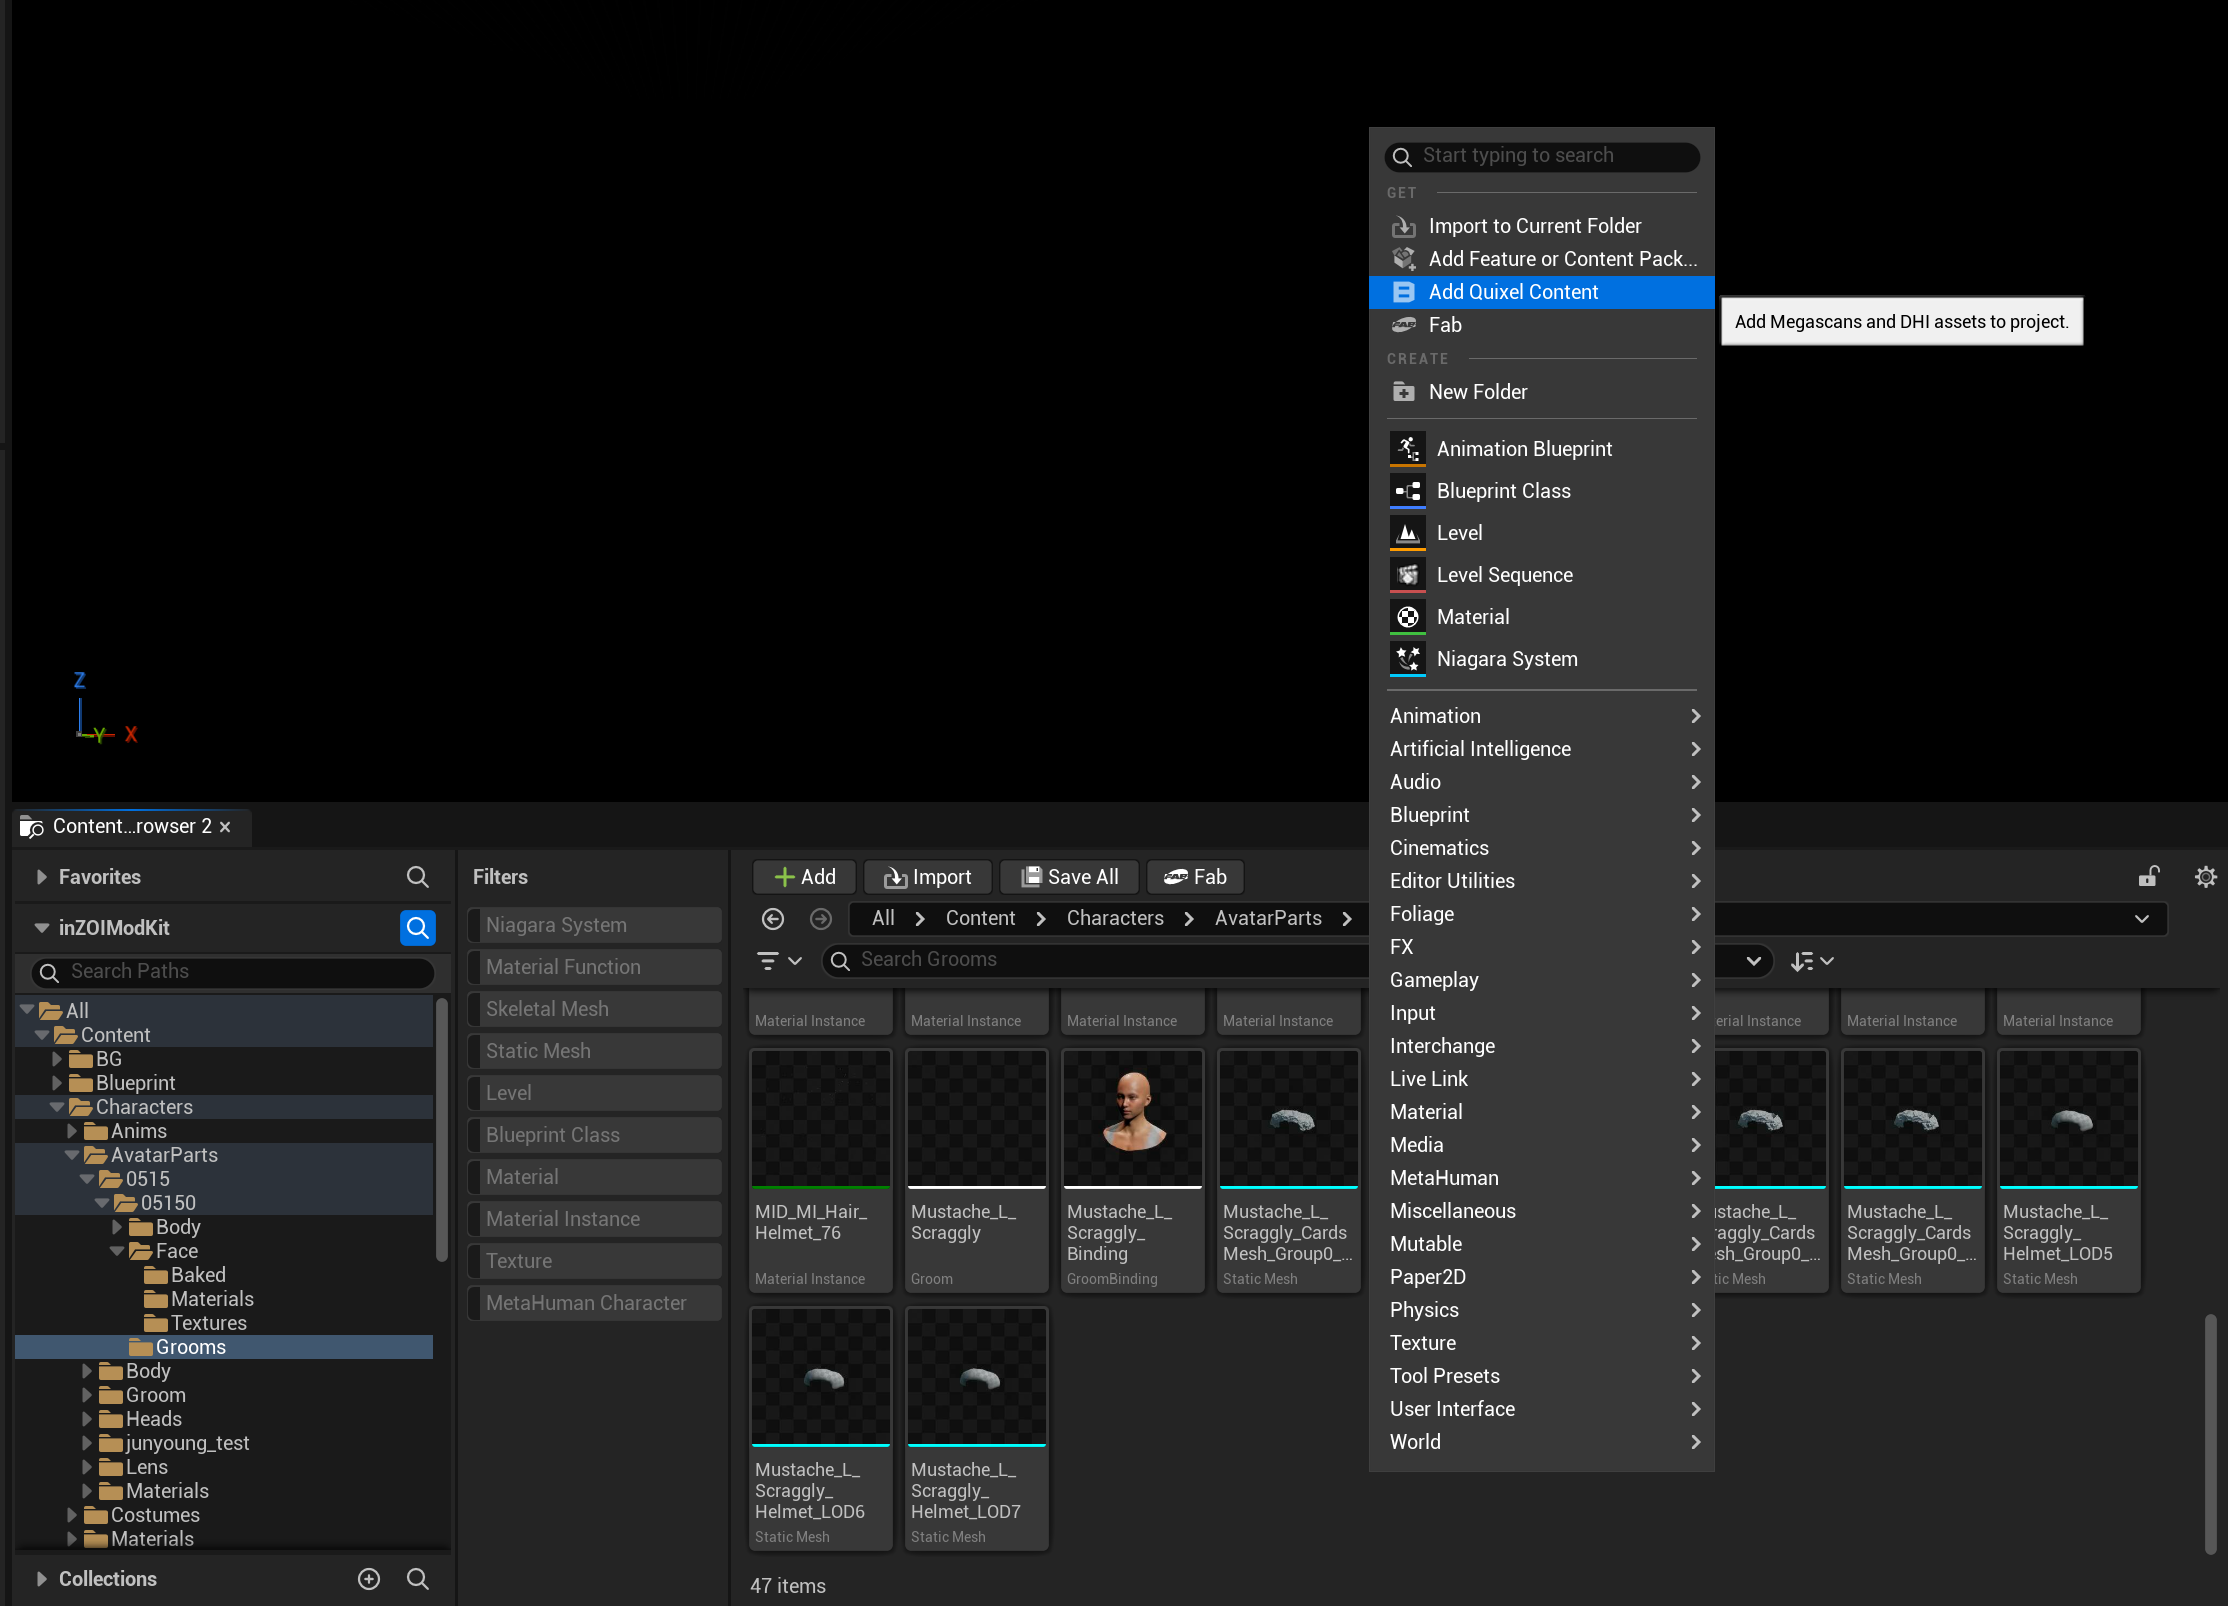
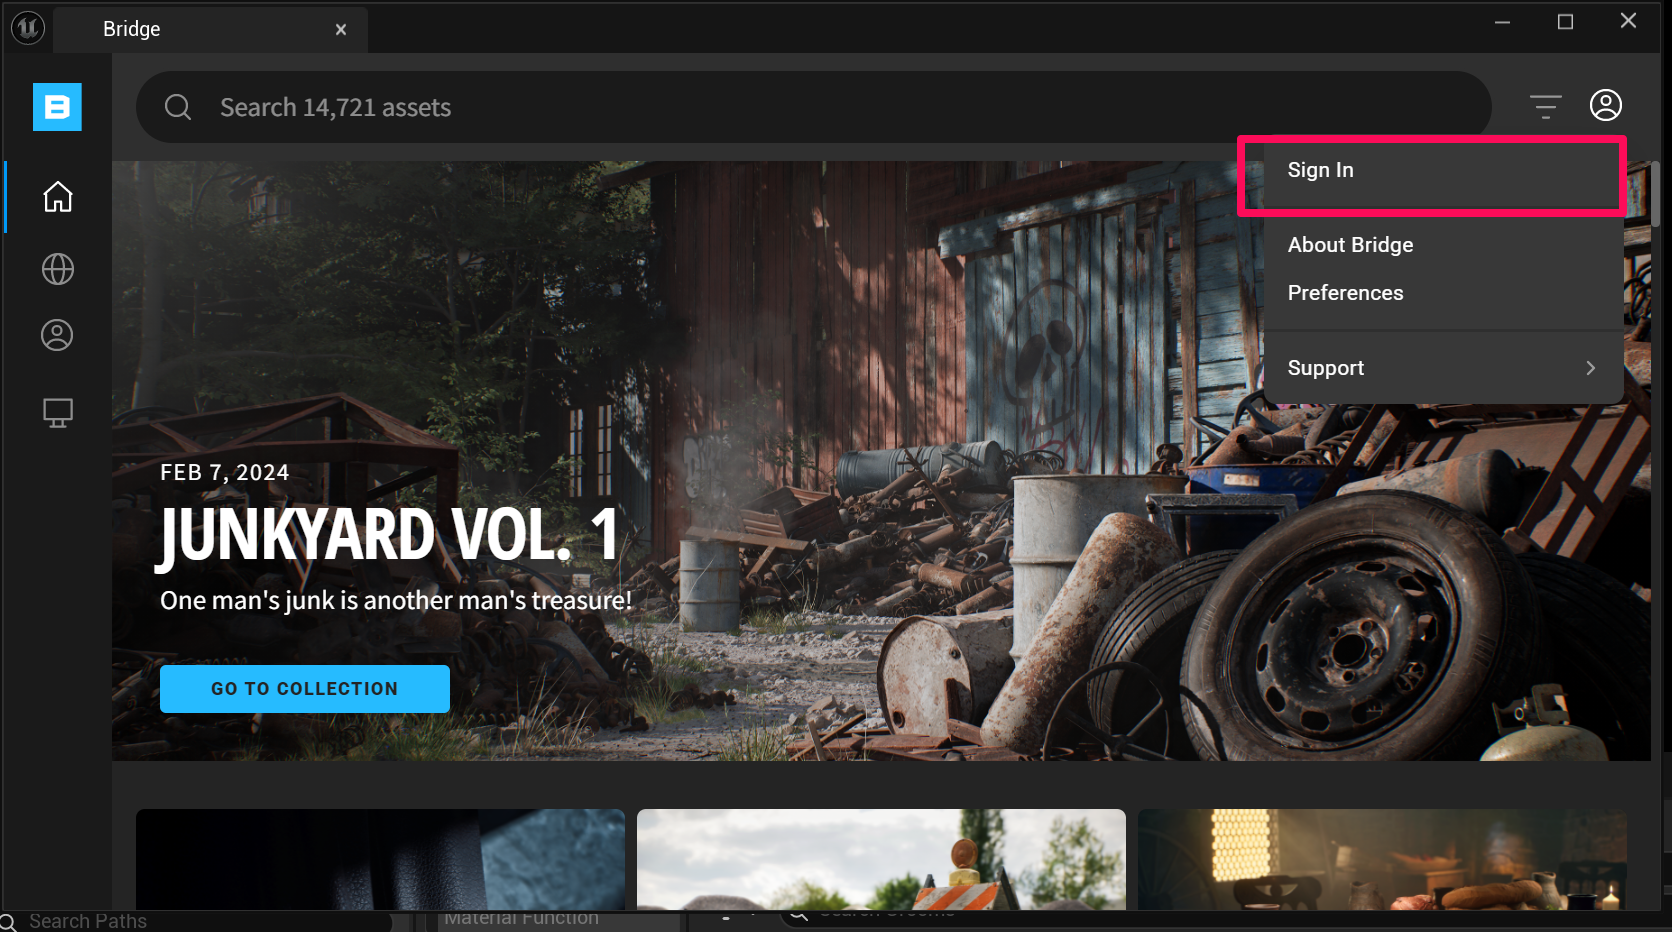
In the Content Browser, right-click an empty area → Context Menu → Add Quixel Content → Sign In. Once you're signed in, Download Texture Source will work as expected.
6. Complete Assembly
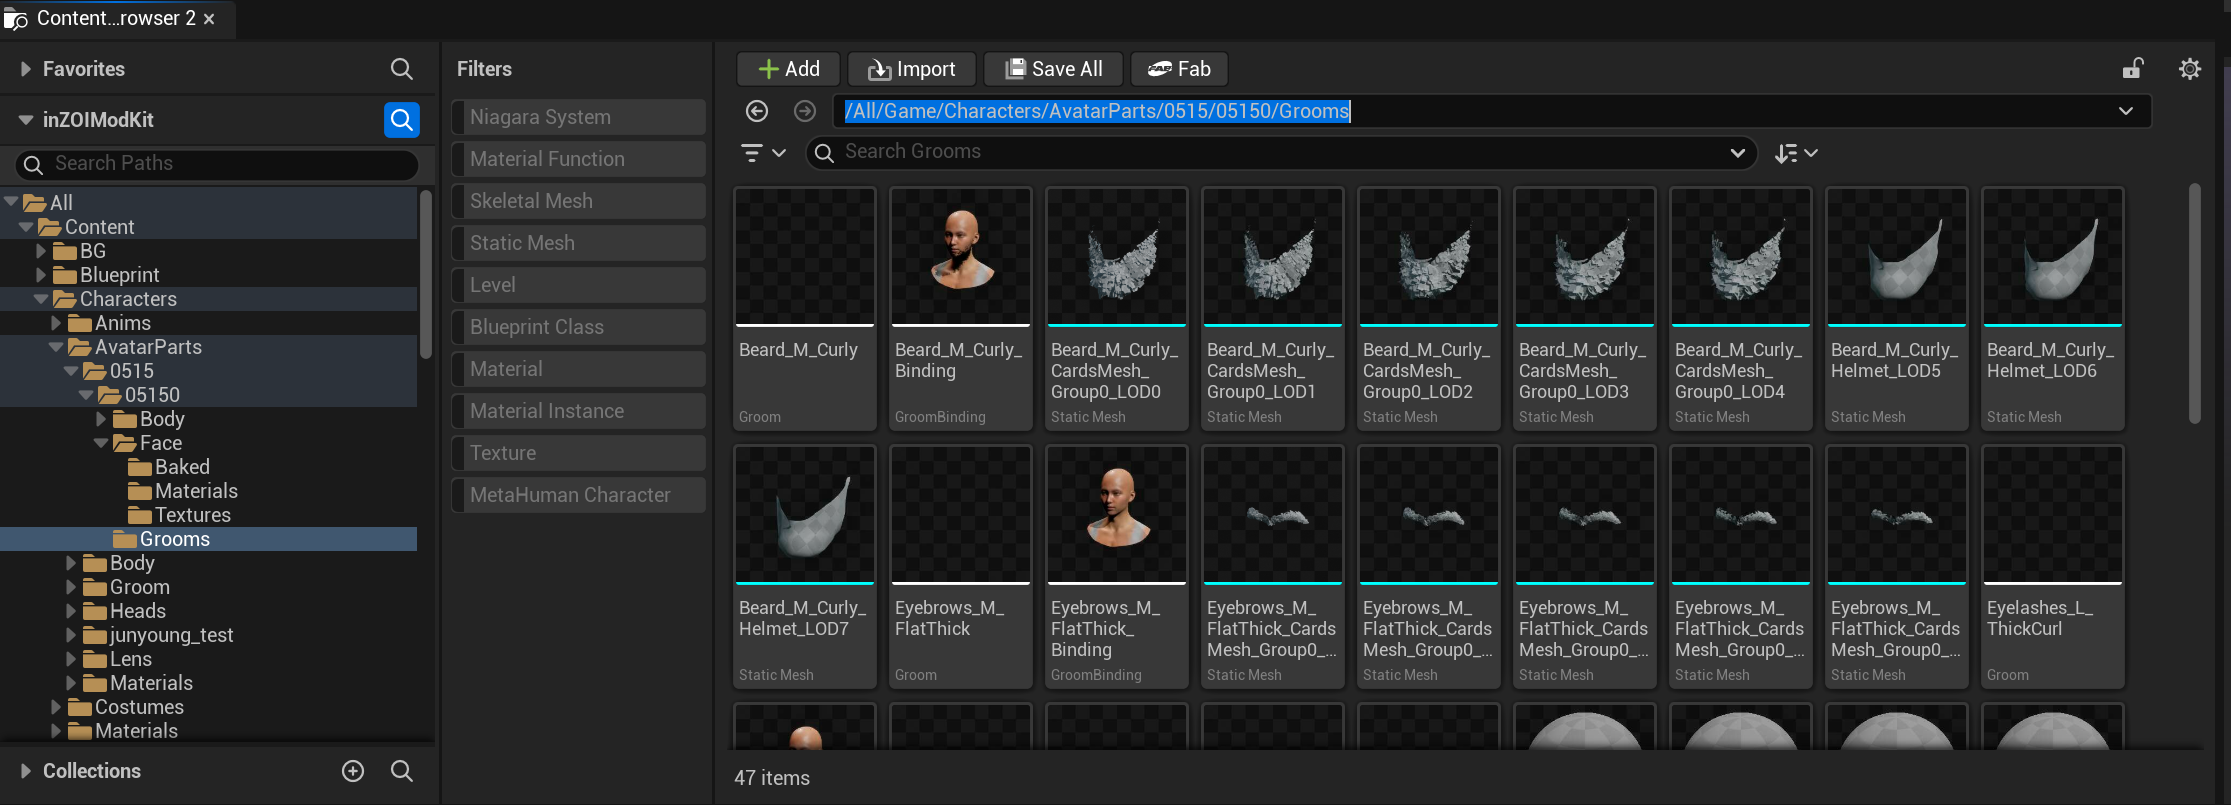
Download the texture source and create the joints-only rig as in the standard modding process, then run Assembly. The process is complete once the assets appear at the preset path /All/Game/Characters/AvatarParts/0515/05150/Grooms.
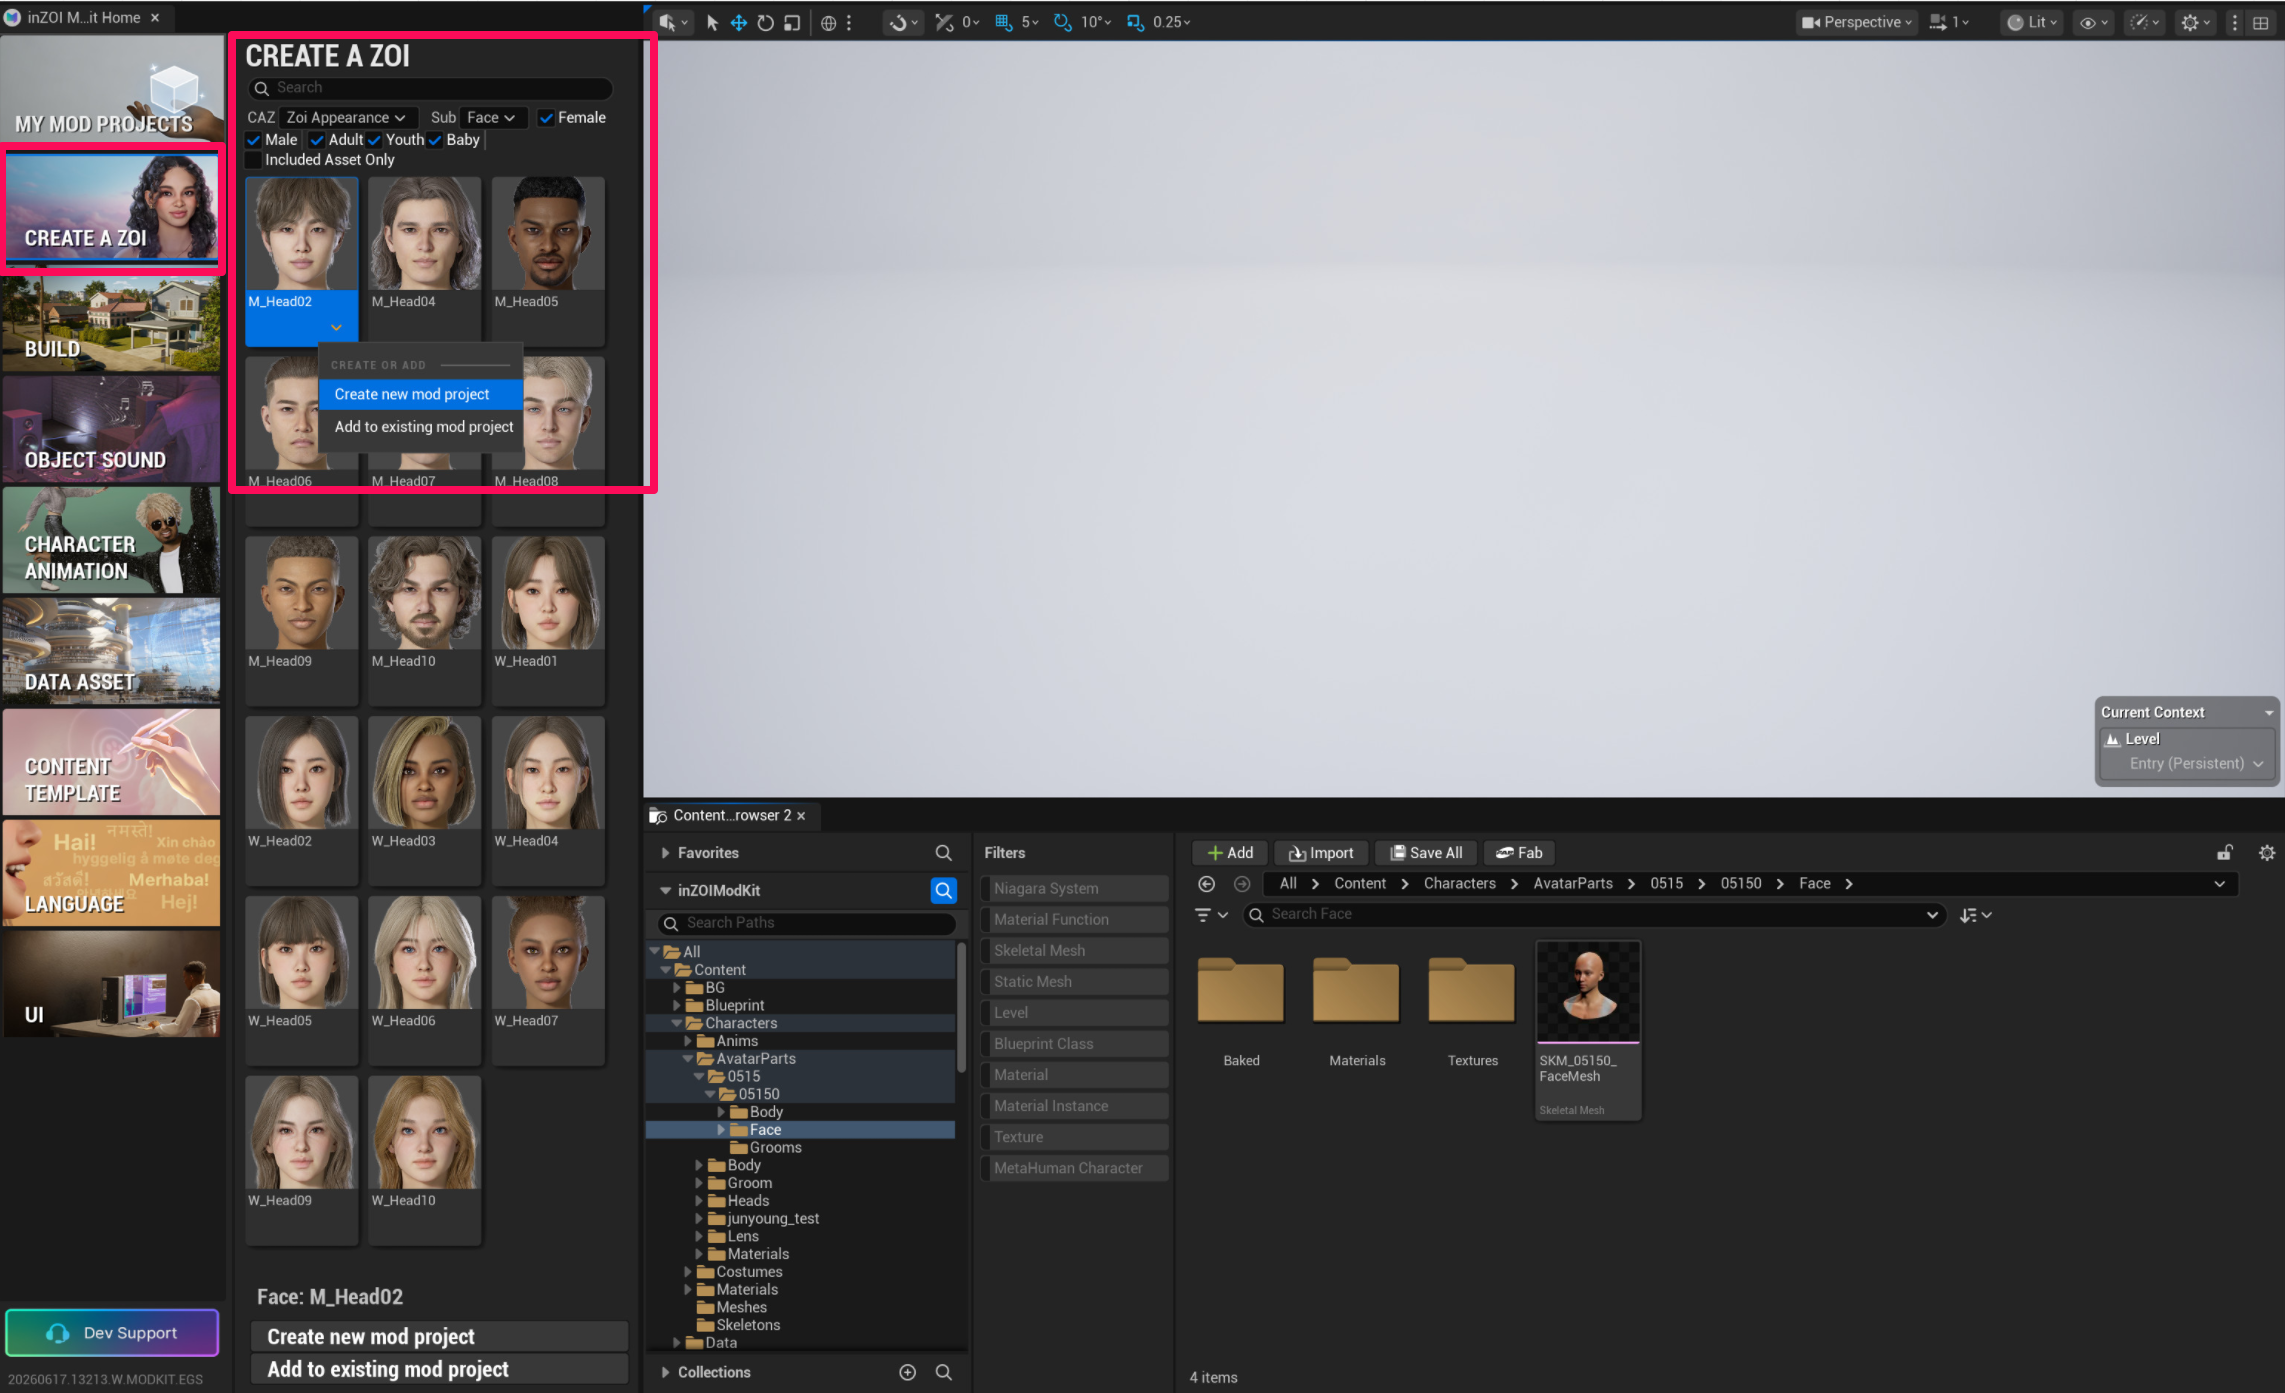
7. Create a Zoi — Face → M_Head02
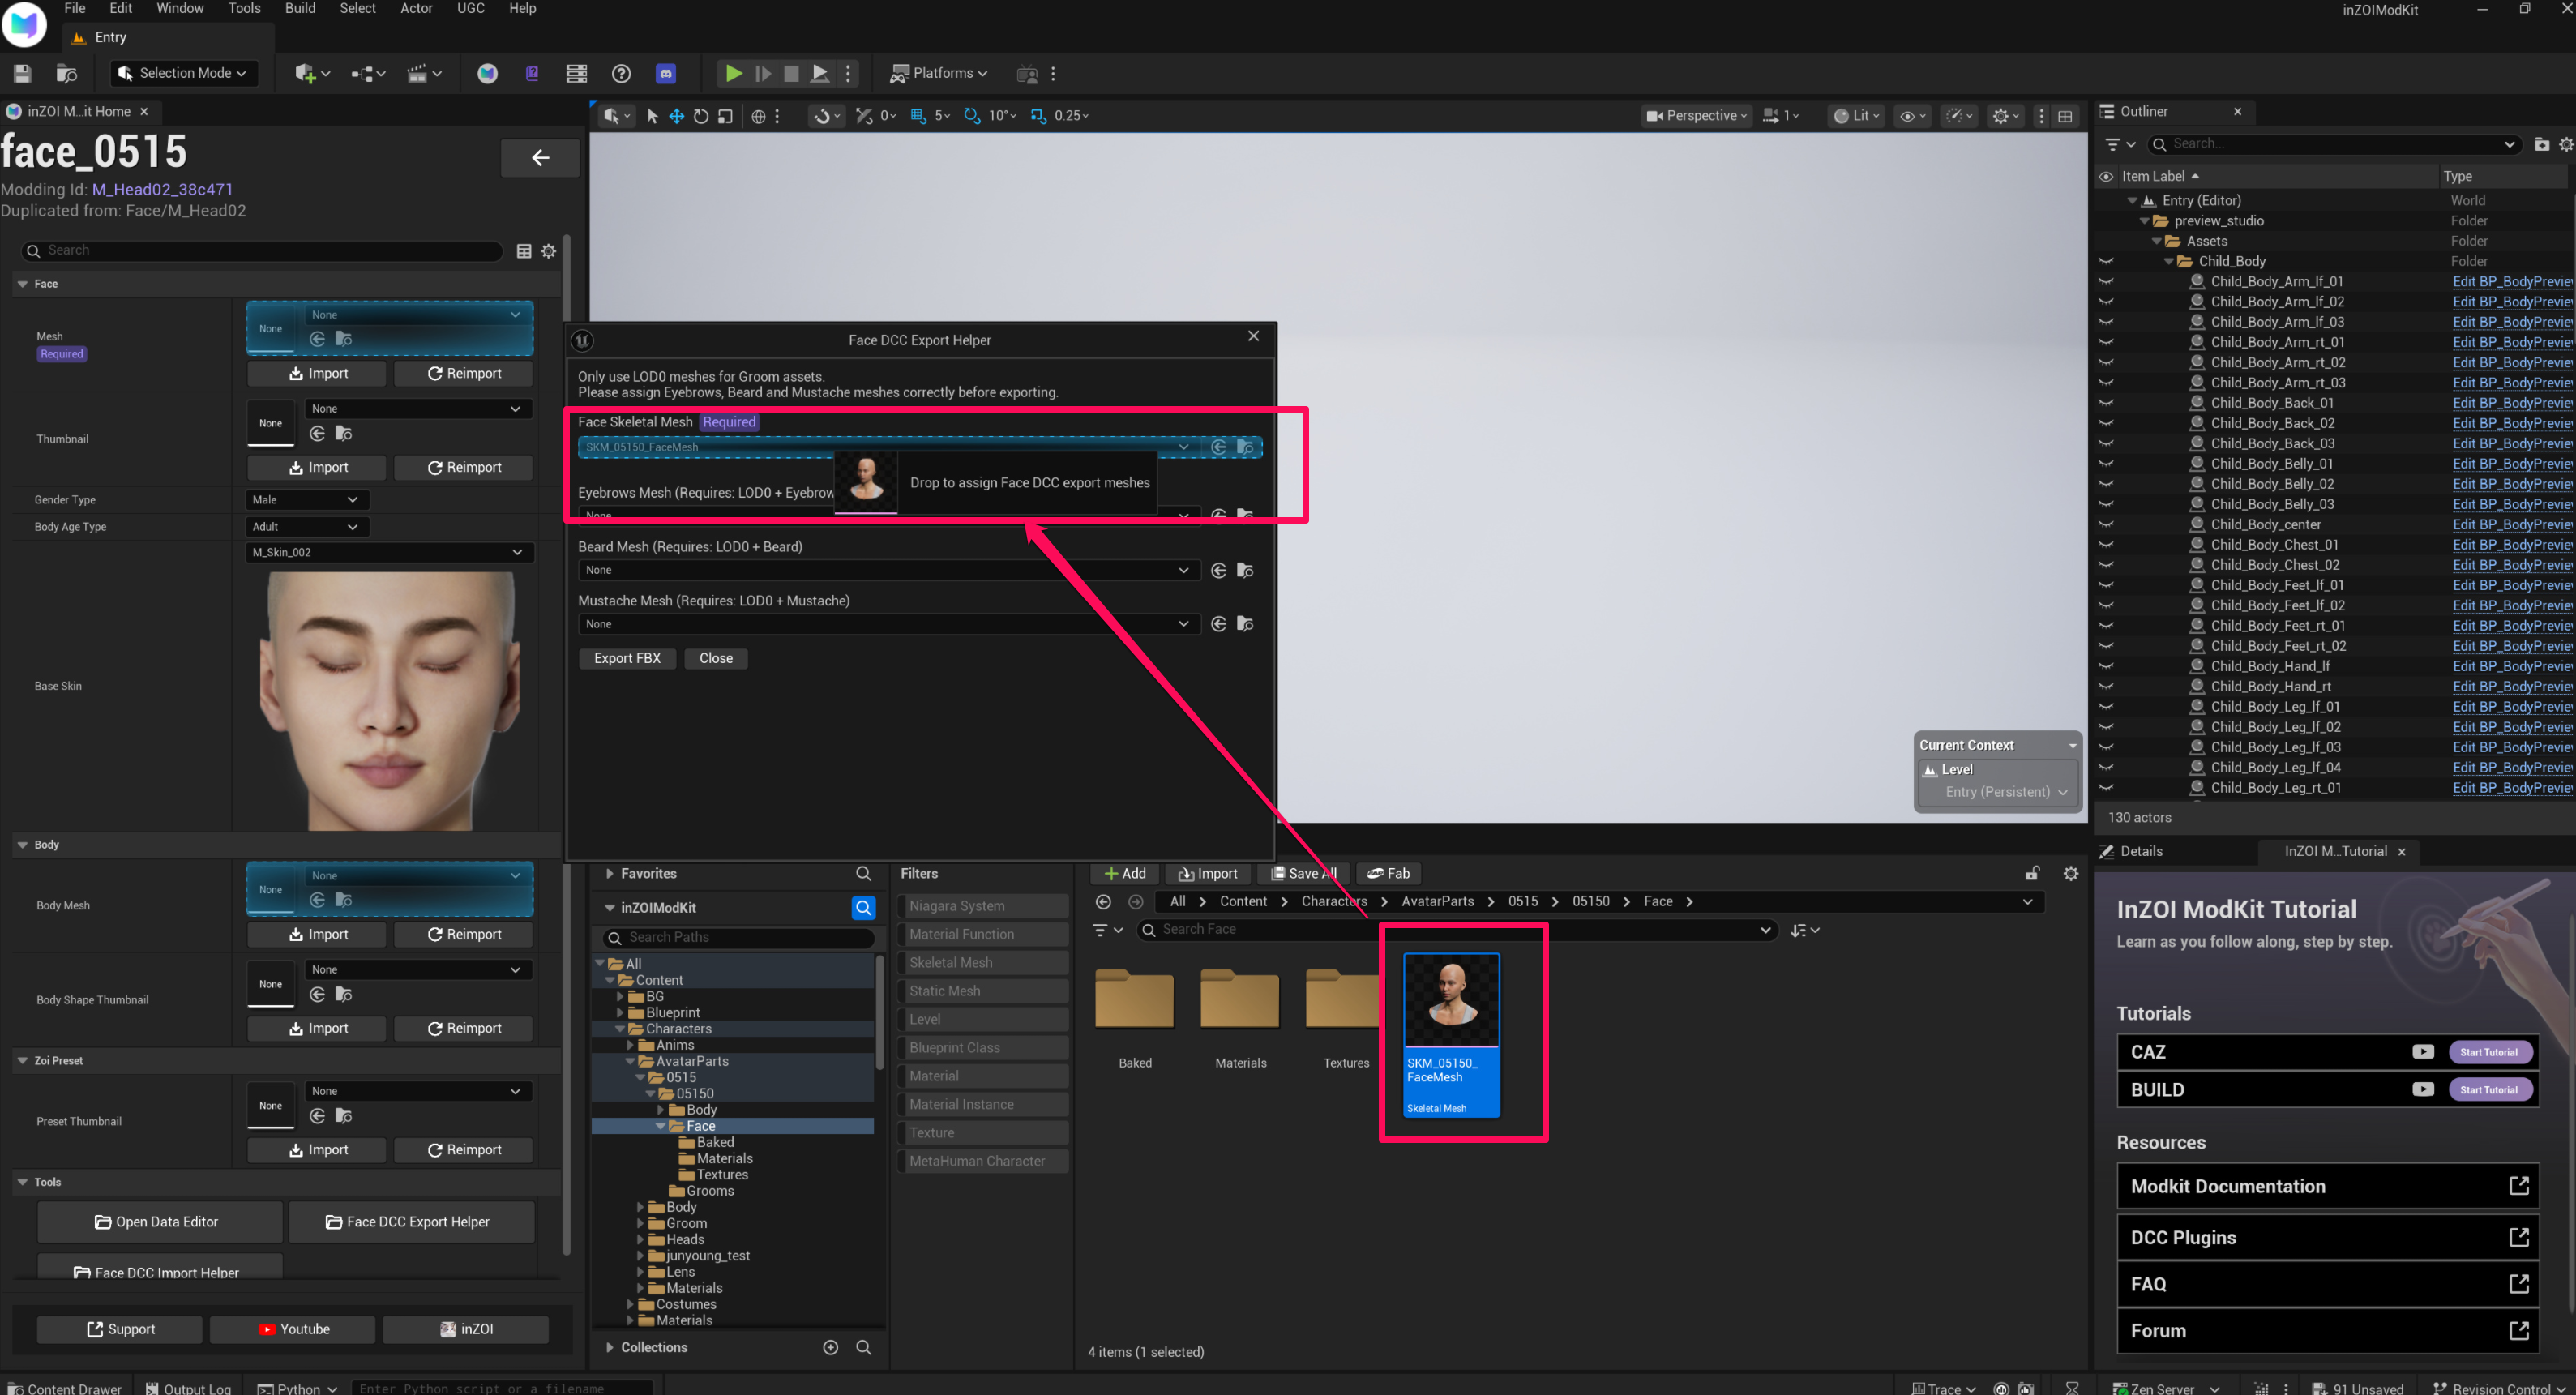
8. Export Face Skeletal Mesh
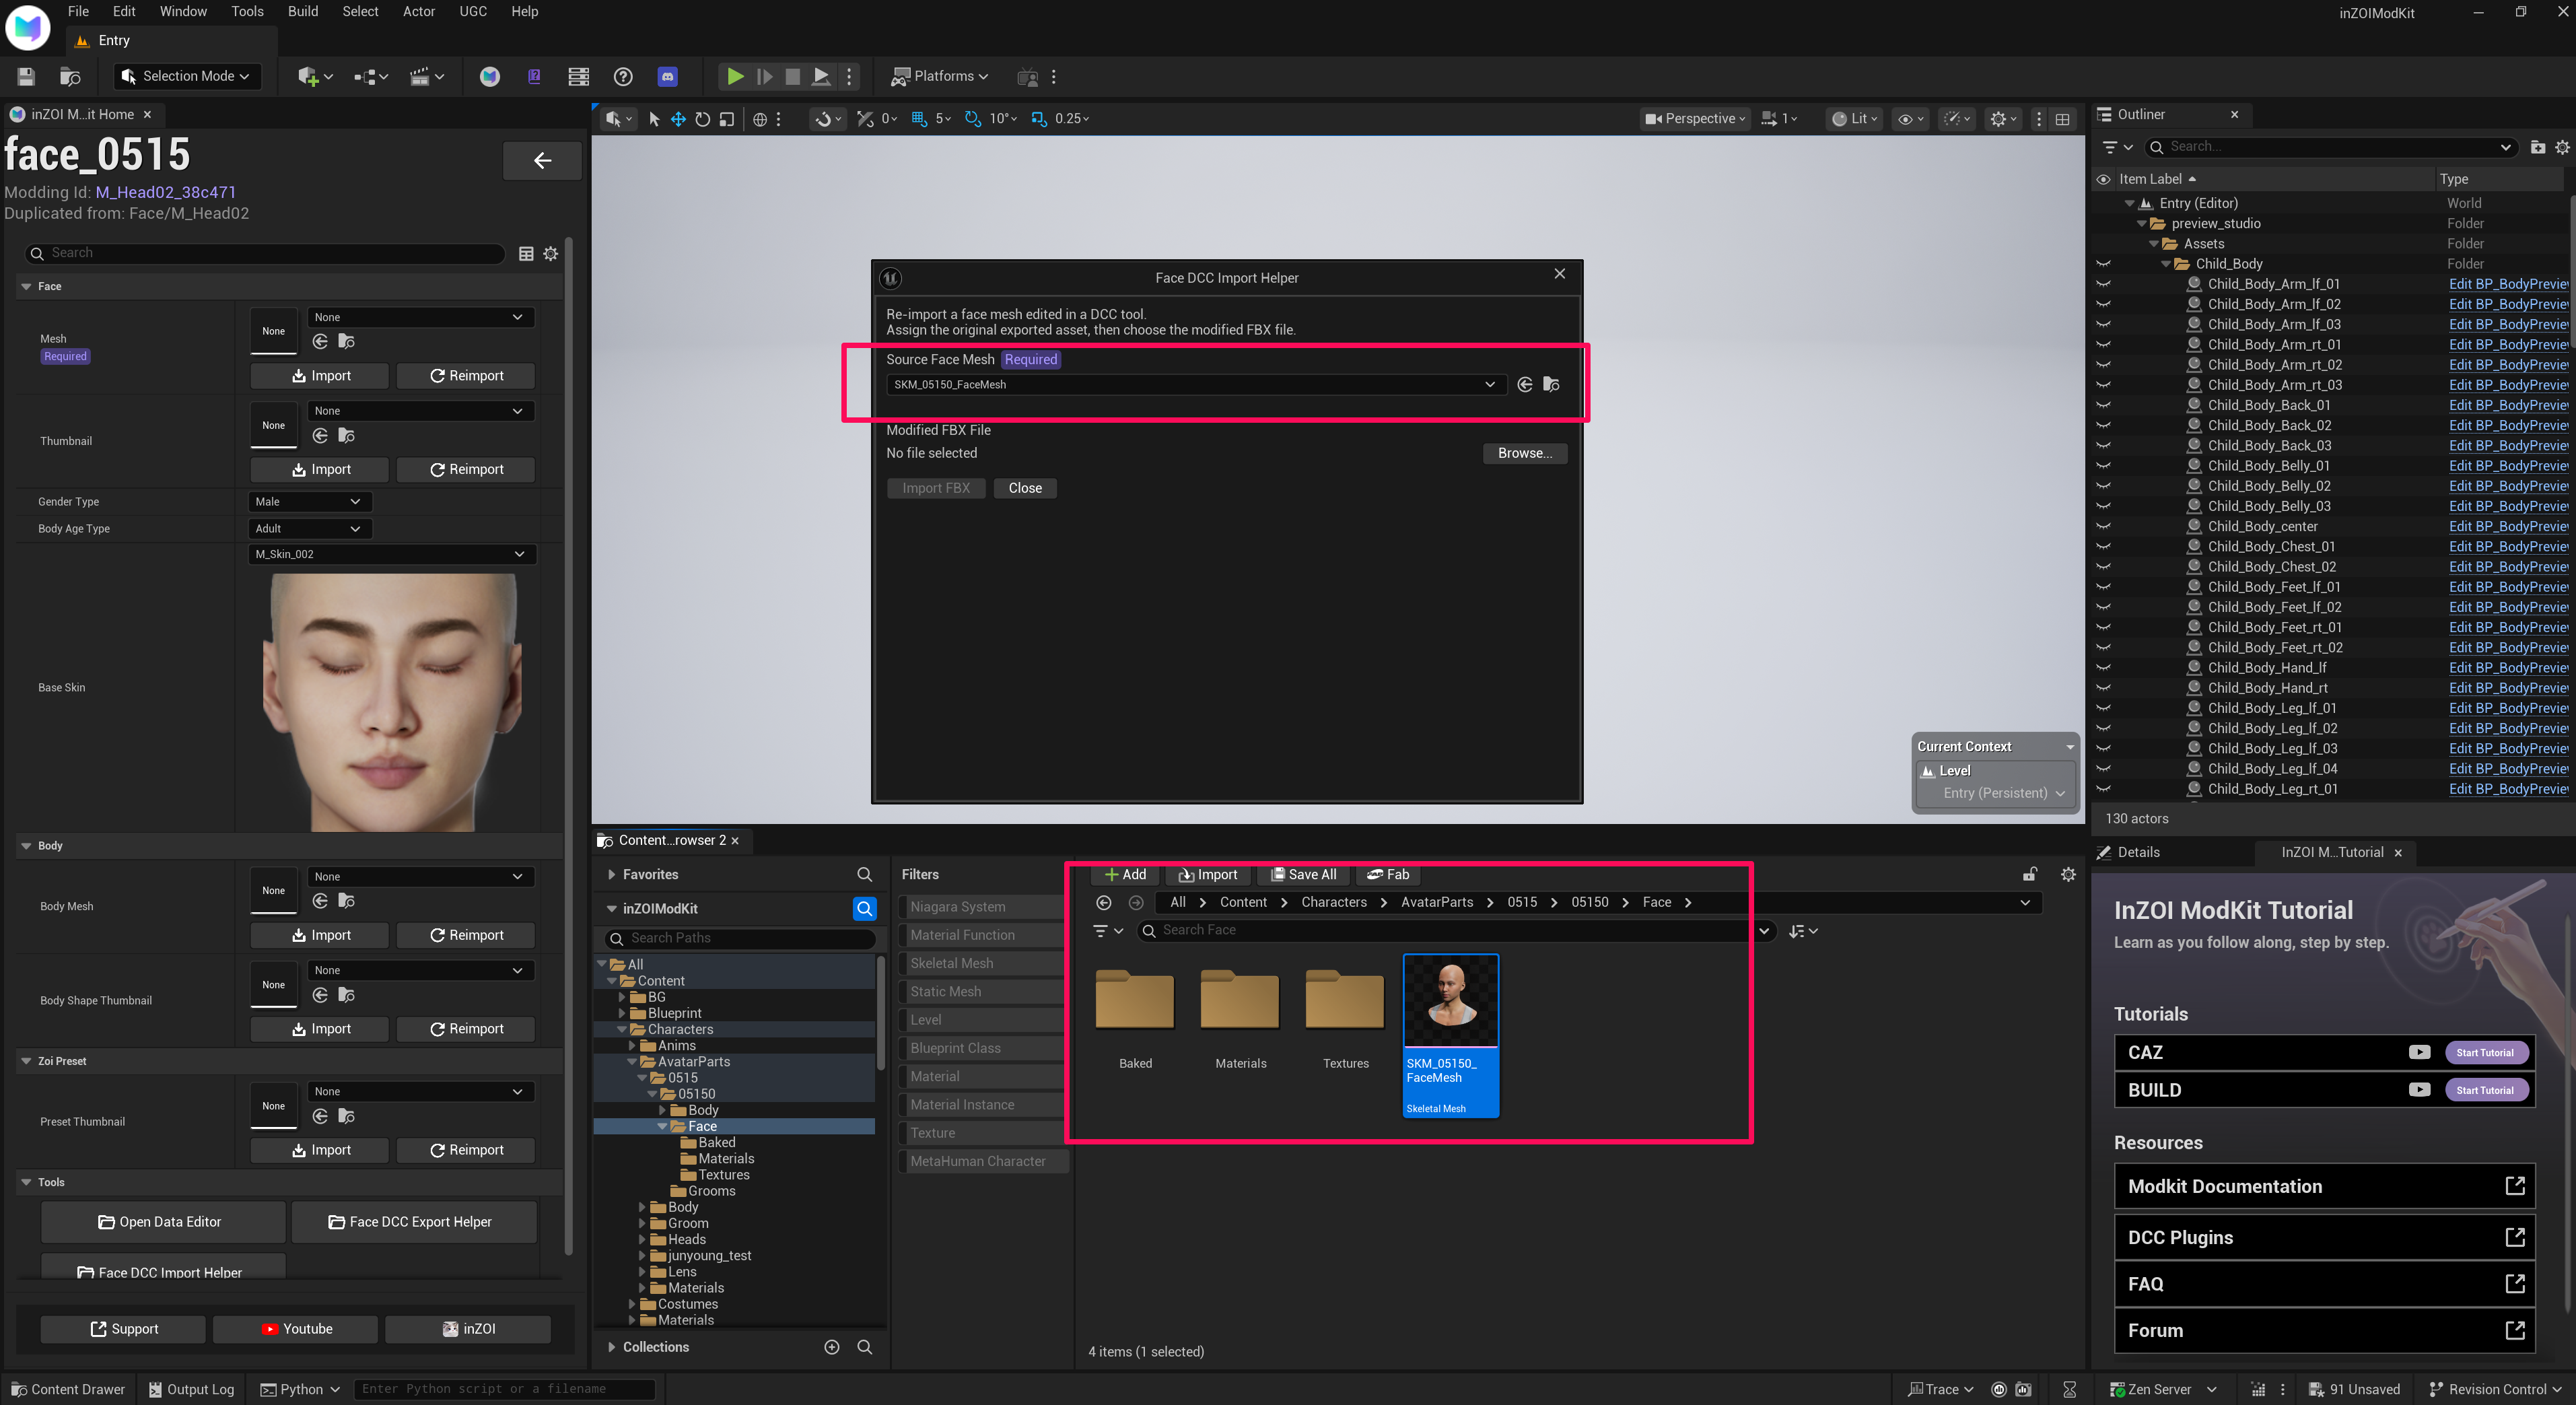
In /All/Game/Characters/AvatarParts/0515/05150/Face, find SKM_05150_FaceMesh (the head skeletal mesh).
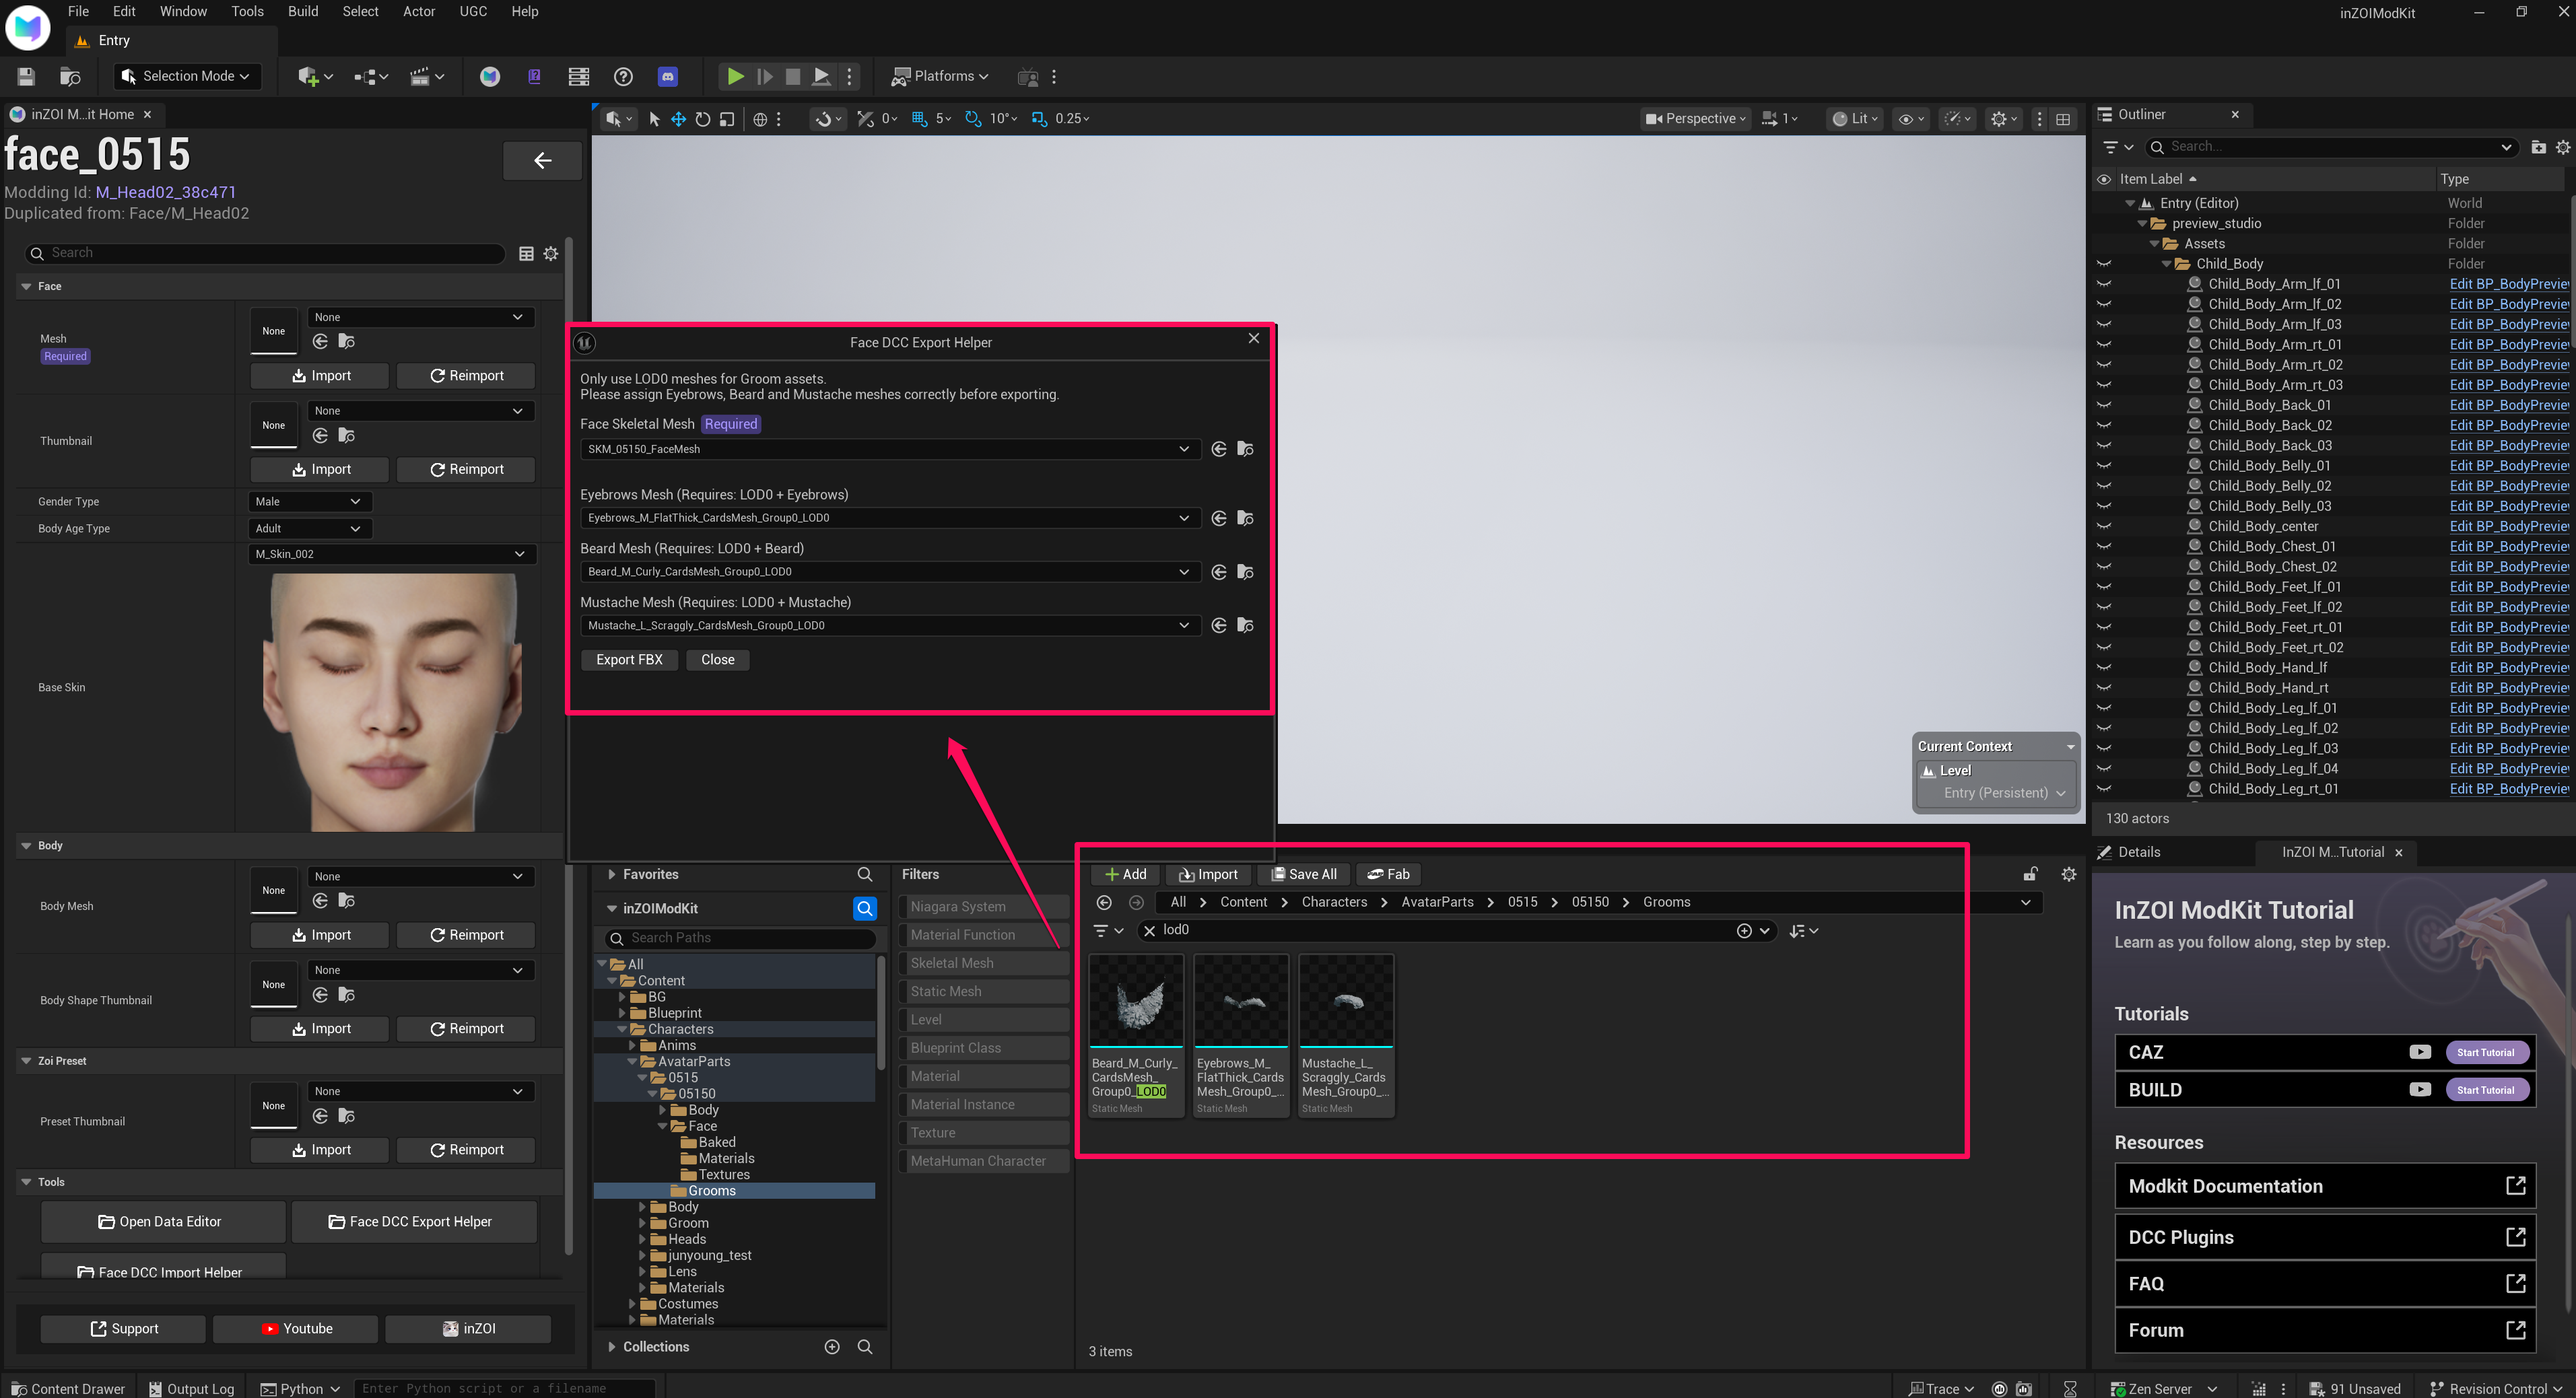
9. Export FBX via Export Helper
Go to /All/Game/Characters/AvatarParts/0515/05150/Grooms, then click Export FBX.
Warning
For the Eyebrows, Beard, and Mustache static meshes, export LOD0 only.
10. Export Result — 4 FBX Files
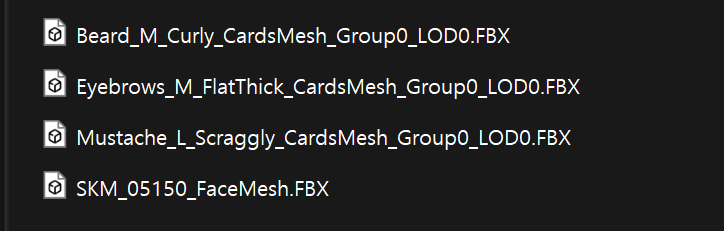
Once the export is complete, you'll have a total of 4 FBX files: Eyebrows, Beard, Mustache, and Face. (Eyelashes are attached to the face mesh.)
11. Install Blender Plugin
DCC Tools - ModKit Documentation.
12. Run Blender ModKit — Import Face
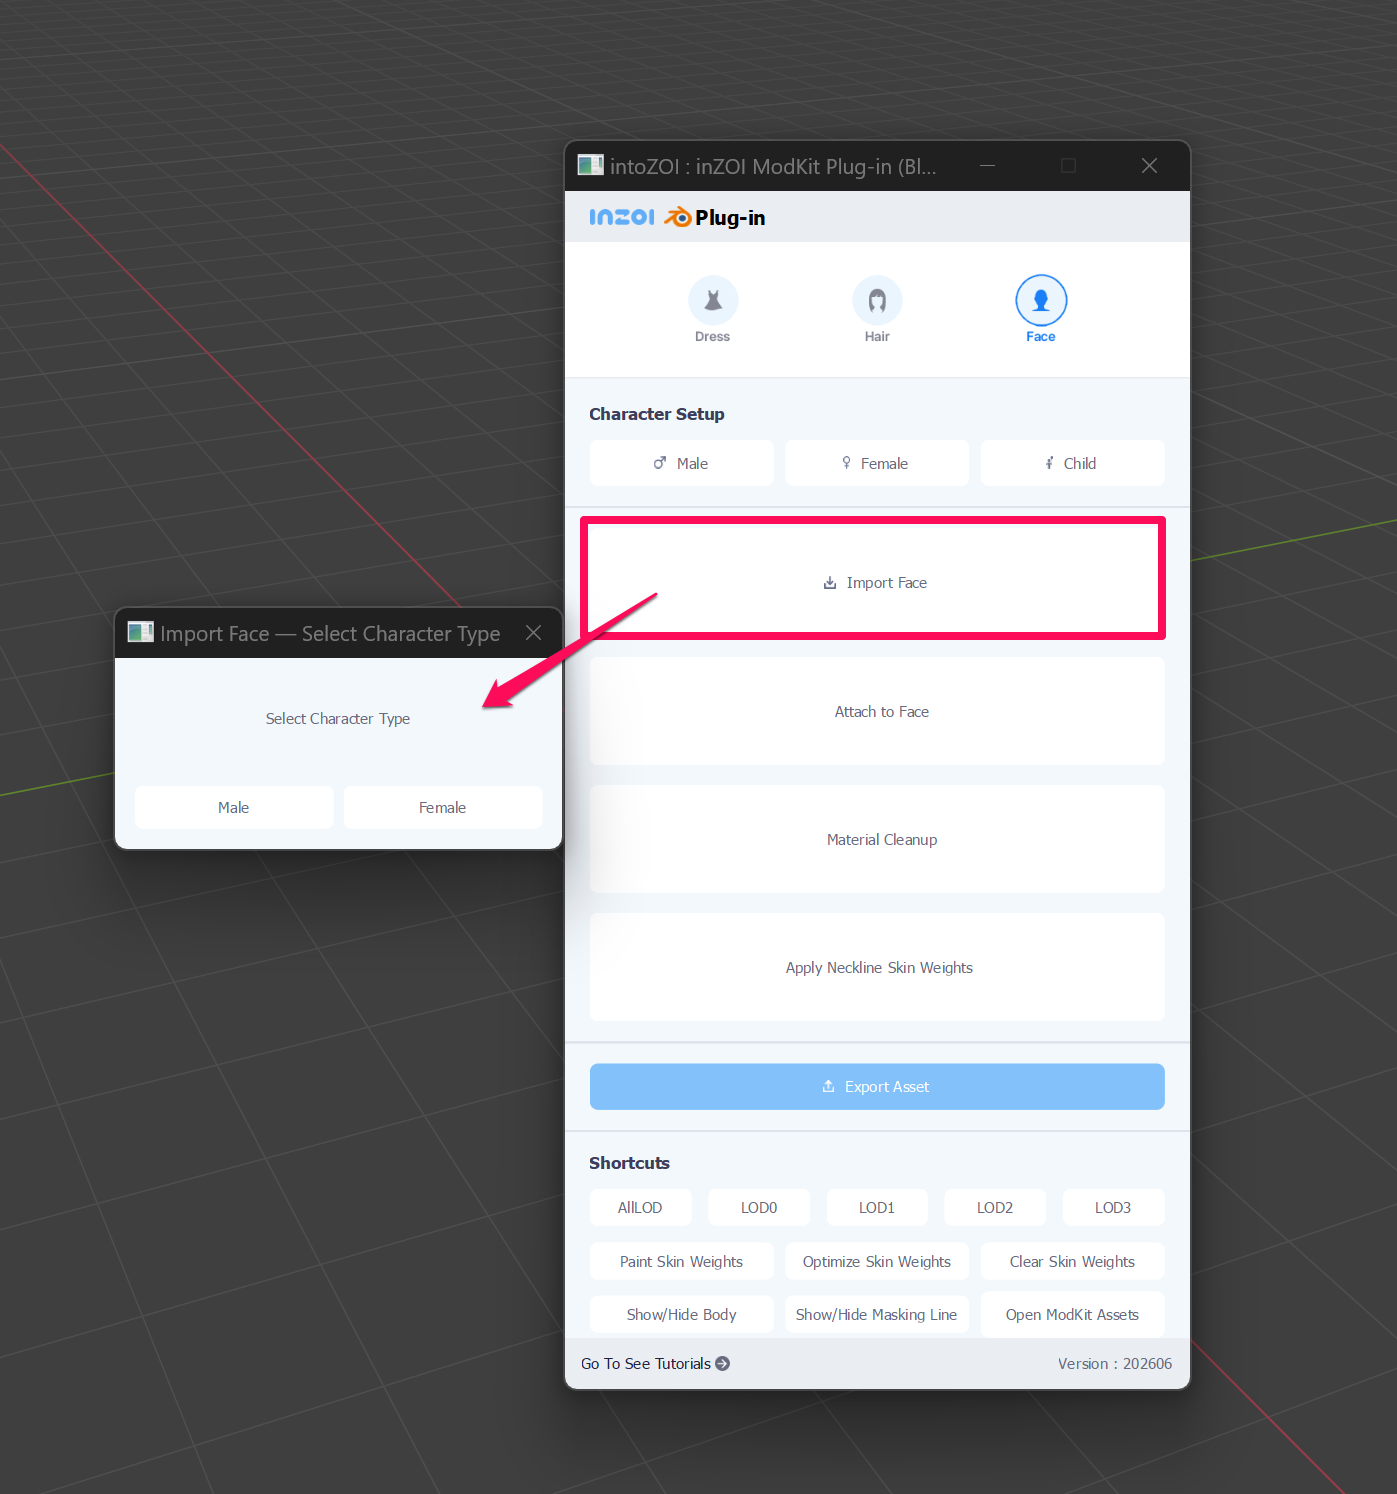
Face tab → Import Face → Don't Save → select gender.
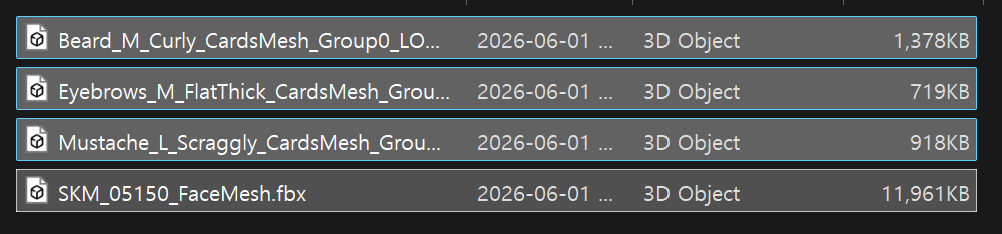
Open all the face, eyebrow, and beard meshes you exported earlier.
13. Process in Order — Attach / Cleanup / Export
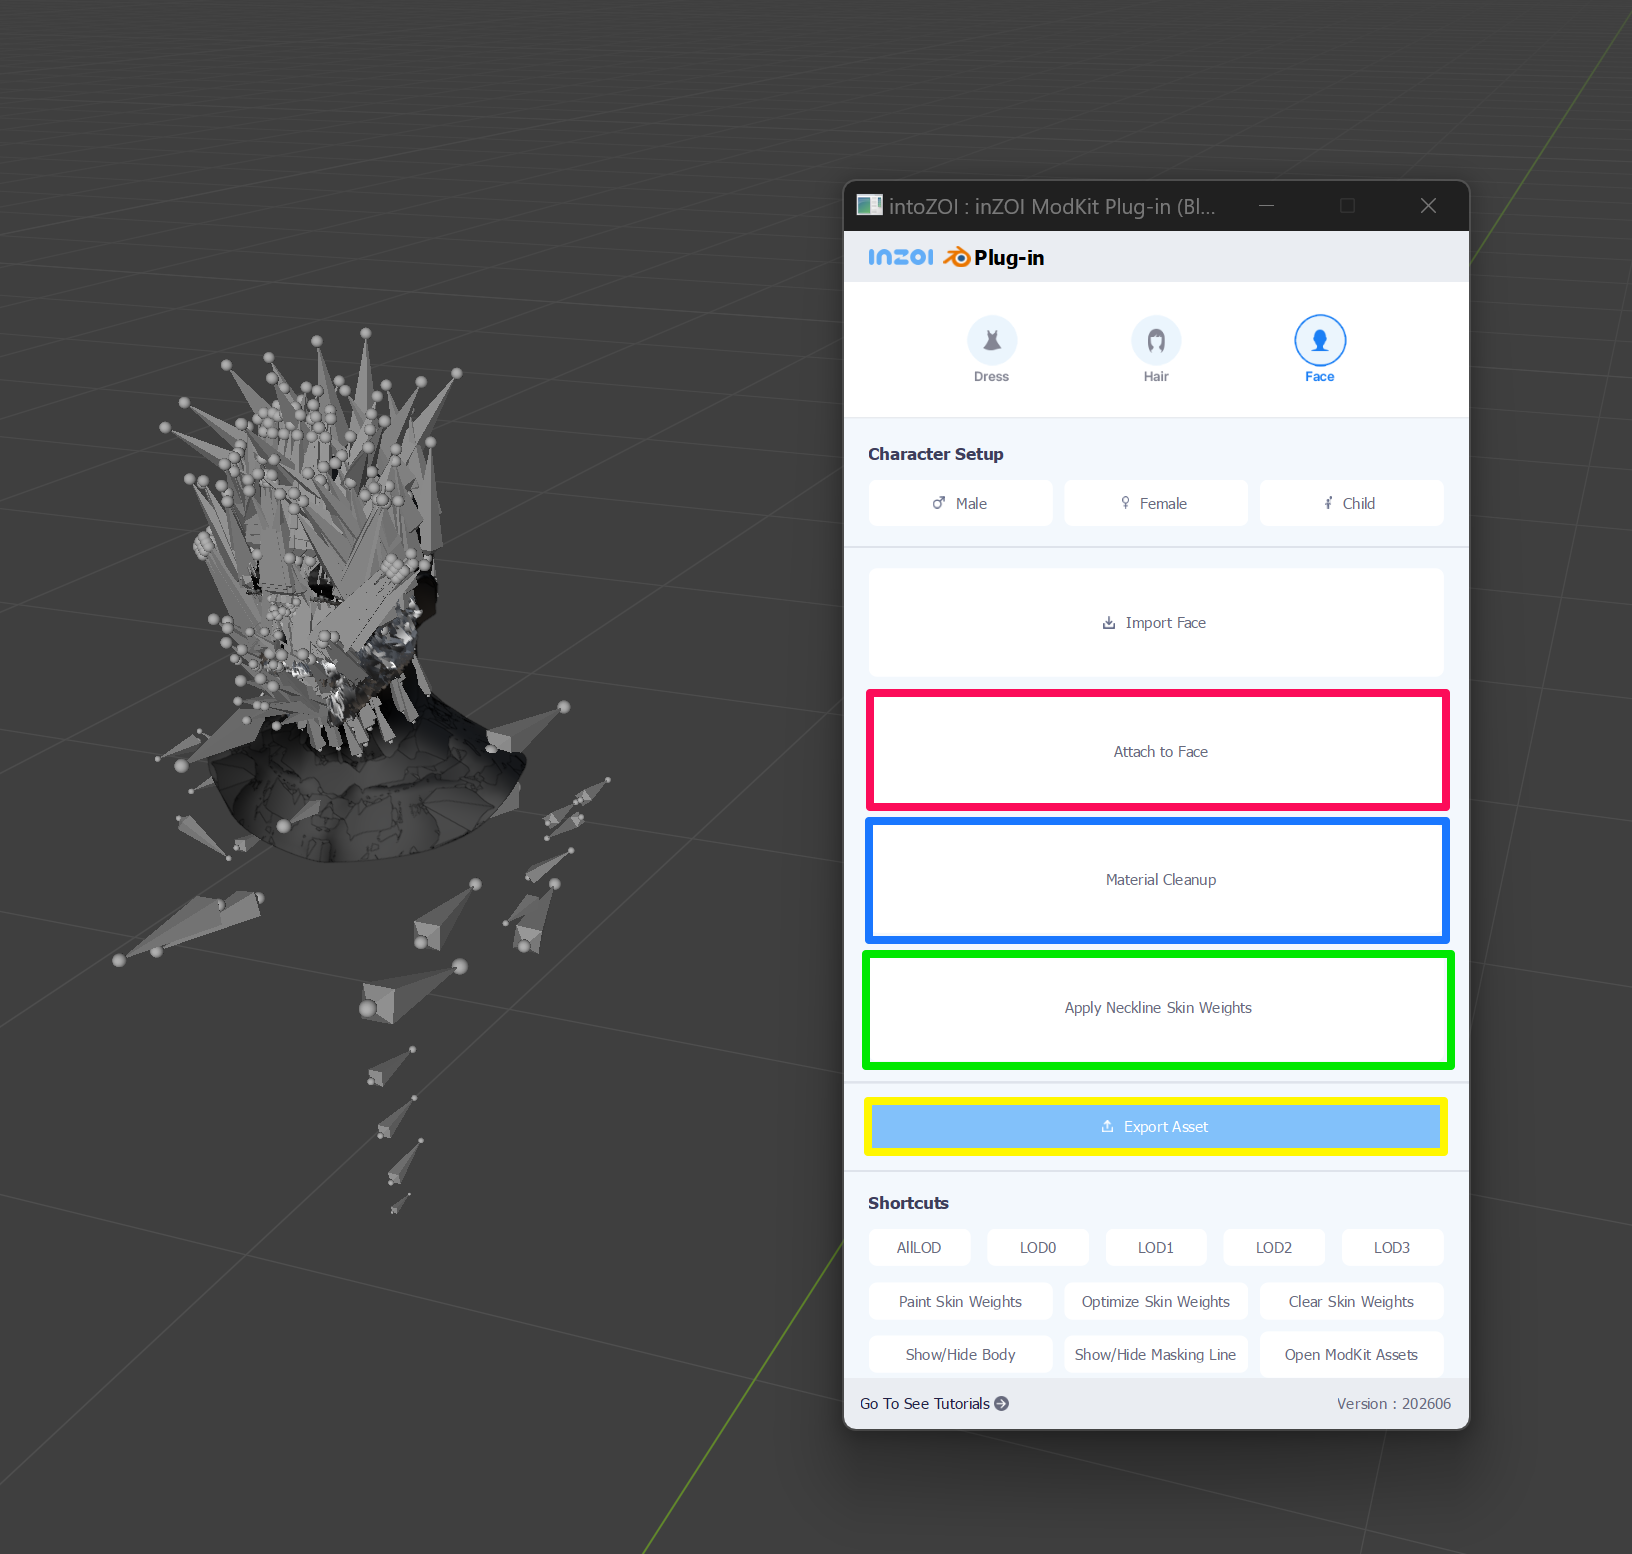
With the face, eyebrow, and beard meshes loaded, click the following buttons in order:
- Attach to Face (Red) — Attaches beard and eyebrows to the face (auto rigging).
- Material Cleanup (Blue) — Renames and assigns material slots so in-game materials can be applied.
- Apply Neckline Skin Weights (Green) — Matches the neckline skin weights to the inZOI body.
- Export Asset (Yellow) — Exports the FBX files in sequence. (No visible change in the viewport is normal.)
When to use Step 3 (Apply Neckline Skin Weights)
Press this only when modding the face on its own. If you're creating a face & body set, skip Step 3 — do not press it. Pressing it conforms the neckline to the default inZOI body, which will conflict with your custom body.
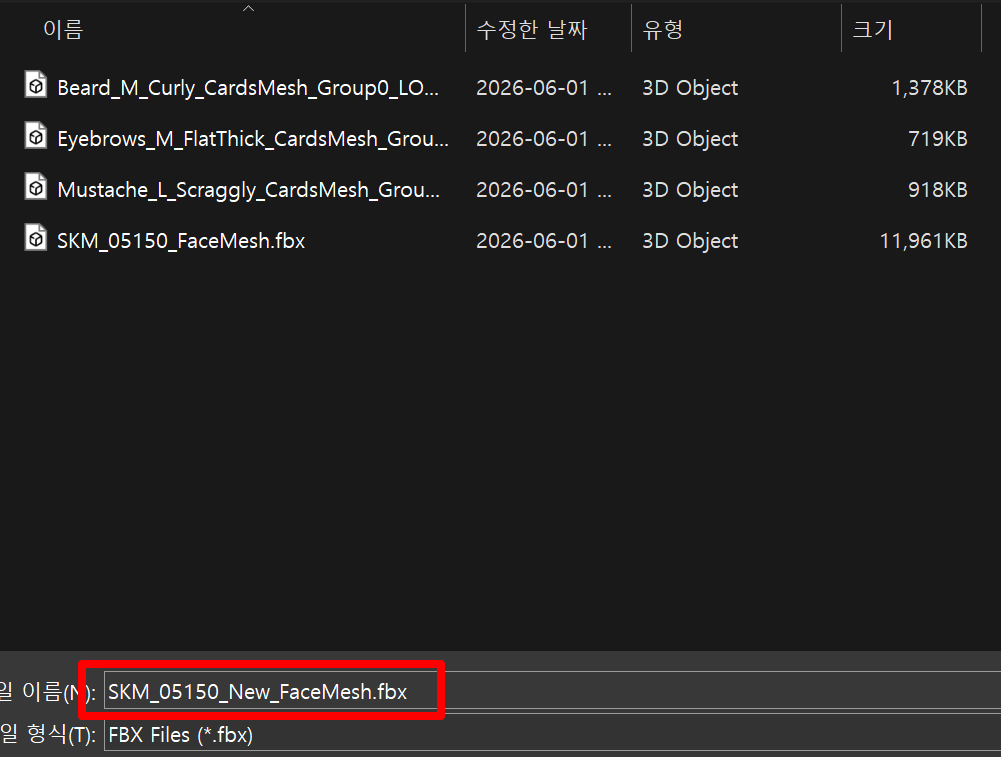
14. Run Import Helper — Set Source Face Mesh
Launch Import Helper. Place the Original HeadMesh (SKM_05150_FaceMesh) into the Source Face Mesh slot.
Important
The Source Face Mesh must remain at its original folder path.
Setting the Source Face Mesh transfers the MetaHuman data from the original head to the new head that has the eyebrows and beard attached.
15. Import Modified FBX
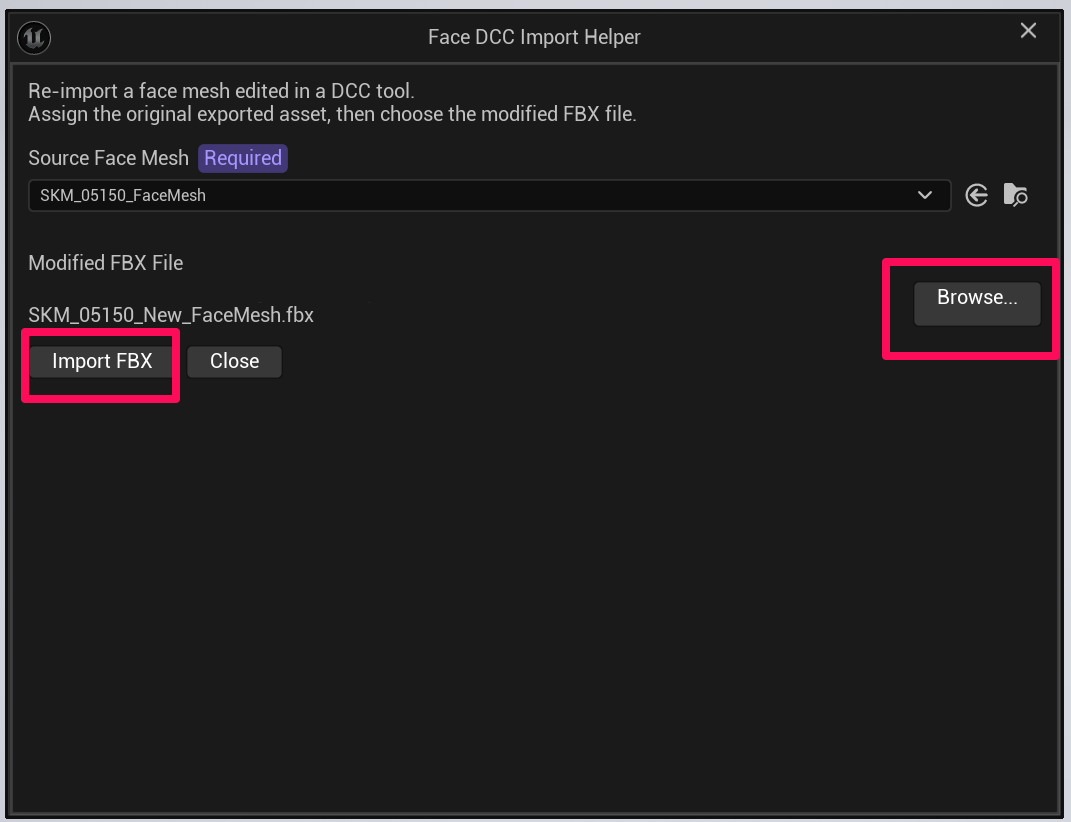
Click Browse..., select the SKM_05150_New_FaceMesh you just created in Blender, then click Import FBX. The file is automatically moved to the correct location.
16. Import Complete
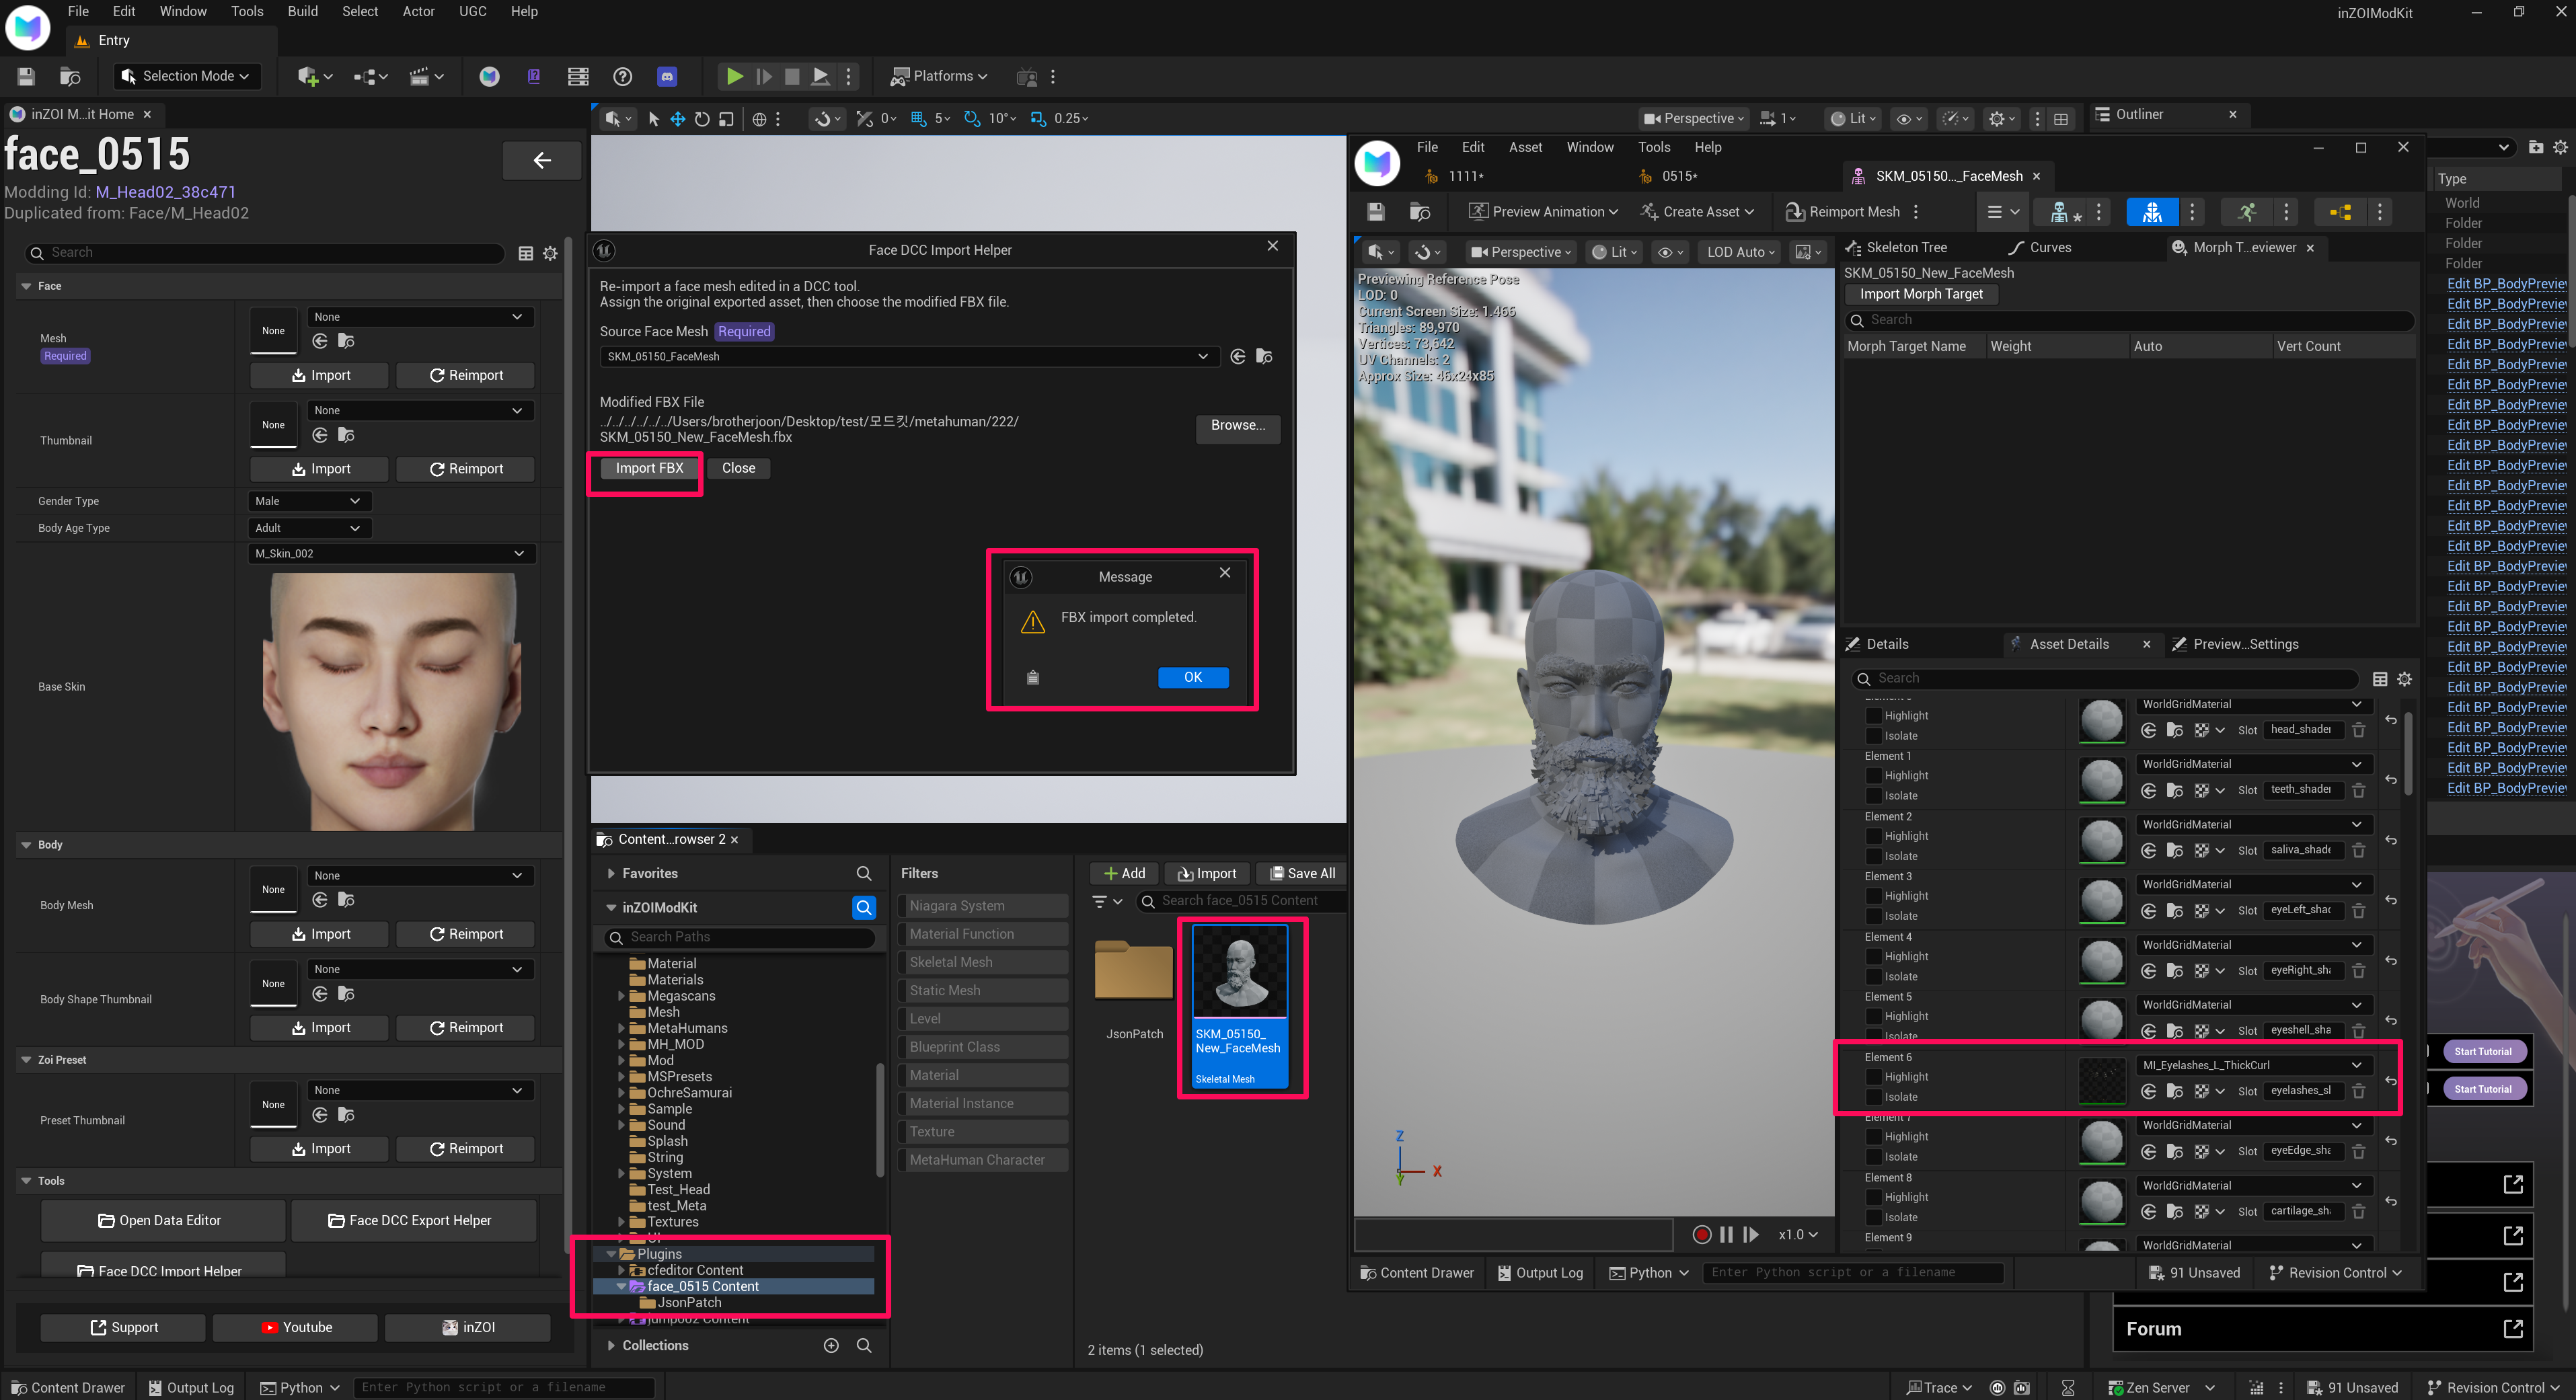
Once the import is complete, a pop-up window will appear, and you will be taken directly to the corresponding mode path. If the Eyelashes material is automatically applied, the import was successful.
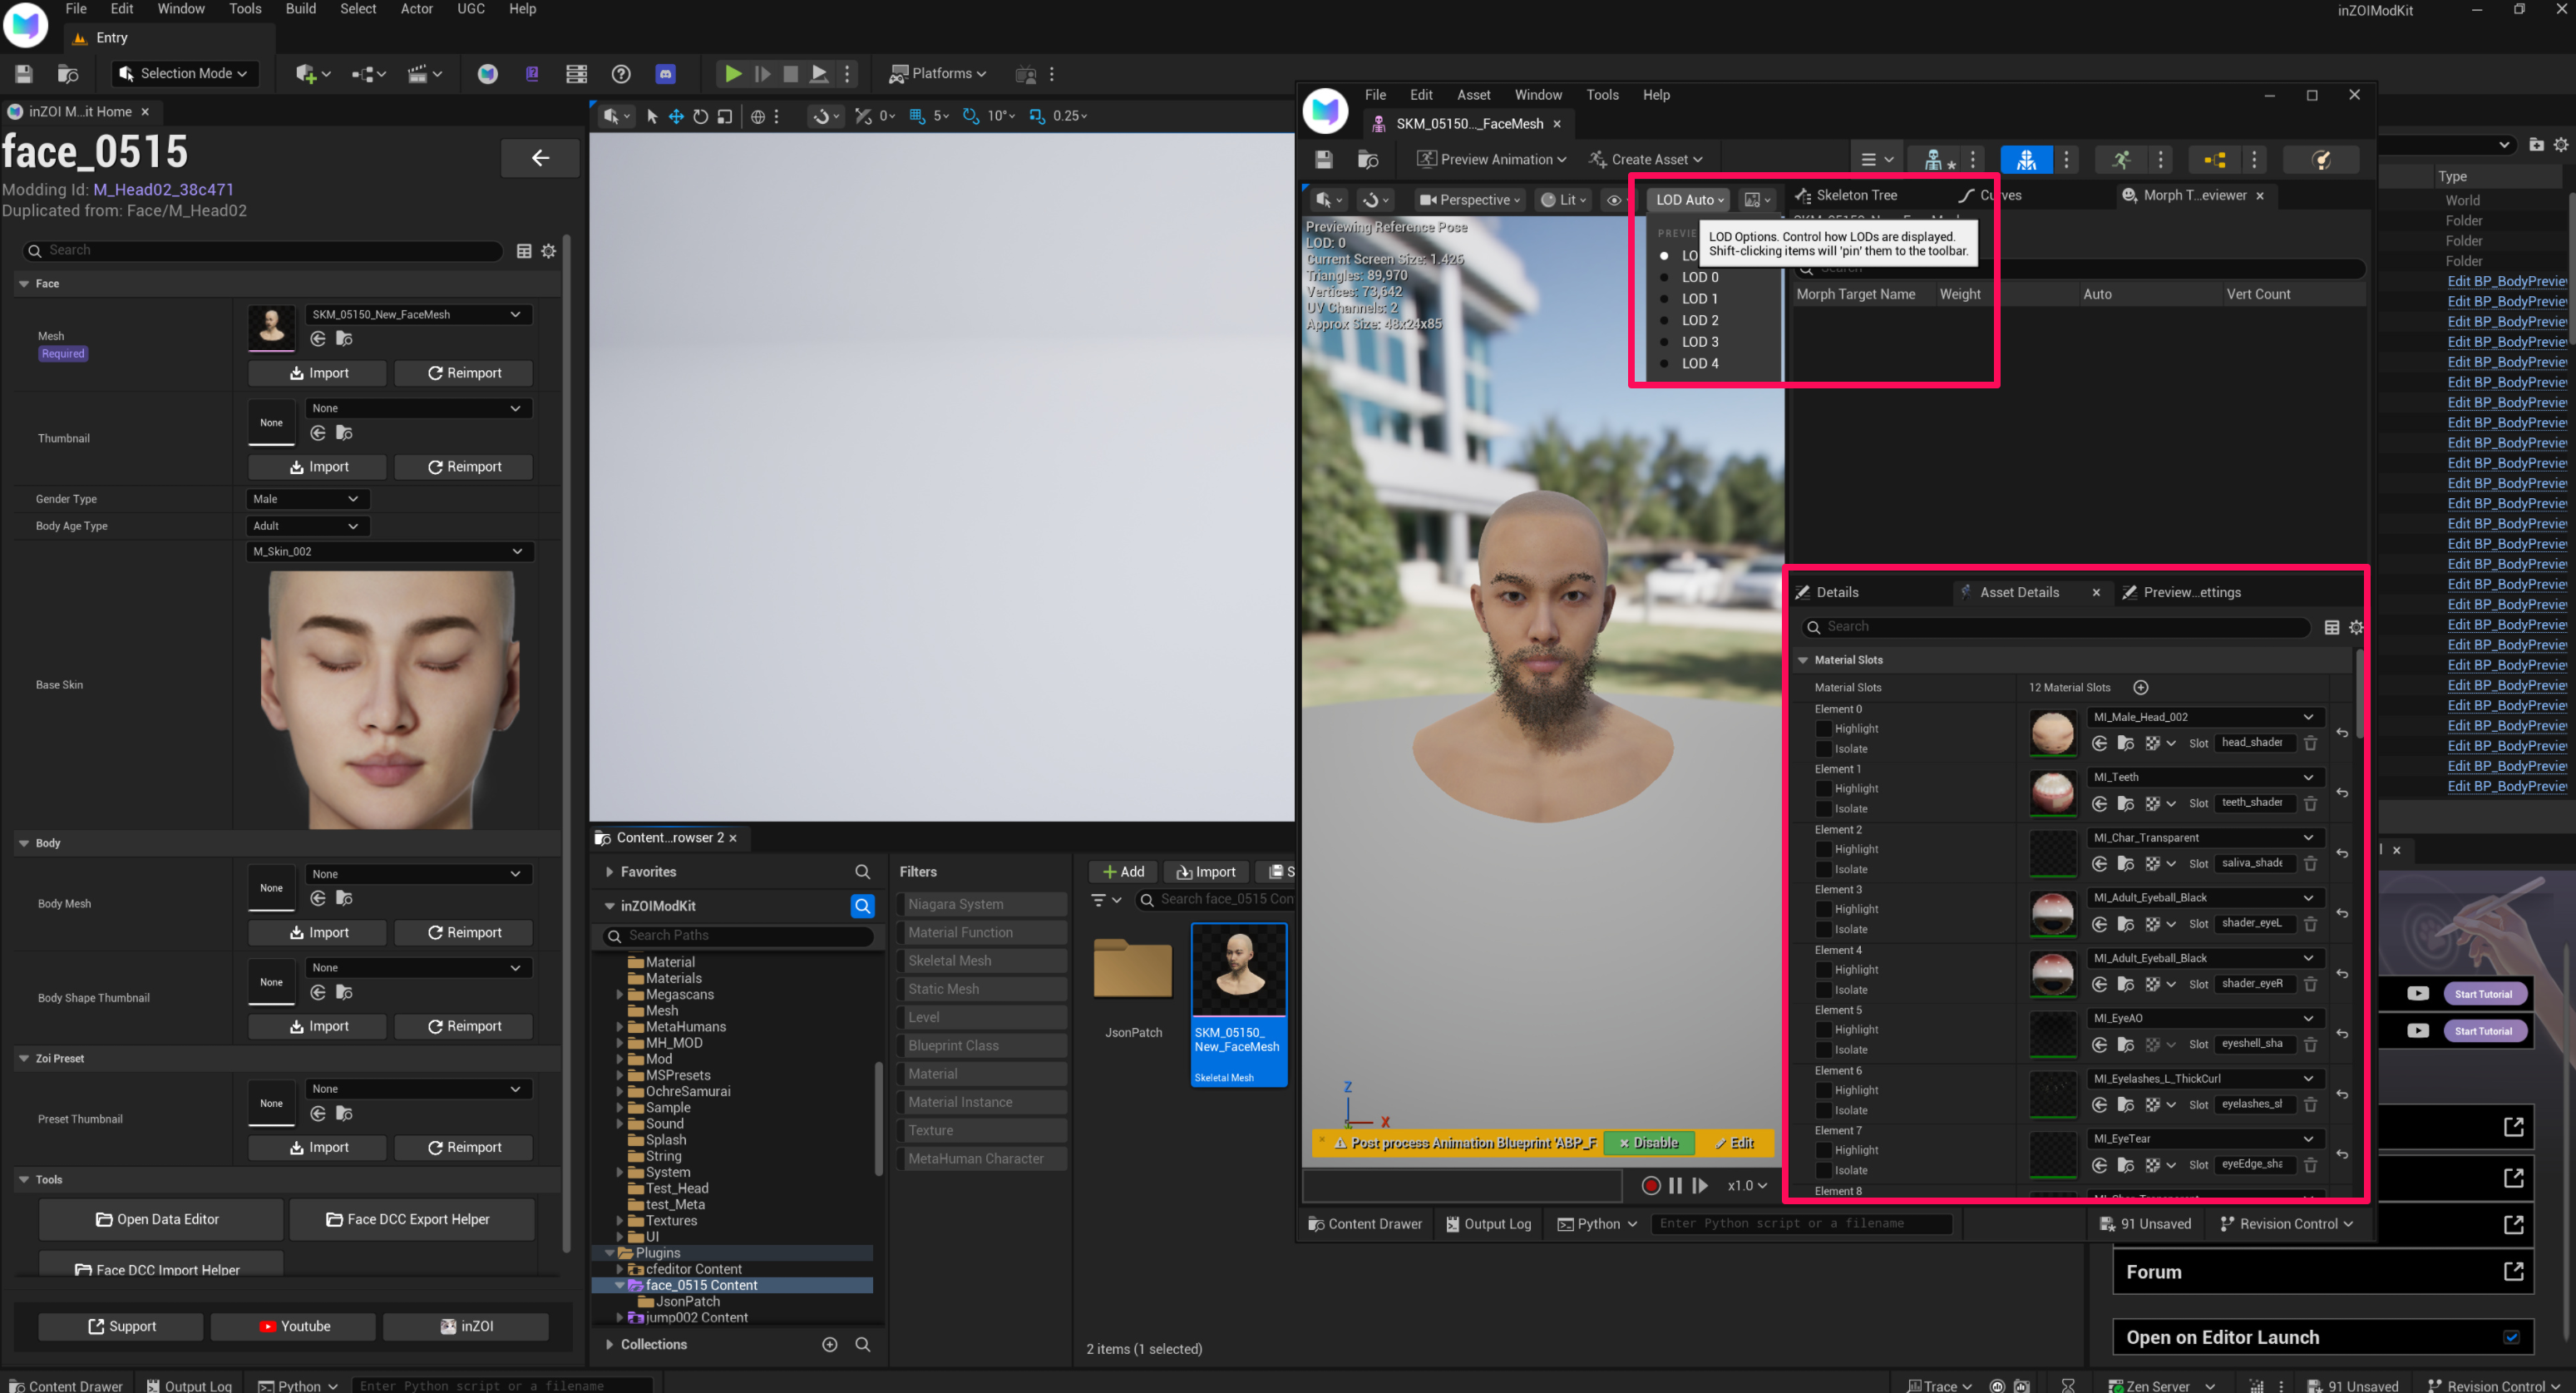
17. Face Mesh Setup — Confirm Head Mesh
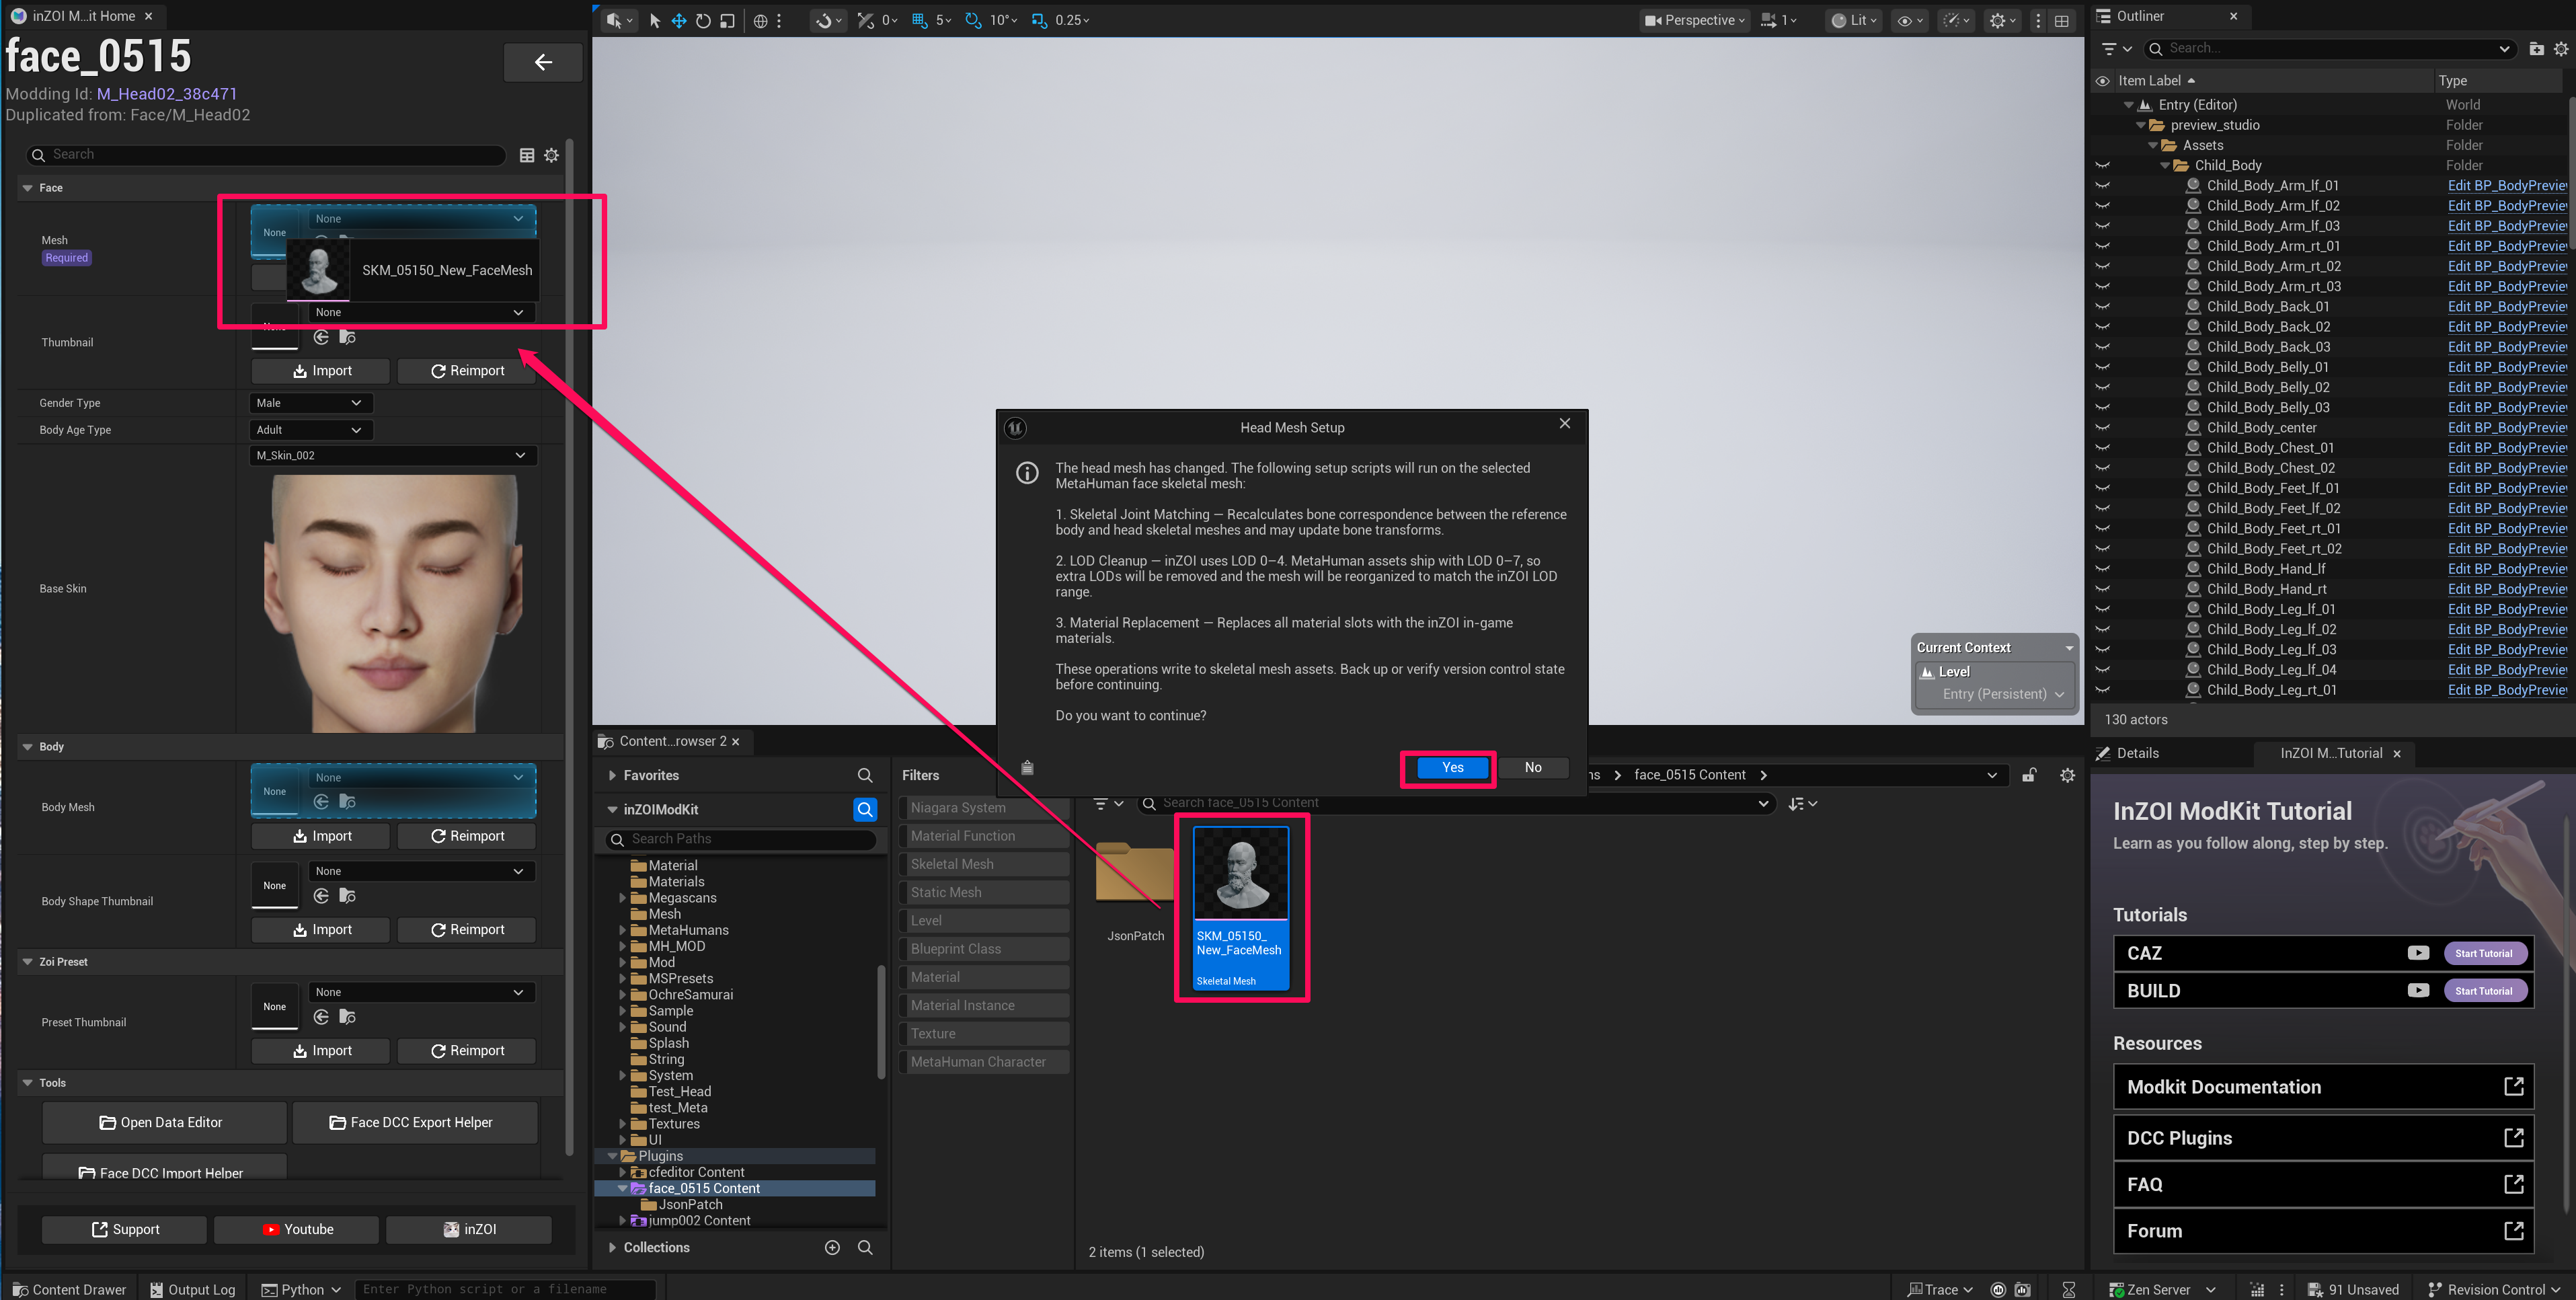
Drag Face → Mesh, assign the head and click Yes.
Head Mesh Setup
The following setup scripts will run automatically:
- Skeletal Joint Matching — Recalculates bone correspondence between the reference body and head skeletal meshes and may update bone transforms.
- LOD Cleanup — inZOI uses LOD 0–4. MetaHuman assets ship with LOD 0–7, so extra LODs will be removed and the mesh will be reorganized to match the inZOI LOD range.
- Material Replacement — Replaces all material slots with the inZOI in-game materials.
These operations write to skeletal mesh assets. Back up or verify version control state before continuing.
18. Proceed to ModKit Packaging
Once the LOD 0–4 settings and material assignments are verified, proceed with the ModKit packaging process.