Creating a Project
Once you’ve installed the inZOI ModKit and explored the basic UI, it’s time to create your first project. This guide walks you through creating a new empty project and opening the Data Editor.
Step 1: Creating
First, create a new empty project.
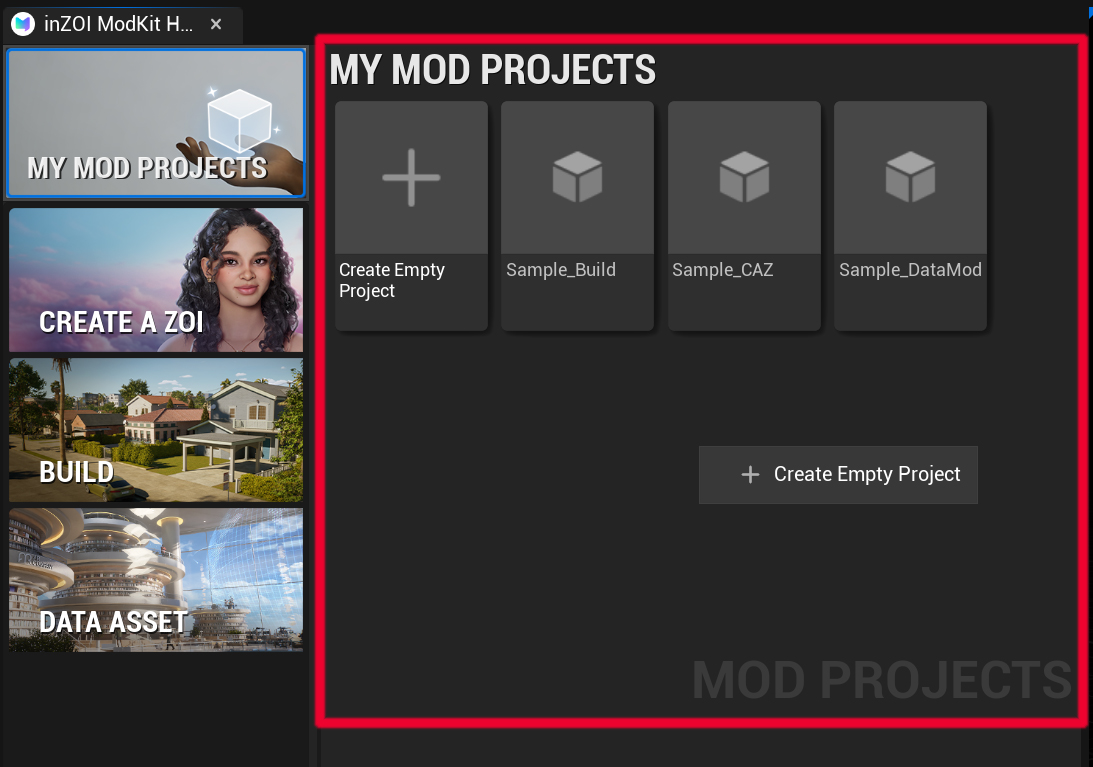
- Right-click in the My Mod Projects area.
- From the menu, click
Create Empty Project.
Step 2: Project Information
Next, enter the basic information for the project, such as its name and author.
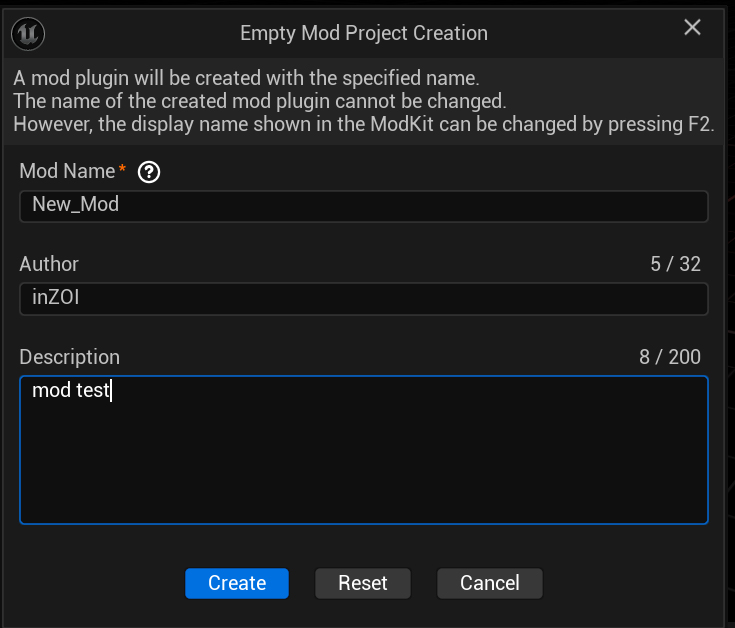
- Specify the Project Name and save path.
- Enter the Author (creator’s name) and Description.
- Once finished, click [Create] to generate the project.
Step 3: Check
After creation, you can see the project in the My Mod Projects list.
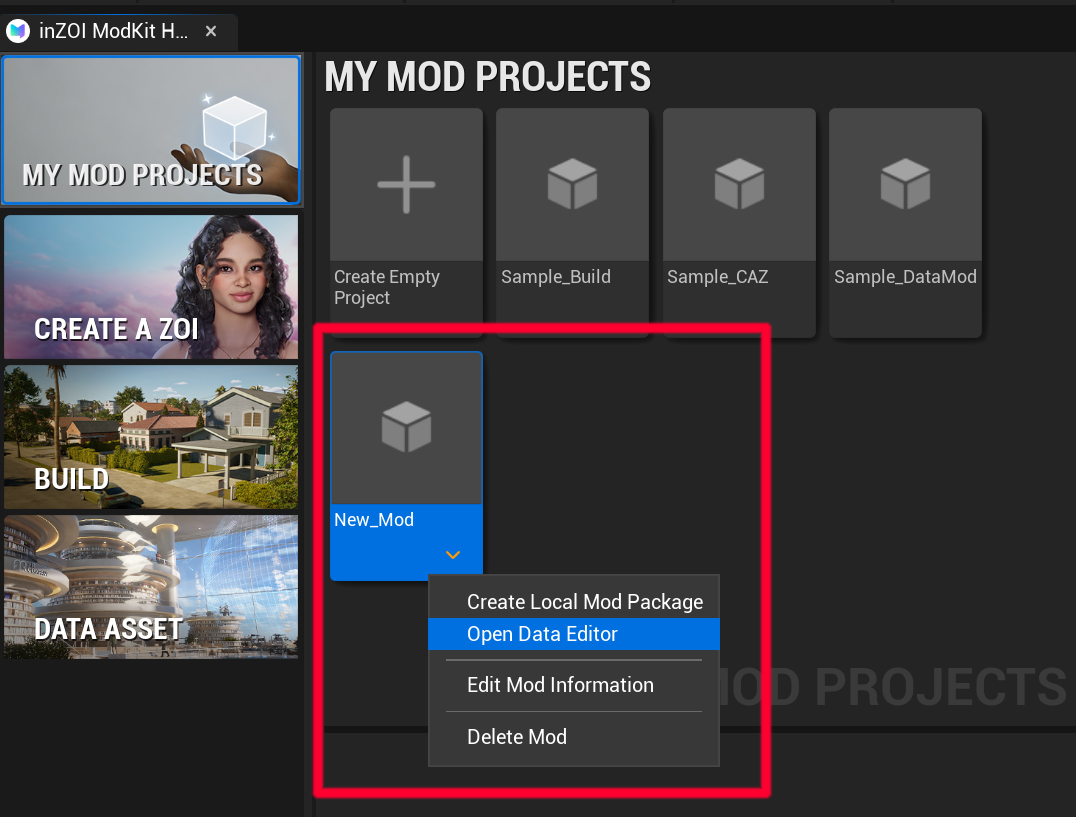
- The created project appears under My Mod Projects.
- Right-click the project to access additional options such as Open Data Editor, Edit Mod Information, Delete Mod.
Step 4: Open Data Editor
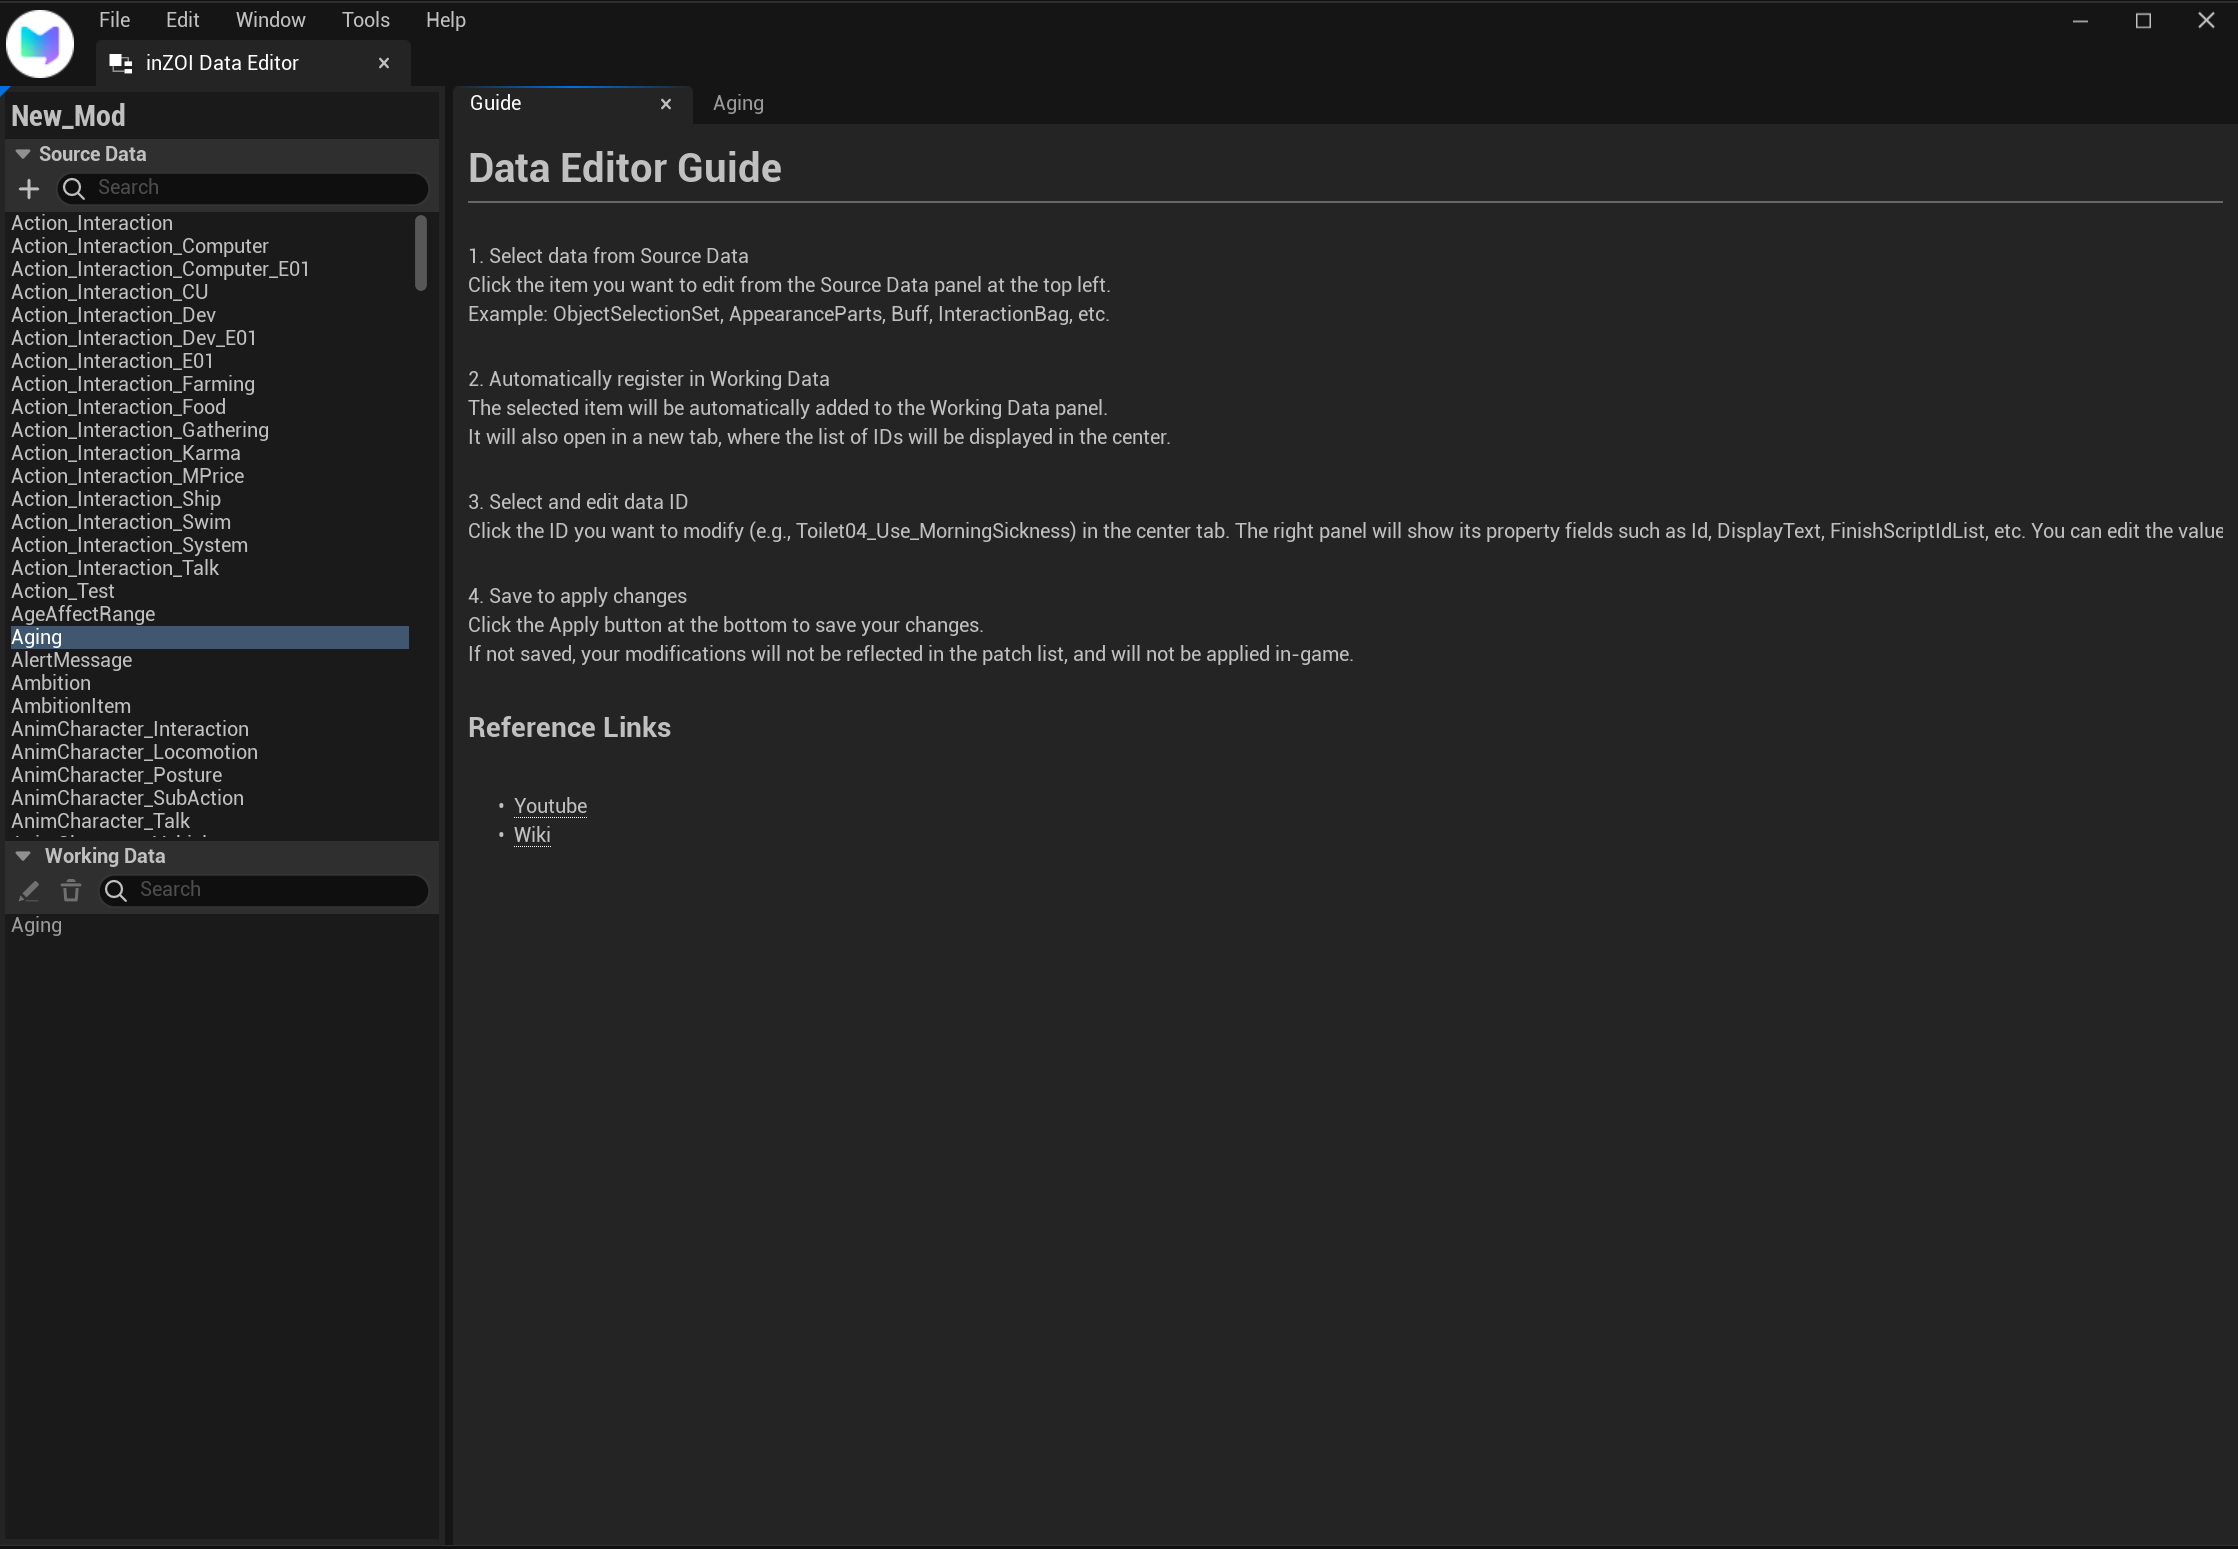
The Data Editor is the core tool in inZOI ModKit for loading, editing, and managing project data.
-
Source Data Contains data items used in inZOI.
- Examples:
ObjectSelectionSet,AppearanceParts,Buff,InteractionBag - Select items from here to load into Working Data.
- Examples:
-
Working Data The editable data space where selected items from Source Data are automatically registered.
- When you click an item in Source Data, it is added to Working Data.
- Working Data can be freely edited.
- Modified values are applied in-game via MY MOD PROJECTS.
-
Guide A help panel that provides instructions on how to use the Data Editor.
Step 5: Reference Links
For more details, check the links below: