Create
This guide walks you through the practical, step-by-step process of creating a new mod project by selecting an asset on the CREATE A ZOI (CAZ) screen.
Select Asset
First, choose the asset you want to turn into a mod.
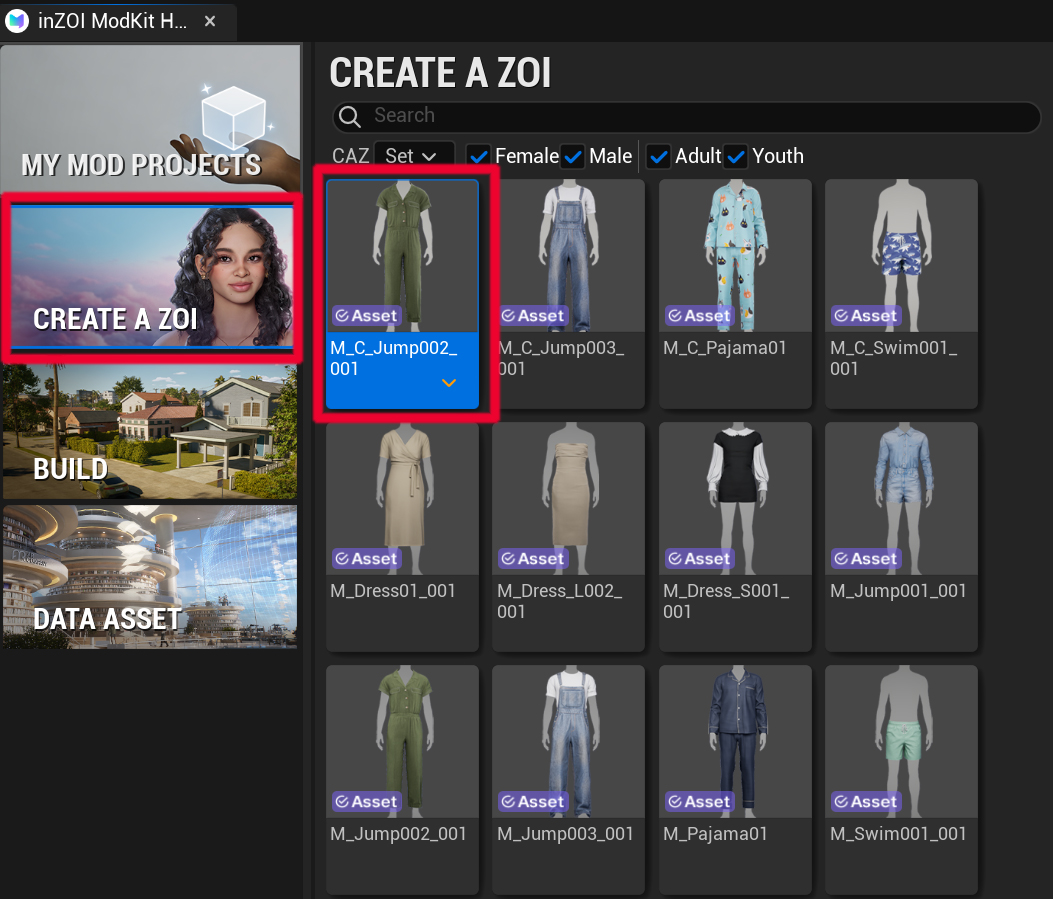
- Go to the [CREATE A ZOI] menu.
- In the asset grid, find and click the asset you want (e.g., clothing, hair). The selected asset will be highlighted with a border as shown.
Use the filter checkboxes at the top—Female, Male, Adult, Youth—to quickly narrow down the type of asset you need.
Mod Creation
After selecting an asset, a popup menu appears to let you decide what to do with it.
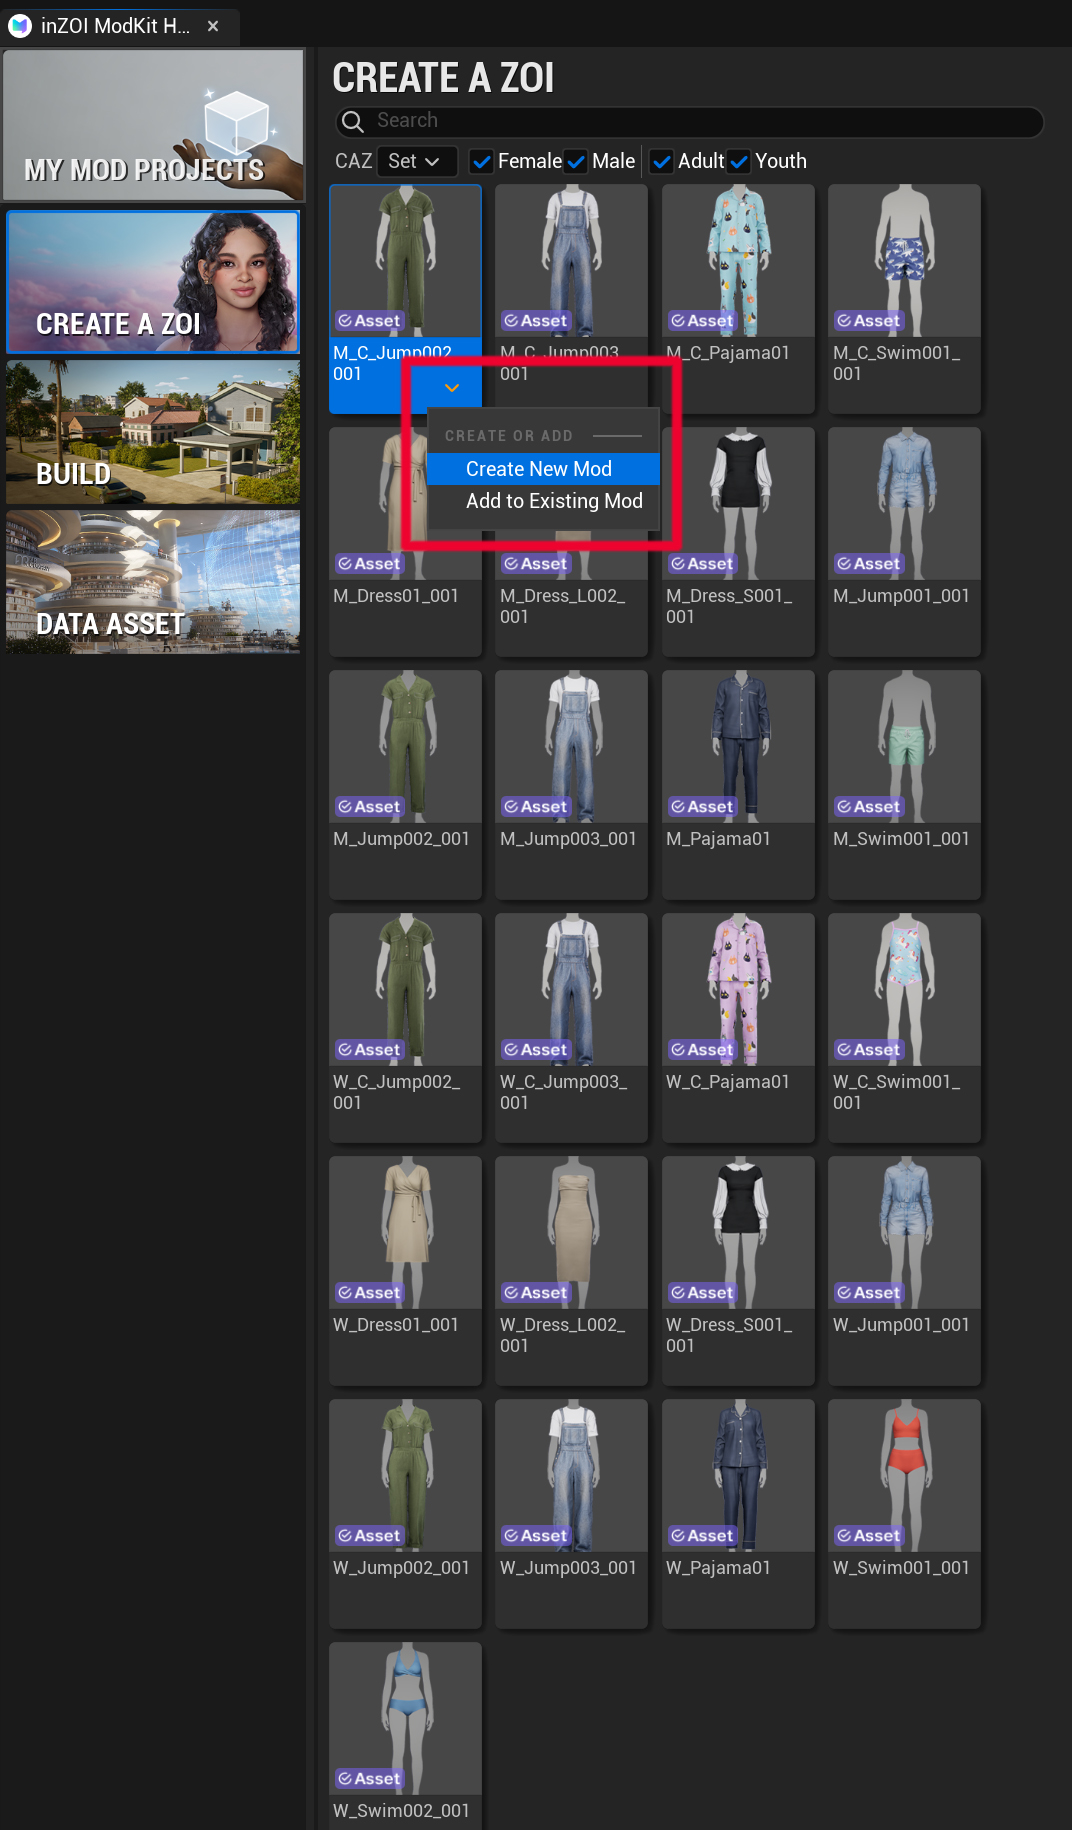
- In the [CREATE OR ADD] menu, click [Create new Project] to start creating a new mod.
If you want to add the selected asset to a mod you are already working on, choose [Add to Existing Mod] instead.
Mod Information
Enter the detailed information required to create the mod.
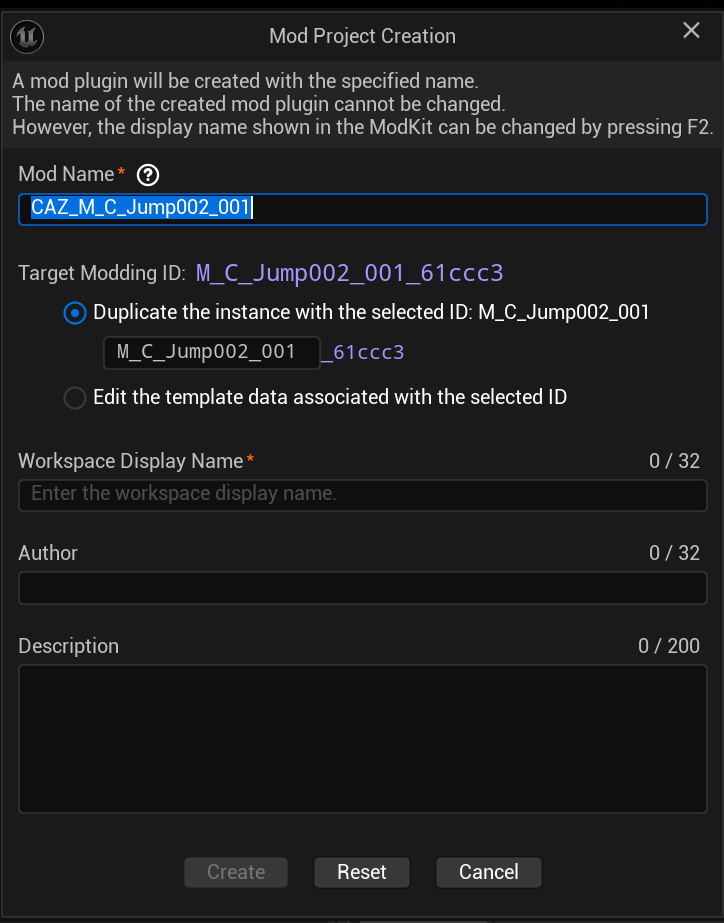
When the [Mod Project Creation] window appears, fill in the fields as described below.
- Mod Name: The unique ID (file name) for the mod. It is auto-generated from the selected asset and cannot be changed later.
- Duplicate/Edit Selection:
Duplicate the instance...: (Recommended) Duplicates the source asset to create a brand-new item. Use this in most cases.Edit the template data...: Edits the source asset’s data directly. Use with caution as it may affect the entire game.
- Workspace Display Name: The name shown within ModKit for your reference. You can edit it freely.
- Author: Enter the creator’s name.
- Description: Provide a short description of the mod (within 200 characters).
Creation
After entering all information, click [Create] at the bottom of the window.
Your new mod project is now created. You can find it under [MY MOD PROJECTS] on the left and begin editing.