Texture Channel Editing
Texture Channel Editing (or Channel Packing) is an advanced optimization technique that combines multiple grayscale textures into a single color image file (using the RGB channels).
A computer uses a similar amount of memory to process a single grayscale image as it does a single color image. Therefore, instead of using three separate grayscale textures like Ambient Occlusion, Roughness, and Metallic, combining them into the R, G, and B channels of a single color image can reduce memory usage by approximately 1/3 and significantly improve performance.
Channel Overview
Before you begin channel packing, it's important to understand what property of the material each grayscale texture controls.
inZOI basically uses an efficient format that combines four grayscale texture maps—AO, Metallic, Roughness, and Displacement—into a single RGBA image. The role of each channel is as follows:
- R Channel: Ambient Occlusion
- Adds depth and realism by creating soft shadows in crevices and corners. White (1) represents areas that receive light, while black (0) represents shadowed areas.
- G Channel: Metallic
- Determines if a surface is metallic or non-metallic. White (1) looks like a pure metal, while black (0) looks like a non-metal such as plastic or wood. Intermediate values are used only in special cases.
- B Channel: Roughness
- Controls how rough or smooth a surface is. Values closer to white (1) scatter light, making the surface look rough (matte), while values closer to black (0) reflect light, making it look smooth (glossy).
- Alpha Channel: Displacement
- Creates genuine three-dimensionality by actually pushing or pulling the model's surface using the texture's grayscale values. White (1) pushes the surface out the maximum amount, and black (0) results in no change.
For more in-depth technical information about each property, please refer to the official Unreal Engine documentation below.
Plugin
To handle the ModKit's textures (.EXR, .DDS, etc.) smoothly in Photoshop, you must install the following essential plugins beforehand.
-
1. EXR-IO (EXR File Support)
- This plugin is required to open
.EXRfiles exported from the Content Browser in Photoshop. - Installation: Go to the EXR-IO Download Page to download and install the plugin.
- This plugin is required to open
-
2. NVIDIA Texture Tools Exporter (DDS File Support)
- This plugin is necessary for saving modified textures in the game-optimized
.DDSformat. - Installation: Go to the NVIDIA Texture Tools Exporter Download Page to download and install the plugin.
- This plugin is necessary for saving modified textures in the game-optimized
Practical Guide
Textures from assets received from Quixel Bridge may have a different channel configuration than the inZOI ModKit standard. This guide walks you through the entire process of reconfiguring a _DpR mixed map from Quixel Bridge into an R=AO, G=Metallic, B=Roughness channel map that conforms to the inZOI standard, using Photoshop.
1. Preparing
Typically, files downloaded from Quixel Bridge that include _DpR in their name are mixed maps where multiple data types are combined into a single image.
This texture is usually composed as follows:
- R Channel: Displacement
- G Channel: Roughness
- B Channel: Not used
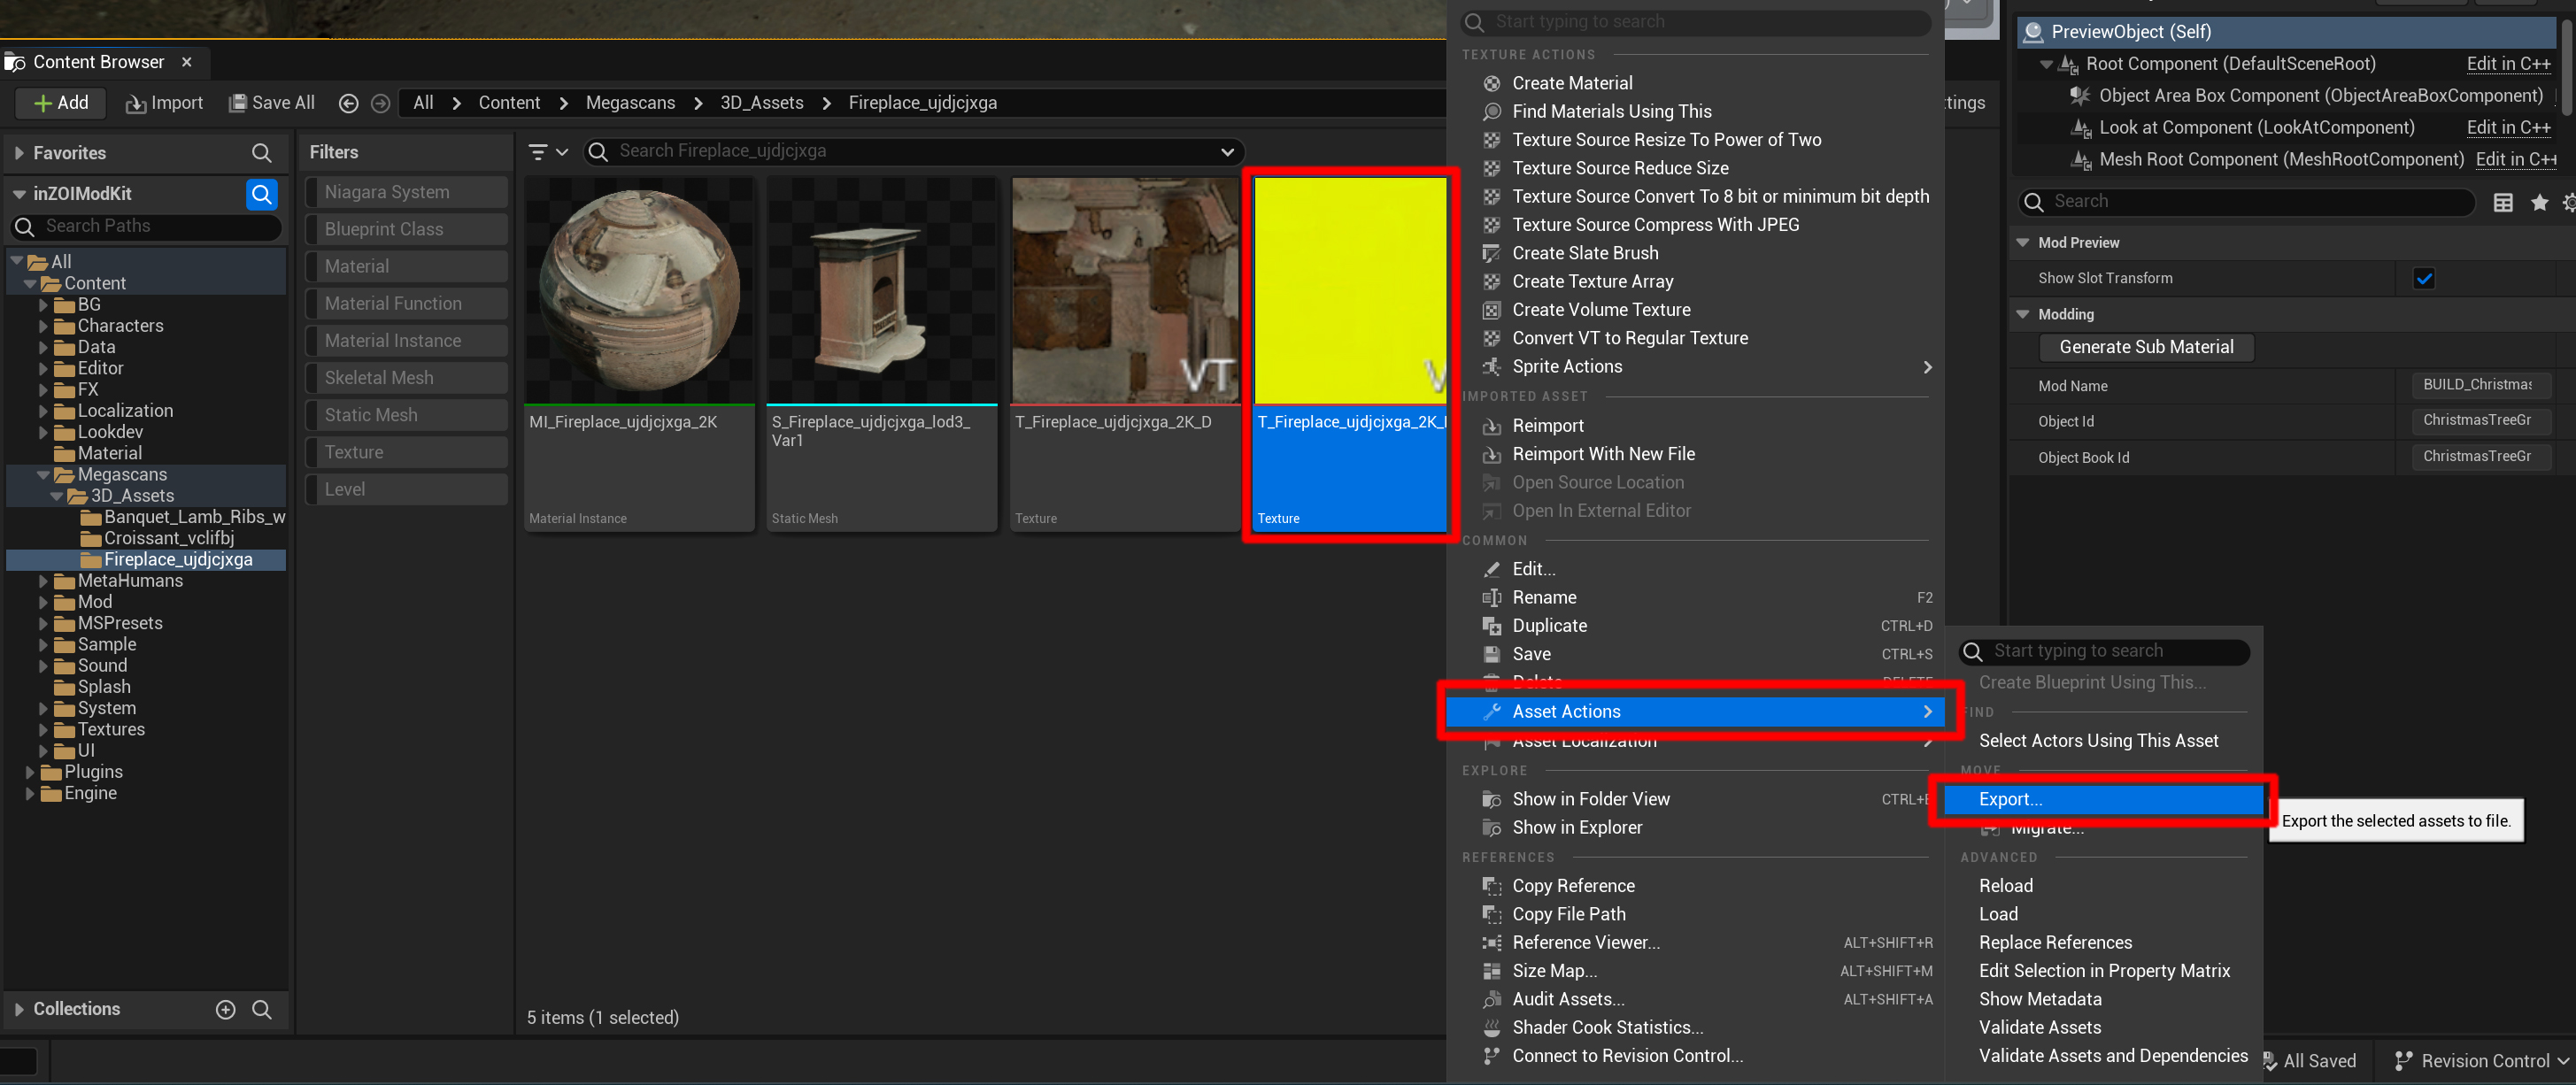
- Find the
_DpRtexture you need to work on (e.g.,T_Fireplace_..._DpR) in the Content Browser. - Right-click on the texture and select [Asset Actions] > [Export] to save it to your computer as an
.EXRfile.
2. Channel Map
This process explains how to reconfigure a texture where the Roughness information is in the G channel (like a _DpR map from Quixel Bridge) into a channel map that conforms to the inZOI standard. The final goal is to create a texture in the R=AO, G=Metallic, B=Roughness format.
Reference Video
You can see the actual process in the video below:
- Open the EXR texture prepared in Step 1 in Photoshop.
- Create a new RGB color image and open the [Channels] panel.
- Select the Green channel, select all (
Ctrl+A), and then copy it to the Blue channel (Ctrl+V). - Go back to the Green channel and fill it with Black.
- Click the top RGB channel again to activate all channels, and save the image in
PNGorTGAformat.
In PBR rendering, the Metallic property is defined by a grayscale value where black (0) means non-metal (cloth, wood, plastic, etc.). Since this example is for creating a non-metallic material, the G channel (the Metallic channel) is filled with black. If you were making a metallic material, you would place a Metallic map in this channel.
3. Importing
Now it's time to import the channel-packed texture you completed in Photoshop into your ModKit project.
Method 1: Using the Import Button
- Click the [Import] button at the top of the Content Browser.
- When the file explorer opens, select the texture file and click [Open].
Method 2: Using Drag and Drop
- Simply drag and drop the texture file from Windows Explorer into an empty space in the Content Browser for an automatic import.